
At first the idea of connecting the portable Nintendo Switch to a laptop might seem strange, but there are actually multiple situations where it makes a lot of sense. Even if to some picky gamers it didn’t, what’s the point of gaming if you can’t pick your own optimal gaming experience? The good news for Nintendo fans who want a larger screen is that a Nintendo Switch can be connected to a laptop.
If you’re a YouTuber or Twitch Streamer then you have even more reasons to want to be able to take a game on the Switch and record or stream it through a computer or TV. The good news is that Nintendo thought about this needed versatility for their portable player, and it is possible to connect a Switch to your computer.
You connect a Nintendo Switch to a laptop by using an HDMI cable to connect the dock to a capture card plugged into the laptop. This is enough to play on a larger screen, stream, or record gameplay while using your capture card’s software or a tool like OBS. To record or stream while playing on a TV or other screen, a second HDMI cable also must be connected via the capture card to the external screen.
Basically to record or stream a game an extra set of steps, as well as an additional capture card and HDMI cable, will be a part of the process. This isn’t difficult in theory, but it’s important to know the top troubleshooting steps in case your HDMI cables, port, and screens don’t want to play nicely with one another.
Read on for the step by step process, as well as tips, advice, and troubleshooting advice from Braden, the Meeple who is all the tech expert.
IMPORTANT NOTE: Most pre-built or factory built laptops don’t come with the necessary HDMI in ports that are necessary to pull this off. Gaming computers can have capture cards built in, but usually do not have these in commercially built machines. For this to work with a laptop make sure your laptop has both the proper HDMI ports – which usually only comes from a custom built or high-end model. Without them, there is no way to make the laptop-Switch streaming setup work without an external capture card.
All questions of why you would want to attach a Nintendo Switch to a laptop aside, this is possible both for changing display purposes in and of itself, but also for setting up streaming options with Discord or OBS.
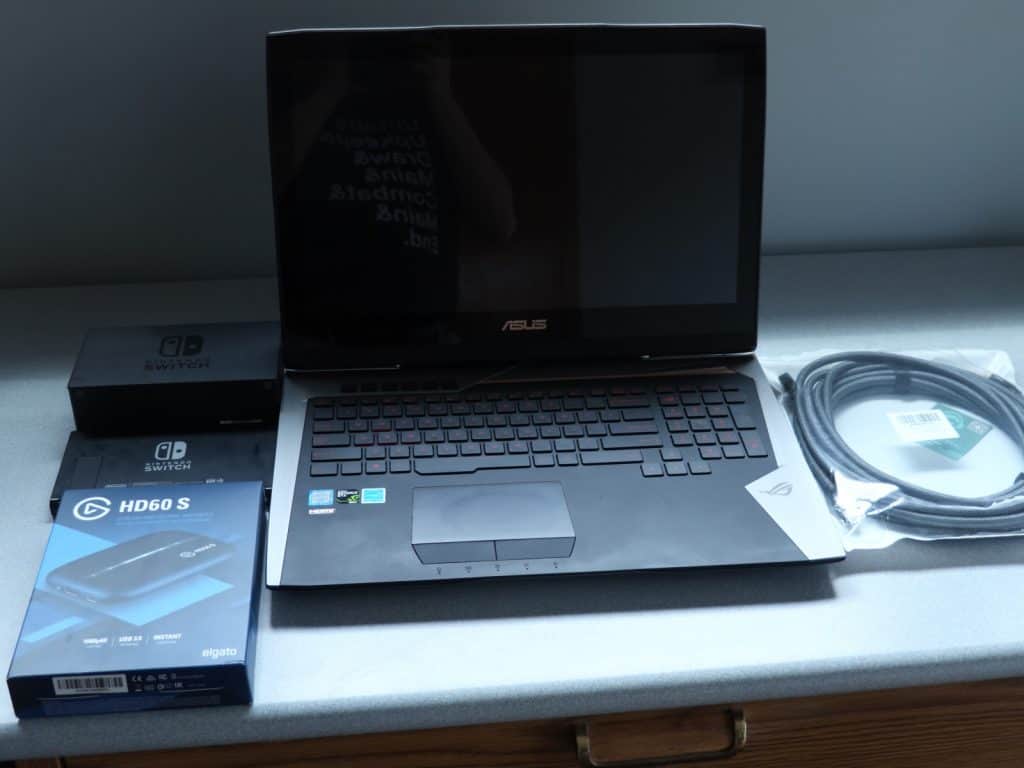
What You Need to Connect Your Switch to a Laptop
- Your Nintendo Switch
- An HDMI Cable, or two if you’re playing on another screen while recording/streaming
- The laptop, smart TV, or other screen you’re attaching the Switch to
- Video capture card
- Proprietary software like OBS
We’re going to go through the step by step process of connecting your Switch to a Laptop for streaming or recording. That way if you’re not concerned about YouTube or Twitch, then it’s even easier!
Step 1: Make Sure You Have Your Materials
If you’re setting up to stream or recording for YouTube you need to make sure you have at least 1 HDMI cable (plus an additional one if you’re planning to play on your TV), a video capture card, and your software updated and ready to go. Most of us use OBS, but there are other options.
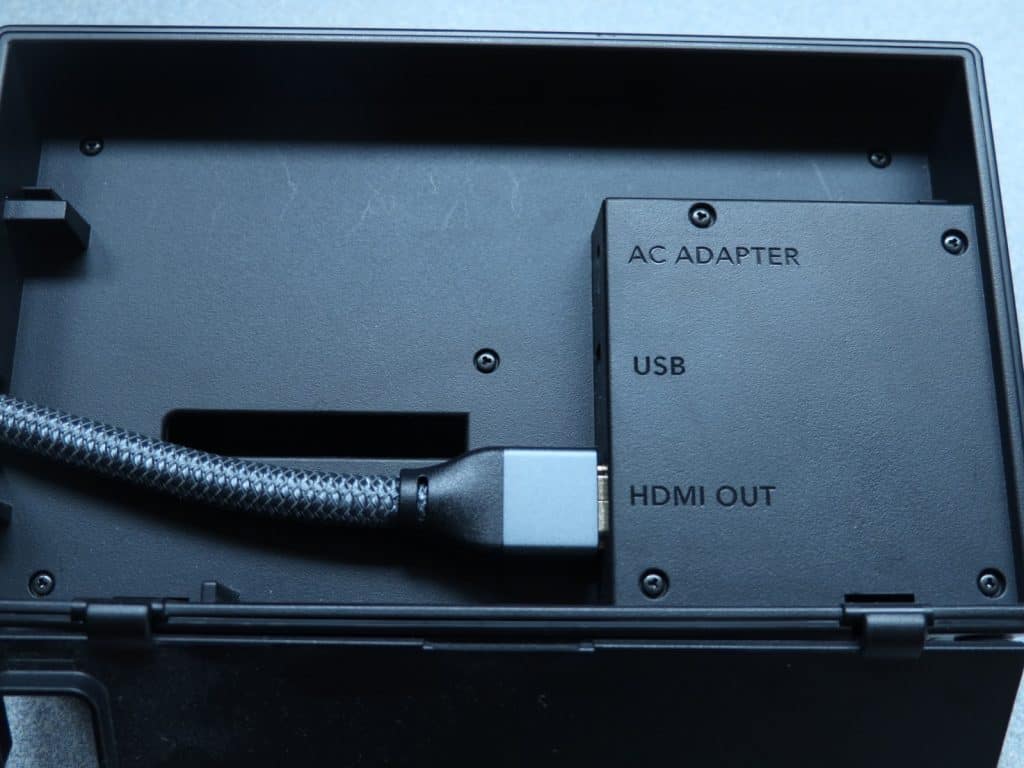
Step 2: Connect the HDMI Cable to Your Switch Dock
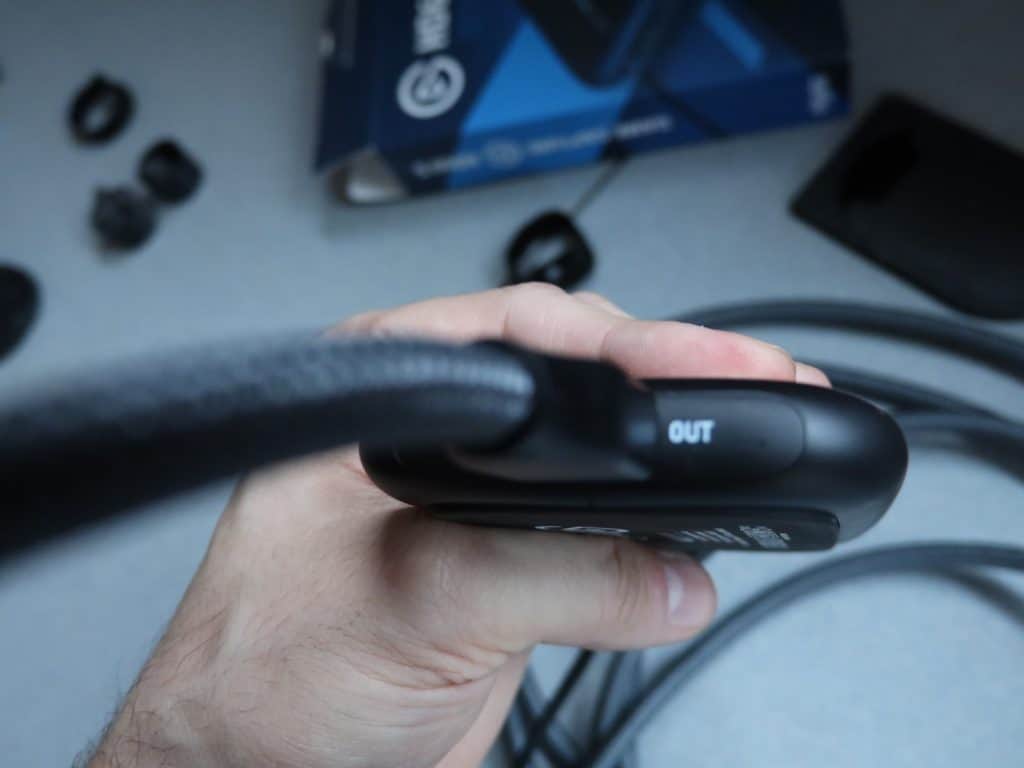
The Nintendo Switch Dock will have an AC Adapter port, a USB port, and an HDMI Out port. They are clearly marked. You are looking for the HDMI Out port. Hook one end of the HDMI cable into this port.
Recommended HDMI Cable: I personally use these cables in my stream setup, as they are durable, affordable, and transfer high quality footage from my Switch to my computer. They also conveniently come in a 2-pack, so if you want to play your Nintendo Switch on your TV while recording on your laptop (or just want a backup cable), you’re able to easily do that too!
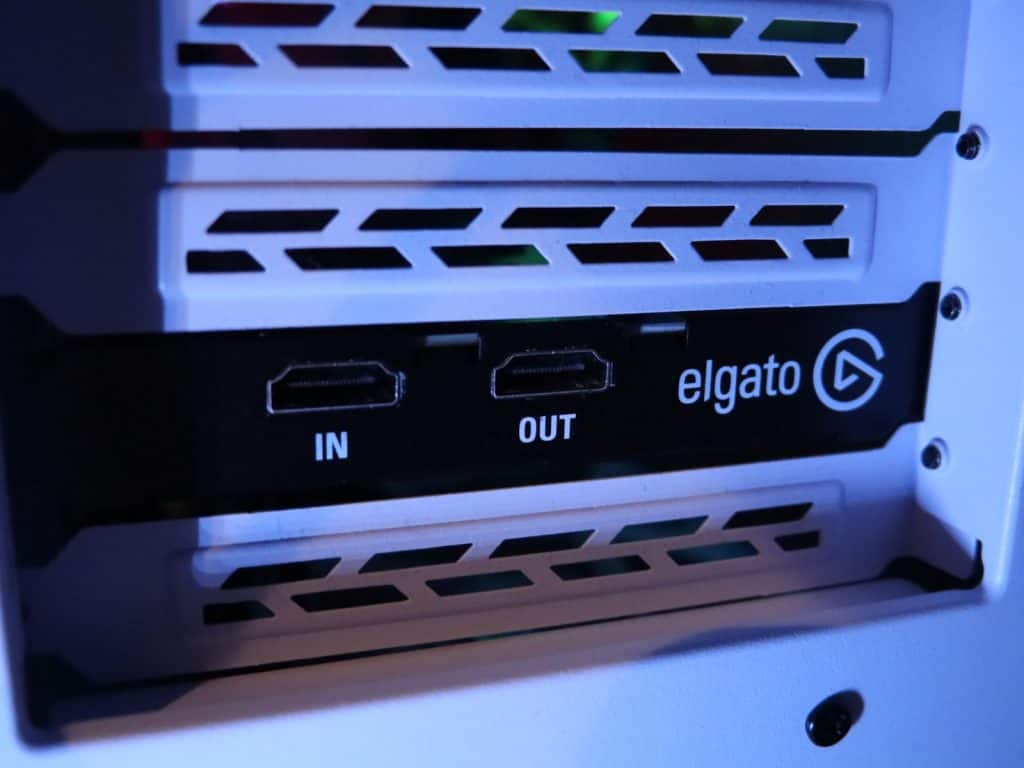
Step 3: Connect HDMI Cable to the Capture Card
It’s assumed this is either going to be built into your laptop or customized gaming tower, or that you will have picked up an external capture card. This step also assumes that your capture card is of high enough quality to handle your footage. Since you’re going out from the Switch, you’ll want to plug in to the capture card.
Note: Virtually all HDMI ports on a desktop or laptop are out ports, designed to display your computer’s desktop screen on an external monitor or TV. You cannot substitute these for the HDMI in ports built into capture cards.
What if you don’t have have a good video capture card?
This actually is one of the most common problems for streaming on current generation video game consoles. Powerful capture cards are prone to price swings right now due to a combination of low supply, high demand, and a world wide supply chain that has been disrupted due to world events of the past few years.
However, there is no good way to MacGyver a good Switch stream setup if you don’t have a capture card that is up to the task. If you are in that unfortunate situation, it’s time to follow Braden’s “You might not like it, but I know what I’m talking about” advice.
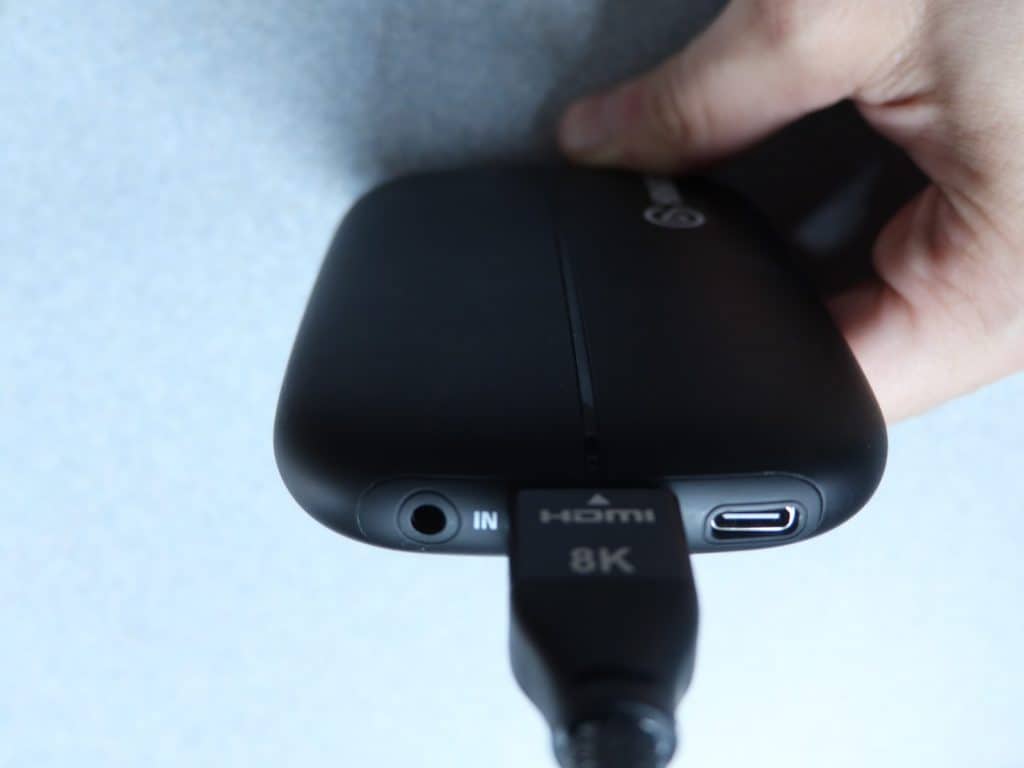
Recommended Capture Card: I recommend the Elgato HD60 S+ if you have other consoles that can take advantage of 4K footage, though if you’re only streaming on the Nintendo Switch and want to save a few bucks, the Elgato HD60 S is perfectly capable of streaming the docked Switch’s 1080p resolution.
Braden – he’s less of a tech king and more of a tech god
Step 4: Connect Your Capture Card to the Laptop
If your gaming PC has this built in, you can skip this step. If not, you’ll need to locate the cord that came with your capture card for this purpose. For the Elgato cards, one end connects to the capture card, and the other has a traditional USB that you’ll plug into a USB 3.0 port on your computer. You can usually tell these apart from USB 2.0 ports by looking for ports that are blue, like the USB end of your cord.
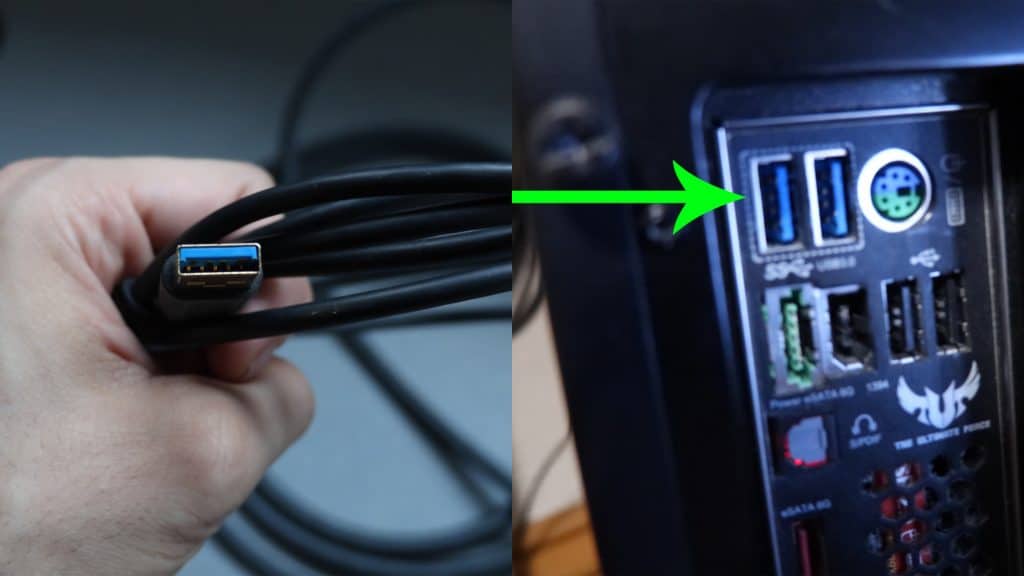
Do not, under any circumstance, plug this into a USB 2.0 port. These just aren’t capable of handling the data a modern capture card manages.
Some computers, like my laptop, do not showcase this difference in USB ports by color. If you aren’t sure of where your USB 3.0 ports are, or even if your computer has any, you’ll want to do a quick Google search for your laptop or motherboard model to verify where they are.
Step 5: Set Up Your OBS Scene
Having OBS Studio or your software of choice is just step one. You’ll also need to create a scene and add a specific source for your capture card in order to stream specifically from your Switch.

When creating a source for your capture card, you’ll add it as a new Video Capture Device (named however you see fit). You’ll then be presented with a pop-up window that has 2 fairly important fields to verify.
Step 6 (Optional): Use Your Second HDMI Cable to Plug into the HDMI Output Port of the Capture Card
If you are planning on playing your Switch on your TV or a different screen, then this is where you’ll need that second HDMI cable from earlier. One end of the HDMI cable needs to be connected into the video capture card’s HDMI output port. Make sure to get the port type right, or this can cause problems with connecting everything.
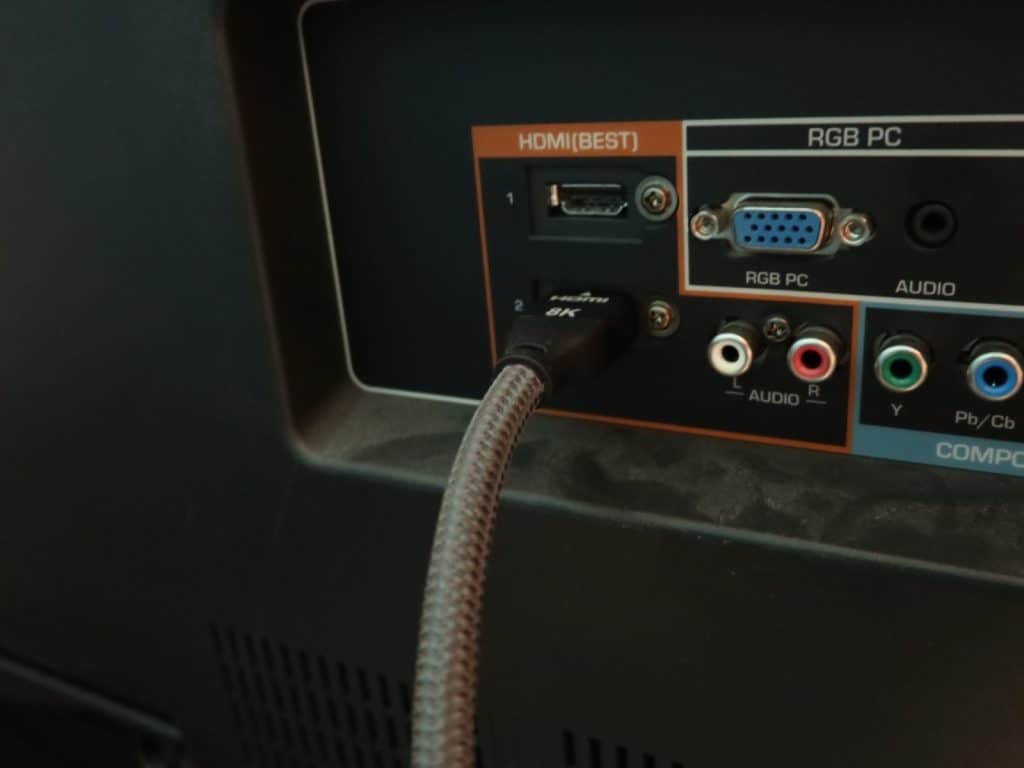
Step 7 (Optional): Connect the Other End of the Second HDMI Cable into Your External Screen
This completes the circuit so the game designed for your portable Switch can be played from a much larger screen. As in steps 3 and 4, you’re connecting out from your capture card and in to a port on your TV or monitor. Simple enough as long as you have the other steps right.
At this point your laptop, or TV or large screen of your choice, should be properly set up and ready for a test run.
Step 8: Connect the Nintendo Switch to the Dock
This should only be done once all the other cables are properly set up and ready to go. If that’s the case, then it’s Dock time.
Step 9: Confirm Your Software Is Reading the Device
You don’t want to go into a stream or recording without testing any of this. Turn the game on you want to stream and check OBS or whatever software you’re using.
Confirm that the software is reading the device correctly and appears to be recording.
Step 10: Do Your Dry Run
Sometimes everything can look good at setup but then give life to a host of issues a few minutes in. Record for 30 minutes without streaming. Use a test game if need be.
Then once you have the video or recording, take a look at it to make sure picture/sound were what you were hoping to see and adjust accordingly.
Once you’ve tested the streaming setup you are then all ready to go.
Common Problems & How to Troubleshoot Them
I can’t see my game in my streaming software and/or TV
Start by verifying your Switch is on and working, and that the dock is working correctly (I typically do this by connecting it to my TV). Continue by reviewing steps 2-5 to verify your game is showing up properly in your streaming software. If it is, double check the HDMI port you are using on your TV to ensure it is an HDMI in port.
If you’ve verified everything is connected correctly, try a different HDMI cable to see if there’s an issue with your cable. If you’ve verified all your other equipment is working correctly, you should either try testing with another capture card or reaching out to your capture card’s tech support for further assistance. Elgato’s can be found here.
OBS is not recording/receiving game audio
This is an especially common issue, but there are usually 3 routes you can take to work toward resolution:
- Make sure your capture card source in OBS isn’t muted
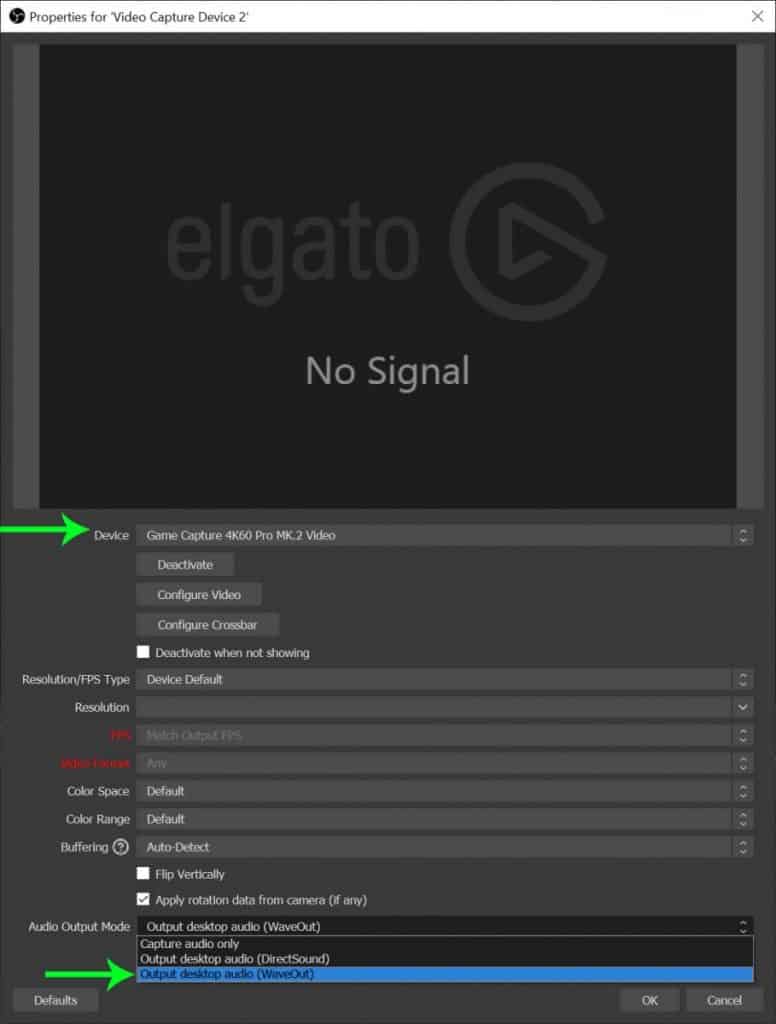
- Verify you have the right device selected for your capture card (you can do this by right clicking the source in OBS, then choosing “Properties”
- Double check that your capture card’s Audio Output Mode is set to “Output desktop audio (WaveOut)” (this can be found toward the bottom of the Properties window for your capture card)
Should all these routes fail, try searching or creating a thread over at the OBS Forums – there’s a lot of very helpful troubleshooting information and experts over there, and they’ll often be able to help you review additional settings to get you on track.
Your Step By Step Guide to Connecting Your Switch to a Gaming Computer
That’s it. If you follow those steps you shouldn’t have any problem showing off your favorite Switch games on stream. If you’re going just to play you don’t need the additional HDMI cable, although the capture card is still mandatory. You can just connect the Switch via dock to your computer and play from there.
Between that step by step guide and the excellent troubleshooting advice from Braden you should have no trouble at this point setting up your Nintendo Switch for streaming and troubleshooting any issues that might arise.
For many people the hardest steps will be getting the software to play nice. As people who have had plenty of issues with OBS, we sympathize, but even these problems can be overcome.
Why Attach Your Switch to a Larger Screen?
There are many reasons why you might want to connect your Switch to a larger stream. From a common sense perspective, sometimes you just want to be able to see things more clearly. Not all of us have great eye sight. Whether or not Shane or Braden is writing this section…yeah the eye sight is horrifically bad at that point.
There are some great games on Switch that we want to play not because Switch is portable, but because PC Steam players simply don’t have access to the great Nintendo titles otherwise. Look, we grew up with Zelda and many other amazing games…30 years later we’re not ready to just give that up!
Plus since so few streamers actually bother to cover the Switch because of Steam games and PC games (which in fairness are also pretty awesome), going the Switch route can be a good way to stand out in a slightly less crowded niche.
Common question: Is there a way to stream from a Nintendo Switch while keeping it portable?
The quick answer is no. The point here for streaming is showing the game to an audience while in your optimized, comfortable, and well set up gaming space. That’s not the time to be walking around the house and doing other things.
Even if you’re not streaming but recording for YouTube, sound is an issue and your gaming area is going to be much more optimized for sound than wandering through wherever you live.
To record or stream you need a connection with a computer involved. That second HDMI cable is mandatory. So you’re streaming from wherever your setup is going to be.
How Do I Connect My Nintendo Switch Lite to My Laptop?
The Nintendo Switch Lite can not be attached to a laptop or computer the way a conventional Nintendo Switch can. This is due to the Lite’s lack of video output – the hardware the regular Switch uses for this simply isn’t there.
This means if you want to stream or record from your Nintendo Switch Lite you are unfortunately out of luck. The hardware just isn’t there in the Lite to pull that off.
The same is true if you wanted to connect the Lite to a laptop or computer. The support is only for USB 3.2. Which is a very techy way of saying that the Switch Lite simply will not consistently connect to and run with video cards in normal gaming computers or laptops. So if anyone is saying that it’s possible, in all likelihood:
- They don’t know what they’re talking about, or
- They’re using the exact match keyword for rankings before telling you that it’s impossible
I’ve seen plenty of pages where they give instructions for connecting the Nintendo Switch for the Switch Lite. News Flash: that doesn’t work.
So unfortunately if connecting your Switch to the laptop is a big deal then you’ll need to upgrade from the cheaper Lite.
In Conclusion
As you can see while attaching a Nintendo Switch to work off a laptop is not easy, it is possible. Keep in mind that there’s always the “Caveat Emptor” that the more steps to the process, the more potential points of failure. On the plus side, Nintendo was very smart in the design of the Switch and the Dock to make this kind of conversion possible.
It might take an extra HDMI cable, a bit of technical MacGyvering, but it is 100% doable even if you are a relative beginner. Thanks again to Braden for his special tricks, tips, and common points of failure to help guide us all through how to do this as smoothly as possible.
Now that he’s shown us how to connect a Switch to a laptop via the Nintendo Dock, now it’s time to get streaming, get recording, and most importantly, to get gaming!
Other Switch Articles of Note
- Is there weapon crafting in Breath of the Wild?
- Is Breath of the Wild Too Hard?
- Is Game Fly Worth It?
- Can you use the xbox 360 power supply with an xbox one?
- Link to the Past Randomizer Guide

Proud to embrace the locally created moniker of “Corrupt Overlord” from one of the all time great Lords of Waterdeep runs, Shane is one member of the Assorted Meeples crew and will be hard at work creating awesome content for the website. He is a long-time player of board games, one time semi-professional poker player, and tends to run to the quirky or RPG side of things when it comes to playing video games. He loves tabletop roleplaying systems like Dungeons & Dragons, Pathfinder, Werewolf, Fate, and others, and not only has been a player but has run games as DM for years. You can find his other work in publications like Level Skip or Hobby Lark.