
It’s fair to say at this point that Red Dragon Inn is truly one of the great games out there.
A great game, whether played on a board, with a deck of cards you’ve collected from booster packs, or with a keyboard/controller, is often one that is lauded for its ability to stand the test of time.
Factors like tight gameplay, innovative rules, and overall creativity play their part, but the ability for each of these traits to consistently bring you and your friends back for more ultimately leads back to this sole piece of criteria.
After over 10 years of fun that has yet to become stale, I’m perfectly comfortable saying The Red Dragon Inn is not only one of my favorite games in our board game cabinet, but one of the greats that will continue to entertain and endure for many game nights to come.
If you haven’t been exposed to this wonderful gaming experience yet, the premise is pretty straightforward. Each player represents a character (usually an adventurer, but the cast has grown to include familiars, monsters, and even staff of The Red Dragon Inn itself) who is heading to their favorite watering hole to unwind from the rigors of a long day of adventuring.
Let’s dive in further with my complete Red Dragon Inn review, taking an in-depth look at every single deck in the game (including expansions)!
[ez-toc]
Red Dragon Inn Rules
You start with 20 health, 0 alcohol, and 10 gold on your game board (unless otherwise noted – check your character details!), then take turns trying to get other patrons kicked out of the inn so you’re the last one standing.
A typical turn looks like this:
- Discard any cards you don’t want, then draw up to 7 from your Character Deck
- Play up to 1 action card
- Order a drink by drawing the top card of the Drink Deck and placing it on top of the “Drink Me” pile of a player of your choice
- Drink the top card of your “Drink Me” pile by revealing it and taking on its effects
You typically get thrown out of The Red Dragon Inn by either:
- Having your health marker and alcohol marker cross on your game board
- When this occurs, you give half of your gold to the Inn (rounded up), then divide the rest equally among the remaining players, with the remainder going to the Inn.
- Running out of gold
For additional rules questions or a list of all the different Red Dragon Inn expansions, you can refer to individual rules on the Slugfest Games website. They also made this handy combined guide that covers everything through The Red Dragon Inn 7: The Tavern Crew.
If you’re looking for hours of fun where you can imbibe your favorite beverages with your favorite people, The Red Dragon Inn is a game that is extremely accessible for gamers of all skill levels.
Plus, ordering a copy or expansion through our Amazon link supports the website, adds an awesome game to your board game collection, and will provide great gift ideas for years once you get your friends and family hooked!
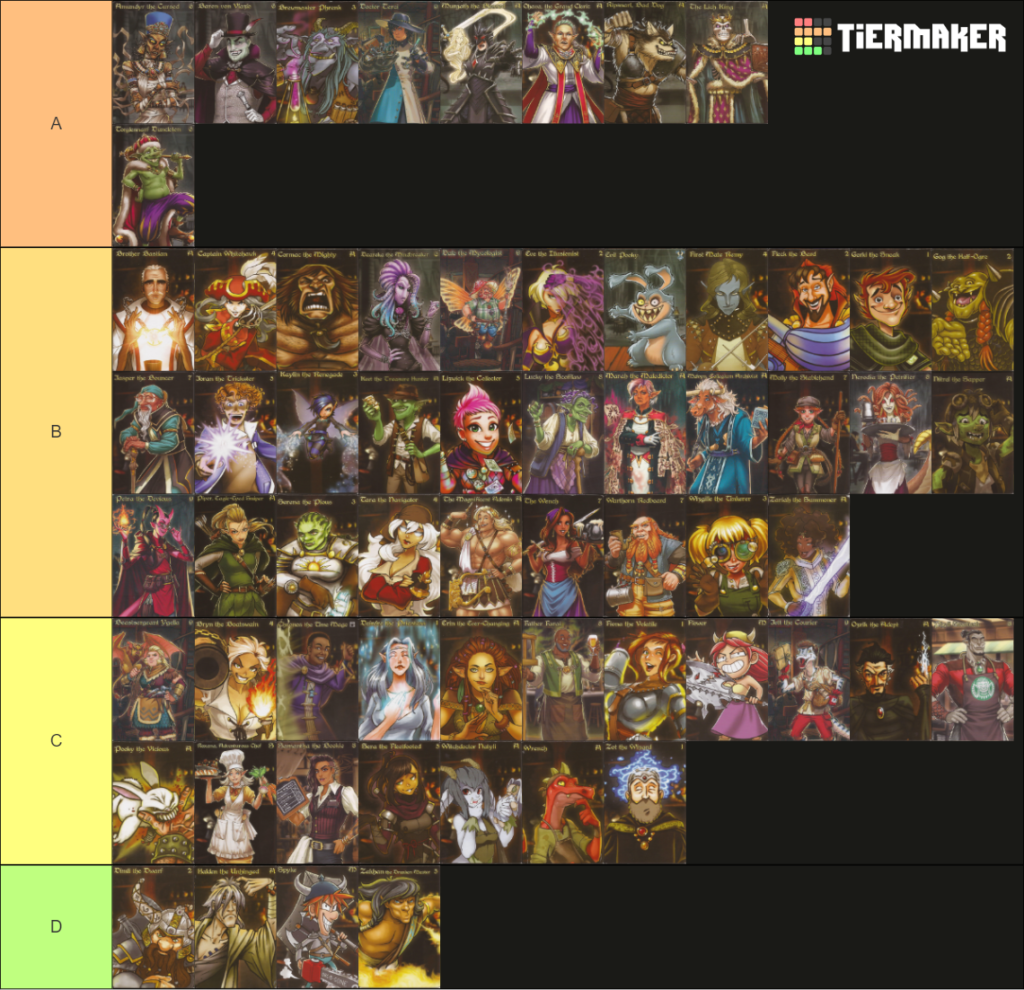
The Complete Red Dragon Inn Character Tier List & Strategy Guide
With a cast of 62 characters and growing, there are lots of different ways you might go about this depending on who you choose to play. Some characters focus on dealing physical damage to everyone around them, others spend their time messing with the drinks, a few will try to swindle you out of your hard earned gold, still others will focus on defense, you get the idea.
Naturally, this means not all characters are created equal, so I’m going to break down my personal tier list for this extensive catalogue of patrons, based on over a decade of experience and more Red Dragon Inn games than I can count.
This Red Dragon Inn character list has been updated for The Red Dragon Inn: Allies – Melvyn vs. Marah.
Grading Red Dragon Inn Characters
- A-Tier: These characters will be top contenders at almost any table, either through raw power or superb strategic potential
- B-Tier: B-Tier characters will almost always put in a good showing, but they’ll need the right opponents or situations to truly dominate a game
- C-Tier: Average characters who aren’t bad, but don’t have anything particularly special going for them either
- D-Tier: The bottom of the barrel. Starting with any of these characters is going to result in an uphill climb toward victory from the first turn
A-Tier
- Amundyr the Cursed
- Baron von Vlazlo
- Brewmaster Phrenk
- Doctor Terci
- Murgath the Blessed
- Ohava the Grand Cleric
- Ripsnarl, Bad Dog
- The Lich King
- Torglesnarf Duncleton, First of His Name
B-Tier
- Brother Bastian
- Captain Whitehawk
- Cormac the Mighty
- Daareka the Mindbreaker
- Dale the Mycologist
- Eve the Illusionist
- Evil Pooky
- First Mate Remy
- Fleck the Bard
- Gerki the Sneak
- Gog the Half-Ogre
- Jasper the Bouncer
- Joran the Trickster
- Kaylin the Renegade
- Keet the Treasure Hunter
- Lizwick the Collector
- Lucky the Scofflaw
- Marah the Maledictor
- Melvyn, Collegium Archivist
- Molly the Stablehand
- Nerodia the Petrifier
- Nitrel the Sapper
- Petra the Devious
- Piper, Eagle-Eyed Sniper
- Serena the Pious
- Tara the Navigator
- The Magnificent Adonis
- The Wench
- Warthorn Redbeard
- Wizgille the Tinkerer
- Zariah the Summoner
C-Tier
- Beastsergeant Ygella
- Bryn the Boatswain
- Chronos the Time Mage
- Deirdre the Priestess
- Erin the Ever-Changing
- Father Farai
- Fiona the Volatile
- Flower
- Jett the Courier
- Ozrik the Adept
- Pooky the Vicious
- Roxana, Adventurous Chef
- Phyll Startusk
- Samantha the Bookie
- Sera the Fleetfooted
- Witchdoctor Natyli
- Wrench
- Zot the Wizard
D-Tier
Or, if you’d prefer the Tiermaker version I made to see all 62 characters at a glance:
These grades and character breakdowns are also assuming you’re playing a traditional game of The Red Dragon Inn. I won’t be covering boss battles, team games, or the use of add-ons like the Gambling? I’m In! game, as these rarely see play in my circles and change the gameplay dynamic pretty dramatically.
Much of the information in this guide will still be helpful for them, however, so if these variants represent your preferred ways to play, I’d still recommend giving this guide a once-over.
A-Tier Red Dragon Inn Characters
A-Tier characters represent the cream of the crop across the illustrious history of The Red Dragon Inn. Most are from more recent expansions, showcasing an unfortunate, if not unexpected bit of power creep over the years, but none of them are unbeatable either. Characters in A-Tier are always performing in a well above-average capacity in the areas where they excel, start with extra benefits other characters don’t, and/or have multiple strengths they can execute well.
They are simply stronger choices than the rest, often requiring a concerted effort from the rest of the table to bring them down.
Amundyr the Cursed (Found in The Red Dragon Inn 6: Villains)
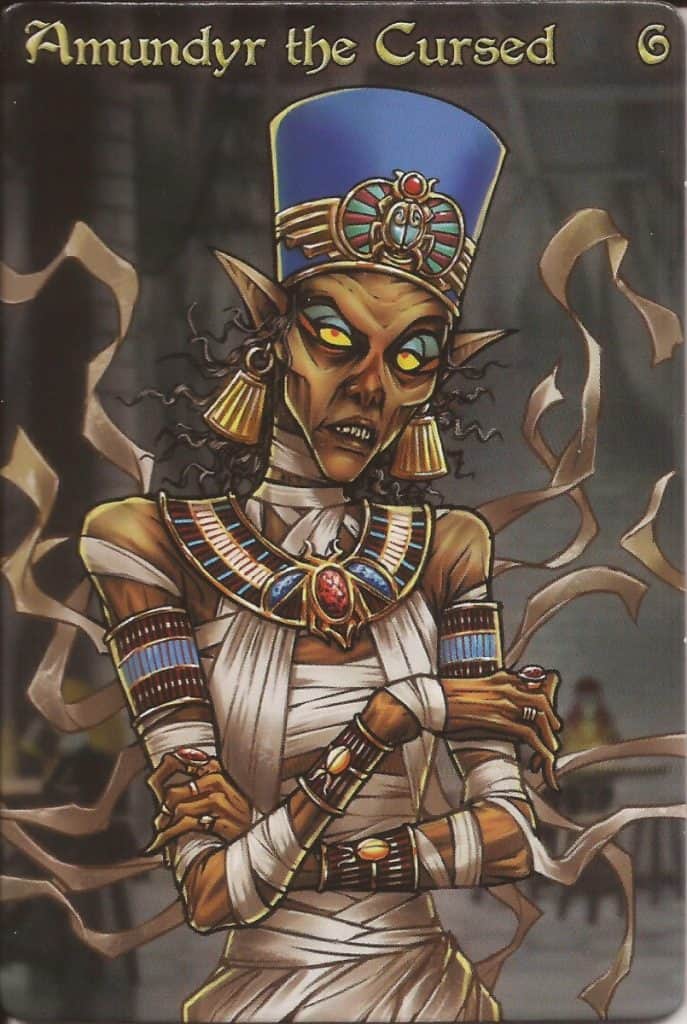
Amundyr has one of the meanest Character Decks our table has seen to date. One of its primary areas of focus is gold, with ways to avoid paying it, ways to take it away from opponents, and a reasonable set of gambling cards. Raw damage output is a little below average, but that deficiency is shored up with some decent defense cards.
Oh, and her scarabs.
The ability to give out her 12 scarab tokens to enemies is littered all over her cards, often appearing as an incidental addon to a wide variety of effects, including typical abilities like splitting drinks, allowing you to cheat during gambling matches, and reducing fortitude loss!
At the end of a player’s turn, if they have at least 1 scarab token, they lose a fortitude and return 1 token to Amundyr. You can prevent the damage with appropriate cards that interact with action cards, but you can’t play cards that “hit back” in response to this damage.
Best of all, if you succeed in getting Amundyr out of the game, the scarabs persist until they finish running their course. This tends to make Amundyr significantly above average when it comes to overall damage, and it’s split up into tiny increments that are inefficient to deal with using defensive cards.
Ignoring her for more than a few rounds is likely to spell a quick death for the rest of the table, so enjoy the one game you get to steamroll your friends with a swarm of little bugs before they gang up on Amundyr on sight.
Baron von Vlazlo (Found in The Red Dragon Inn 6: Villains)
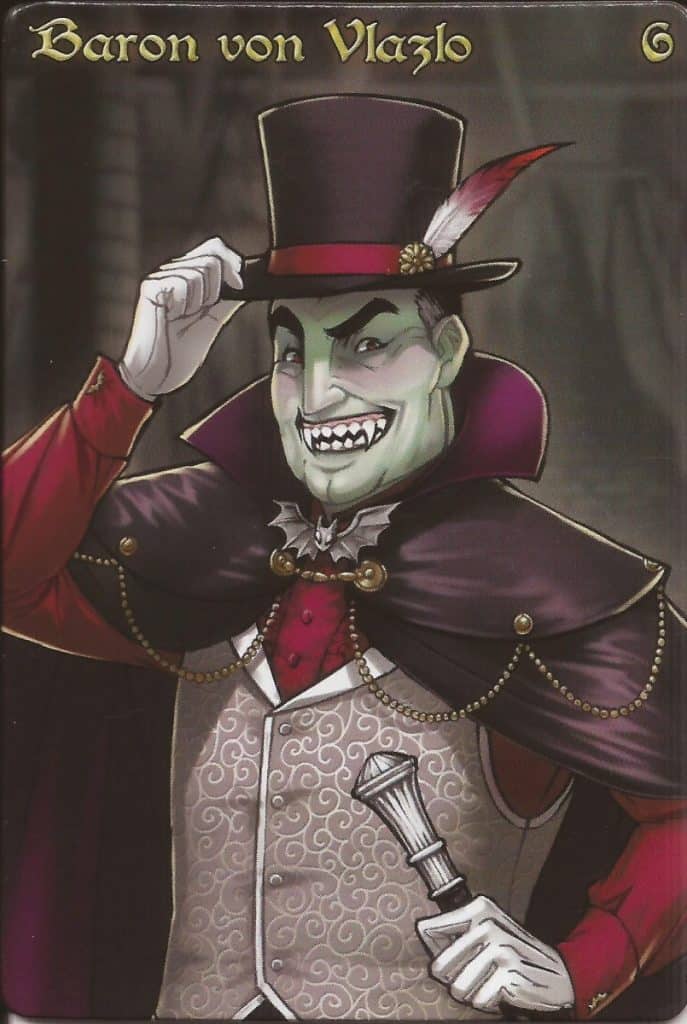
Baron von Vlazlo is not a Vampire you want to meet in a shadowy corner of The Red Dragon Inn. His primary deck has a healthy mix of gambling, interaction to reduce alcohol content and fortitude loss, minor healing, and a couple above average cards for damaging a player’s fortitude.
On its own, this would be a solid B-Tier deck, but the good Baron has 2 additional decks he may buy cards from using an exclusive currency available to him – Blood Tokens. Blood Tokens are accumulated by playing cards where their markers appear in the lower right hand corner, and can be spent a couple different ways.
Some of your better cards in the primary deck will require you to pay blood tokens to play them, and are reasonably costed for the privilege of countering an action without response, dealing an impressive 3 damage with an action, or dropping 2 alcohol content at any time.
But this isn’t Baron von Vlazlo’s final form – he can also transform into a bat or a wolf, which plays out through use of his Bat and Wolf decks.
After you discard unwanted cards at the start of your turn, you can spend 2 Blood Tokens to draw a card from either of these decks – even if drawing would take you over 7 cards. Rinse and repeat to your heart’s content, then if you still have fewer than 7 cards in your hand, you can draw up to 7 from your primary deck. These new cards become part of your deck until the end of the game, allowing you to tailor your long game a couple different ways.
The Bat deck is designed to strengthen your defense (5 cards) and gold disruption/gambling (3 cards). There’s not a bad card in the batch here, and if you’re looking for more ability to interact with heavy punches and dangerous drinks, this will be your go-to. There are also some excellent cards to prey upon tables that aren’t gambling or managing gold well, but as only 3 of the 8 cards here support this strategy, it’s a little harder to recommend it as a primary reason to draw from this deck.
The Wolf deck, on the other hand, is all about brutal, brutal offense (6 cards) with a couple good defense cards mixed in. Actions that hit for 3 fortitude damage (some of which can’t be completely ignored), Sometimes cards that react to fortitude loss by dealing 3 back to your aggressor – this is where you go to ensure you’re dealing out as much pain as possible to everyone around you.
I recommend reading the table for a round or two before spending too aggressively on these cards – the Wolf deck is going to make you a quick target if you draw too much early attention to yourself.
Brewmaster Phrenk (Found in The Red Dragon Inn 3)
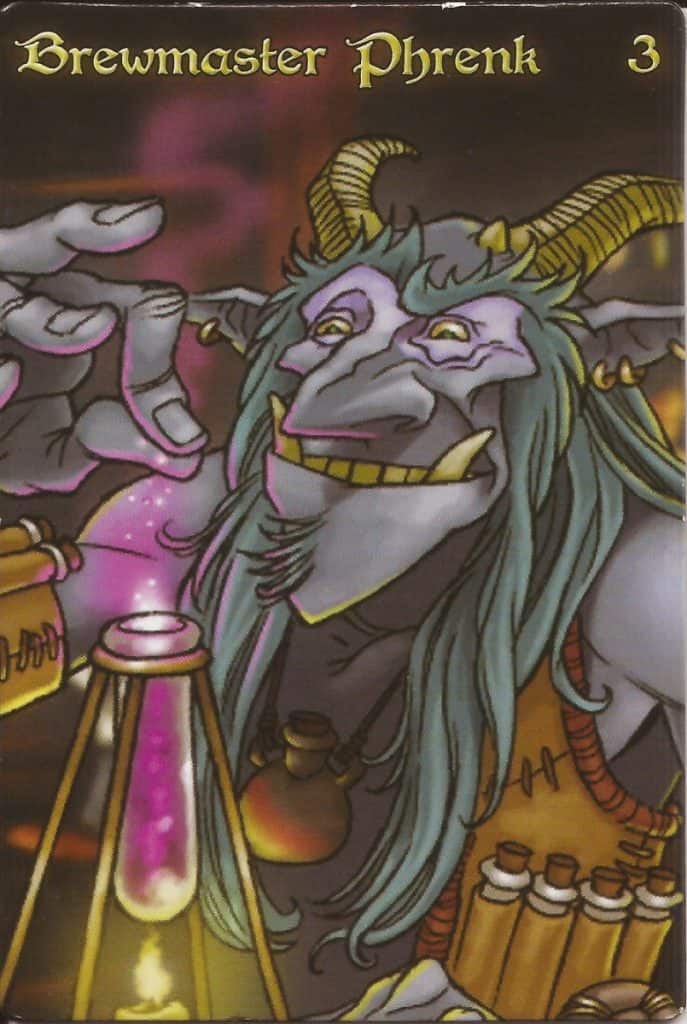
I’ll admit that I wasn’t expecting to find an A-Tier character this early in The Red Dragon Inn’s history due to some of the power creep in recent expansions, but Brewmaster Phrenk brings a surprising number of boons with him to the table.
Most of his offensive actions deal with drinks or add alcohol content to players (occasionally including himself), making it difficult to use the plethora of “hit back” cards found in many Character Decks.
Phrenk, pardon, Brewmaster Phrenk, has the ability to do normal fortitude damage through a couple Actions and hit back cards. He’s a good gambler. He’s an above average healer (though this occasionally spills over to opponents).
And he also almost always has a hand limit of 8 instead of 7.
At the start of the game and each of Phrenk’s turns, he reveals a Potion from an 18 card Potion Deck. Only 1 potion can be in front of Phrenk at a time, and while 2 of his Potions represent Brewing Mishaps that destroy any Potions in front of him, the rest are extremely beneficial.
One is an Action that hits for 3 damage (which pairs nicely with the one in his deck that hits for 3 alcohol content). The other 15 cards are a mix of Sometimes and Anytime effects that cover a wide range of offensive and defensive capabilities. If you run out of Potions to draw, you also get to shuffle the discarded ones into a new Potion Deck.
Rather than using these Potions for yourself, you also have the option of selling them to your opponents. This approach can be a very useful tool for exploiting greed, navigating table politics, fanning the flames of feuds between your opponents, or setting up a fall in conjunction with Gambling cards.
Just remember that opponents can have as many potions in front of them as they can afford to buy, and if you’re dealing with a character like Keet, you are allowed to negotiate for specific non-traditional gold pieces like artifacts when it comes to selling potions.
While using his potions, Phrenk’s offense works out to be above average much of the time, but he doesn’t have very many defense cards in his deck. His healing and potions can definitely cover for some of this weakness, but if you come up against a serious bruiser, you’re probably going to be taking a lot of the punches sent your way if the game runs long or you end up in a fair fight.
Doctor Terci (Found in The Red Dragon Inn 9: The Undercity)
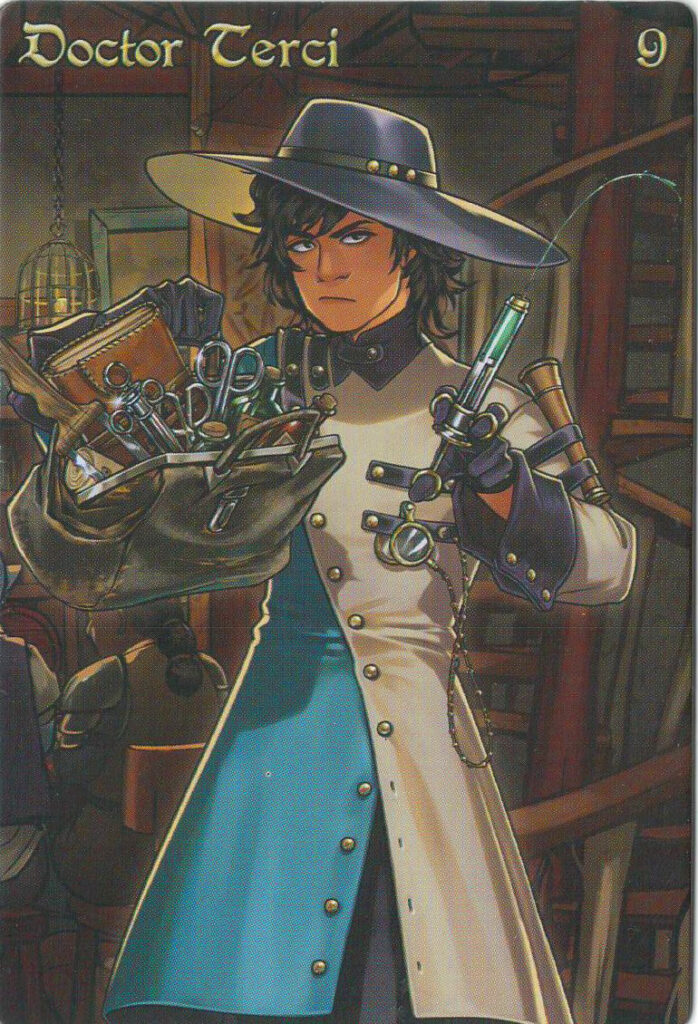
Easily the best deck in The Red Dragon Inn 9, I like Doctor Terci for many of the same reasons I like Brewmaster Phrenk. They have slightly above average gambling coupled with several cards that force players to pay her Gold, good options for attack Fortitude and Alcohol scores, and a very solid defense against Drinks.
Oh, and the ability to have a hand size of up to 9 every turn thanks to their Patients.
Terci’s patients are generally not flush with money, but they find other ways to pay for their care, which translate into a slew of very beneficial Action, Sometimes, and Anytime effects that skew defensively, but have a few surprise punches in there too.
Couple that with attack strength that is also slightly above average, and you get an exceptionally resilient character if you can keep the door of your “clinic” revolving.
In order to treat a patient, you must acquire the appropriate Medical Supplies (Salve, Splint, and Bandage). Doing this requires you to play a card with the appropriate symbol in the lower left corner of the card. A full half of Doctor Terci’s deck has these symbols, including several cards common to character decks, so if you are aggressive about discarding and drawing, you can easily keep these flowing.
Patients may be treated at any time so long as you have the appropriate supplies, then the treated patient’s card is put into your hand, behaving as any other card of its type. Up to 2 patients from the 14 card Patient Deck are available at a time, 6 of whom only need one item, 6 of whom need 2, and 2 of whom need all 3.
This totals 24 supplies, so you probably can’t treat everyone. While this might be an issue since Patients cannot normally be discarded while waiting for treatment (even before the Discard and Draw phase when they’d refresh back up to 2), several of Terci’s cards will let you discard a Waiting Patient you can’t or don’t want to treat!
Remember, you can only have up to 3 of a given Medical Supply type at a time, so spending them when you can is generally in your best interest.
Murgath the Blessed (Found in The Red Dragon Inn: Allies – Ohava vs. Murgath)
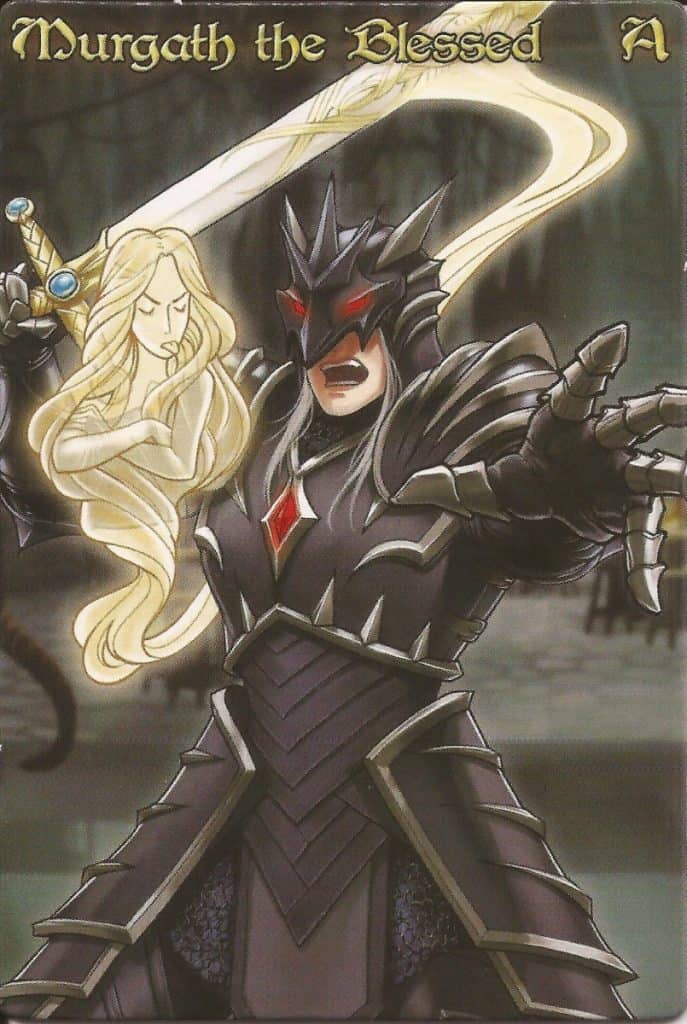
If you like characters that specialize in punching people in the face, Murgath is probably your guy. Most of his cards hit at least 1 player for 3 fortitude loss, with some hitting multiple players and others hitting for 4. Ordinarily, this would be hilariously overpowered in a traditional game were it not for Banefall, Murgath’s blessed blade.
Banefall offsets this brute force by giving Murgath’s victims blessings from the Blessing Deck, which can temper the raw damage a couple different ways.
When a player draws a blessing, they treat it like any other card in their hand and can either use it for its standard effect or use it at any time to gain fortitude if it has a heart in the upper left hand corner (the amount of fortitude gained matches the number inside the heart).
The majority of Banefall’s blessings offer the latter option, so an attack that hits for 3 damage can often result in you healing for 1-2 points as well. You should also note that:
- You can use these blessings like other Sometimes or Anytime cards to heal and stay in the game immediately after you’ve taken a lethal hit or drink
- Blessings have their own discard pile once used
In addition to his raw power, Murgath has a pretty standard breakdown for the rest of his deck, but it is worth noting that some of his cards can also give him blessings.
This can make him a tough opponent to bring down – especially if he throws a curveball at you with cards like “Just a Flesh Wound!” to heal, “Curse this blessed blade!” to negate a blessing, or “I wouldn’t do that if I were you.” to look at the top 5 cards of a player’s Character Deck, strip out the best Action card, then rearrange the rest on top in any order.
Ohava the Grand Cleric (Found in The Red Dragon Inn: Allies – Ohava vs. Murgath)
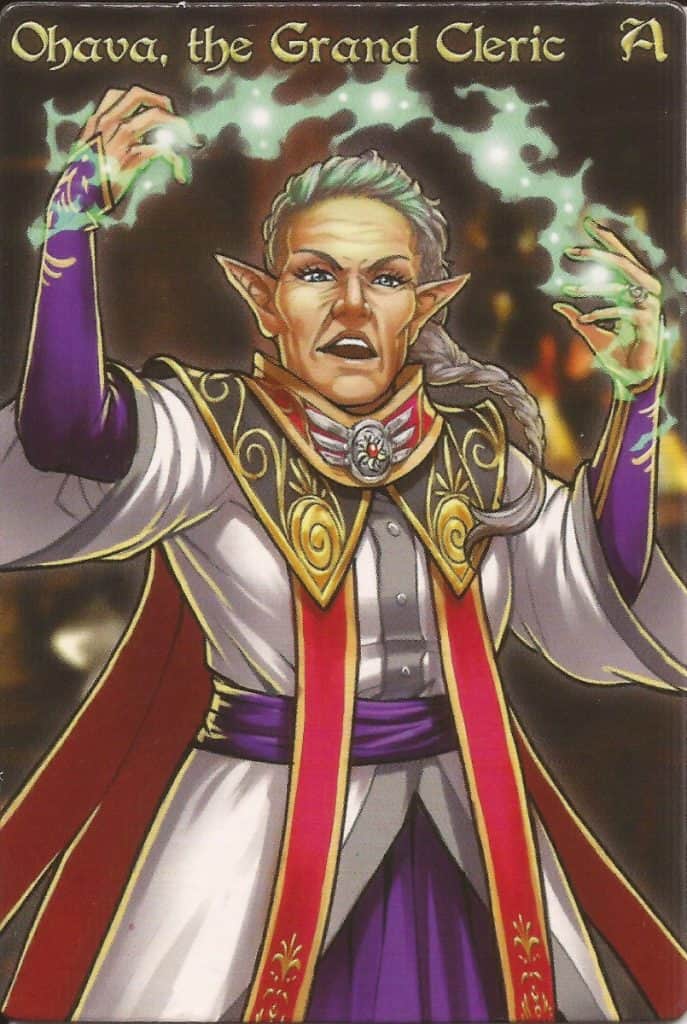
If you look at Ohava’s deck prior to reading her rules card, you’re probably not going to see anything special. The split for this deck is pretty average when measuring attack capability, gambling prowess, and defense, though there is some healing mixed in which is pretty nice. A few cards have some additional perks printed on them for meeting the condition of having one of Ohava’s 4 deities be harmonious, but they aren’t anything particularly backbreaking on their own.
Then you’ll read her rules card and the deck is going to look completely different.
Let’s start with Ohava’s deities. Most of her Character Deck’s cards have a symbol on the lower left denoting Korash, Shalni, Elaana, or Farnir. All 4 of these deities start face down, indicating they are in discord.
When a card with a deity’s symbol on it resolves, if it is in discord, it is flipped face up and becomes harmonious (and vice-versa). If the card is negated, the corresponding deity does not flip; if it is ignored, it does.
When 3 or more deities are harmonious, Ohava’s maximum hand size is increased by 1. If all 4 deities are harmonious, all numeric effects of Ohava’s Character Deck cards are increased by 1.
Forcing someone to tip The Wench? They’re paying 2 gold now. Ordering extra drinks? Grab an extra one to hand out. Giving someone some bad holy water? They lose 2 fortitude and gain 2 alcohol content, because each has a separate numeric value on the card. This boon turns average cards into anything from above average to ridiculous, and is not at all difficult to set up.
Maintaining that boon is another matter, however. Since the vast majority of Ohava’s cards have a deity symbol on them, maintaining harmony between the 4 of them at all times isn’t realistic. Fortunately, it’s extremely easy to keep at least 3 deities in harmony to maintain access to an 8th card in your hand, which is critically important for offsetting the primary weakness of Ohava’s deck – the very deities who fuel her cards.
When you start the game, you’re in a good position to play a lot of cards very quickly, as you are incentivized to quickly get as many deities in harmony as possible. Once you’ve got them there, however, you have to start planning your moves much more carefully to preserve that balance and set up access to the all-important numeric increase when it counts.
This can sometimes put you in a position where you need to play a little more conservatively than you’re used to, but since Ohava does have access to a few healing cards, you can afford to take the occasional extra hit or spiked drink.
I also recommend looking for pairs of colors when assessing which cards to discard as well as those you draw – using an Action to put a deity in discord with a Sometimes/Anytime card to back it up is ideal, and you can also use “May the Harmony of the All-Mother be with us” and her deity-free cards to help you preserve a precarious situation.
The last pieces of advice I have are to pay attention to your gold and watch out for decks that negate cards. Ohava’s got the raw power to hang out in the big leagues, but she’s not a strong gambler and very sensitive to disruption, meaning both of these strategies can trip you up if you are careless.
If you monitor table politics and maintain multiple routes to your next play in order to stay a couple steps ahead of the table at large, only a concerted effort by the remaining players is likely to bring you down.
Ripsnarl, Bad Dog (Found in The Red Dragon Inn: Allies – Piper vs. Ripsnarl)
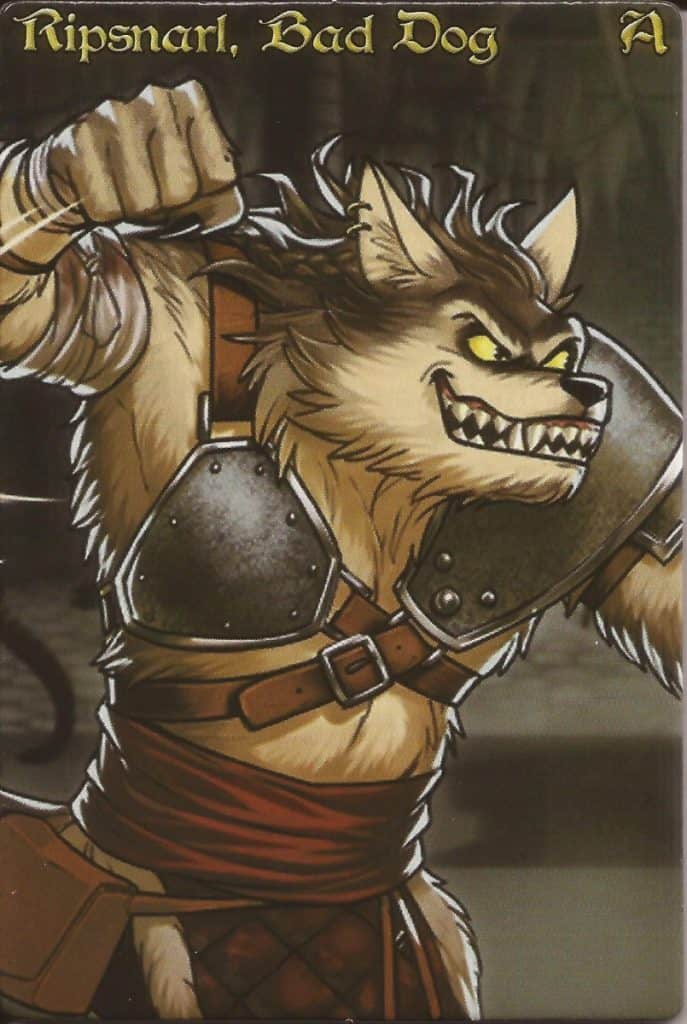
Ripsnarl’s deck looks very much like a Jekyll and Hyde setup. He starts the game in his human form, and can accumulate up to 3 Fury Tokens while in that state. If you play a card that transforms him into his wolf form, you remove any Fury Tokens you’ve accumulated, and deal out fortitude damage equal to the number of tokens removed as though it was coming from a Sometimes card.
This damage can be split among multiple players, and each player targeted results in the creation of a copy of this Sometimes card targeting them with the appropriate amount of damage.
While this type of delayed damage is a bit similar to Amundyr’s scarabs, it’s also a bit more flexible in its application. You have the ability to send fury damage where it most needs to go once it is released – without having to commit to that decision as you’re building it up.
This can make you look much more average in damage capability than you actually are, enabling you to more easily fly under the radar during the early stages of the game.
Additionally, many of Ripsnarl’s cards have fairly different effects depending on whether you’re in his human form or his wolf form. The wolf cards tend to be more powerful, but you can’t gain fury as a wolf, which incentivizes you to flip back and forth strategically.
I’ve found these transformations to be pretty easy to set up and really lend themselves well to table politics. Or, if politics aren’t your thing, you can sucker punch someone for up to 6 damage between a transformation and an action card – whatever floats your boat.
Your raw power isn’t always going to be this high due to your need for setup, so every card you play isn’t always going to match some of the other A-Tier entries on this list, but you’ll often be in a position to deal above average damage between your wolf form and your fury AND maintain a healthy supply of gold through average gambling and a couple cards that cause everyone to pay you 1 gold.
Best of all, you can do both without presenting yourself as a top-tier threat in either category – which makes you a far more dangerous threat in my book.
The Lich King (Found in The Red Dragon Inn: Allies – Adonis vs. The Lich King)
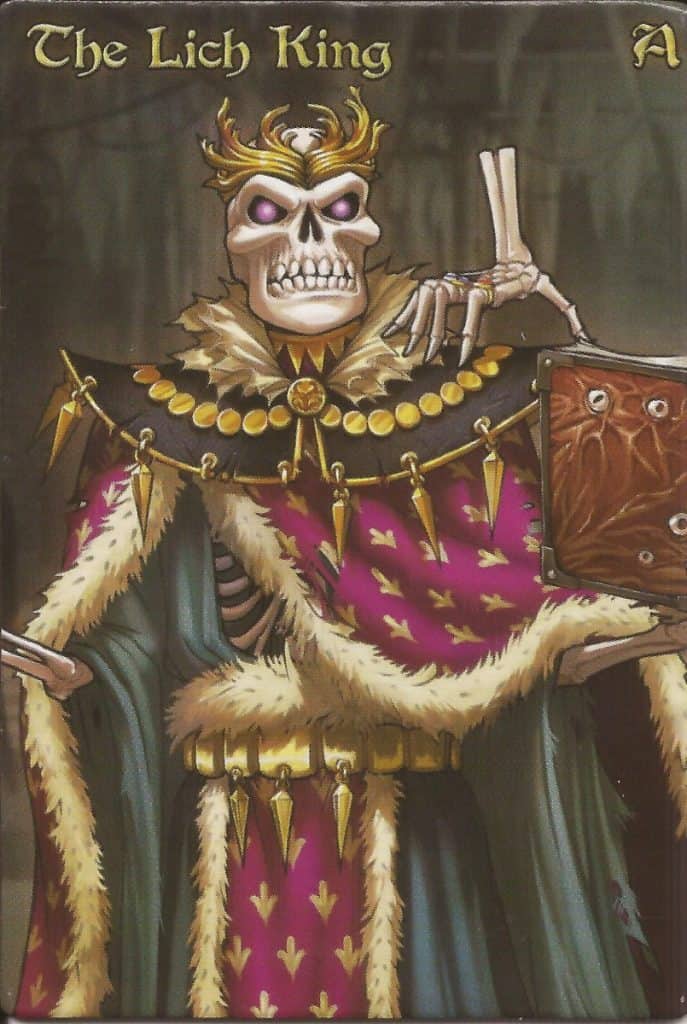
You’ll probably have 1 of 2 reactions when you see the Lich King for the first time:
- He starts with 13 fortitude? Pass.
- He’s only got 13 fortitude? He must be hella strong to get that kind of handicap.
As you’ve probably guessed, the latter is absolutely the correct take. The Lich King is “handicapped” because he also starts with 5 Finger Tokens in addition to his 13 health, 3 of which have rings.
Each of these tokens can be detached from his hand to be treated as a Sometimes card that reads “Ignore any card or effect that affects your fortitude or alcohol content”. Since you’ll typically use these on cards on effects that move a track by 2 or more, that’s like getting to start with at least 10 extra health – more if you’re fending off stronger brews or bruises.
The fingers with rings may each be treated as 1 gold, whether attached or detached, and are always treated as detached when paid to other players or the Inn.
So you’ve effectively gotten to start with more fortitude and gold than everyone else. Surely the deck is also weakened to compensate for this? Not even a little. The Lich King is an incorrigible gambler with an array of cheating cards, a couple of which have additional effects like drawing 3 cards from your Character Deck and kicking a player out of a round of gambling.
He’s also got Action cards that can hit up to 3 players at a time, deal up to 4 damage to a single player, and even reload a hand while skipping out on the rest of his turn. You know, in addition to a standard array of defense cards, a little healing, and a little drink manipulation.
The trick to making the most of The Lich King is keeping your fingers as long as possible. Many of his most awesome cards scale based on the number of fingers he still has attached (with a small minority scaling inversely), so you don’t want to draw everyone’s ire until you absolutely have to.
You may often find this very difficult, as cards like “FIREBALL!” are NOT good for table politics, nor is the explanation of how his mechanics work.
Since your maximum health is so much lower than everyone else’s, it isn’t going to take many bad turns before you’re placed in desperate straits, so doing everything you can to delay them is critically important.
Torglesnarf Duncleton, First of His Name (Found in The Red Dragon Inn 6: Villains)
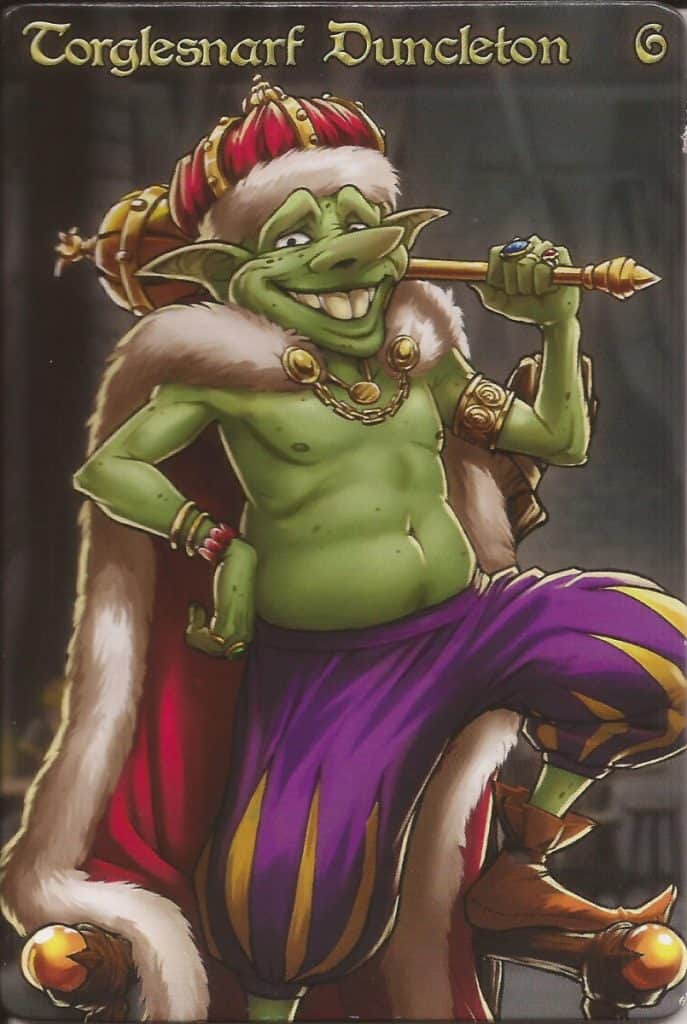
Ready to turn your gold game up to 12? Torglesnarf Duncleton is living proof that money can buy you happiness (as well as clerics, violence, a lack of violence, furniture, drinks, and enforcers).
You start with 2 extra gold at the start of the game, and plenty of ways to acquire more through gambling or other cards in your Character Deck – but be warned, there will ALWAYS be plenty of places for you to spend it.
The first and easiest place you can squander your fortune is on your Minions. There are 3 in your Character Deck, and are placed in front of you once played. 2 give you an ability you can use during each Action Phase in addition to your Action, which will definitely shore up an extremely mediocre offense, and the last reduces the alcohol content of drinks by 1, which is extremely useful over time.
Any Minion can be targeted by cards that cause or redirect fortitude loss, presenting you the option of discarding that Minion or paying their wages to keep them on.
Wages will run you 2-3 gold per instance you need to pay them, and while each card targeting a Minion isn’t targeting you, it’s also important not to overvalue a Minion’s usefulness as your coffers empty.
Don’t get me wrong – access to extra actions and abilities is extremely powerful in The Red Dragon Inn, but several of the goblin king’s cards also need access to your gold to gain their best effects, playing key roles in defense, occasional offense, and healing.
Ultimately, playing these cards will often be more important than getting an extra punch in during your turn, especially during the middle stages of the game.
I personally recommend keeping several gold on hand at most times to keep your options open and cushion yourself from a bad turn or two while gambling (which you’ll also be doing a lot).
This strategy will help prevent you from being kicked out with 15 fortitude and makes it a little easier to both get the most bang for your buck and avoid the pitfalls of greed this deck presents to inexperienced players.
B-Tier Red Dragon Inn Characters
B-Tier Characters are the most common type of character, making up roughly half of the list. These characters have play patterns that deal more than the average of 2 damage per Action/hit back card, flexible attack options, particularly potent strengths, good deck synergy, and/or powerful abilities that can’t be used all the time, but shift the tide of a game when they come out to play.
None will be dominant forces in all games, but against certain opponents, they will do extremely well, and against others, they’ll have a tough go of it.
Brother Bastian (Found in The Red Dragon Inn: Allies – Brother Bastian)
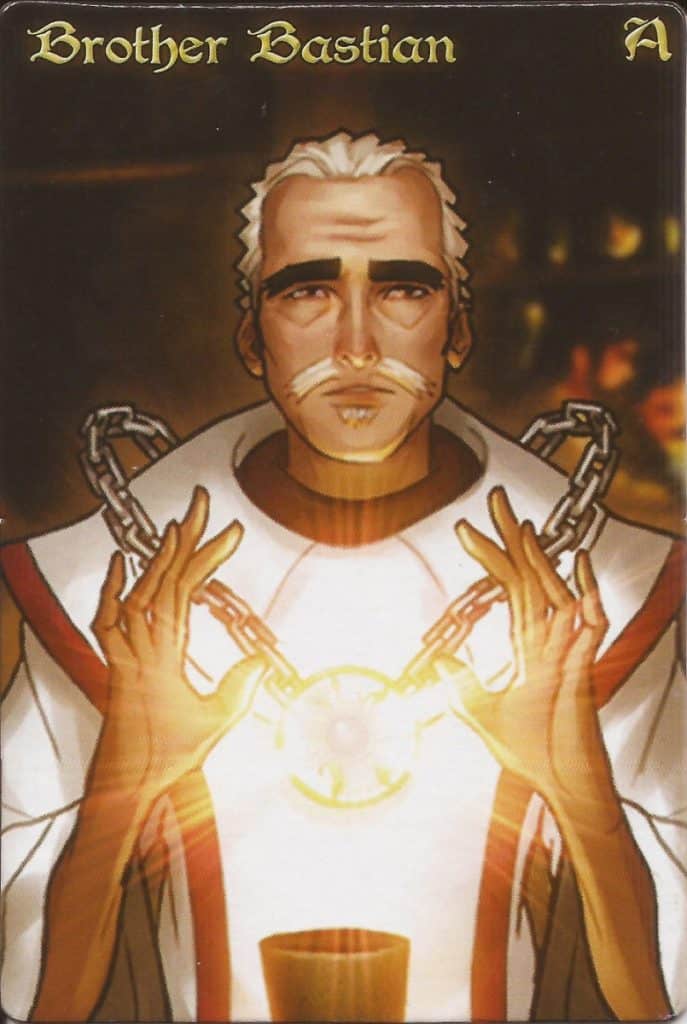
Brother Bastian’s deck looks a lot more complicated to play than it actually is. On the surface, you have a deck that is a little above average in terms of dealing damage and gold management, flexible attack options that can hit both fortitude and alcohol levels, and a reasonable suite of defense cards (though gold is sometimes needed to fuel them). Many of his best cards also have the option to weaken them dramatically in exchange for Prayer Tokens.
These tokens are used to fuel the 3 Prayer Cards you are randomly dealt at the start of the game. These Prayers are often turbo-charged versions of Action, Sometimes, or Anytime cards you might find in Character Decks, require 3-5 Prayer Tokens to use, and don’t count against your hand limit, making their access extremely desirable.
Perhaps even enough so that you’re willing to deal 1 damage instead of 3, or reduce a drink’s effectiveness by 1 instead of ignoring it to rush an accumulation of Prayer Tokens.
Do not fall for this trap.
You have access to 6 cards in Brother Bastian’s Character Deck that will give you a Prayer Token without taking on a weakened card effect in return, so in order to make the most of his talents, it is extremely important you do what you can to accumulate Prayer Tokens exclusively through those cards.
Occasionally, you might come across a situation where having opponents pay the Inn instead of you is worth sneaking in an extra to prep for the following turn, but that won’t be the norm, and you’d better be reasonably ahead before making that call.
Even if you elect to be a little more aggressive with your Discard and Draw phase to find these 6 cards, do not plan on using more than 1 or 2 Prayers throughout the game. You might have 3 aces up your sleeve, but many games simply don’t last long enough for you to accumulate the 9-14 tokens you’ll need to use all of them.
Fortunately, you’re well equipped to hold your own against most opponents, so picking out the right trump cards to help you close out the game should become easy as you witness the progression of early turns.
Captain Whitehawk (Found in The Red Dragon Inn 4)
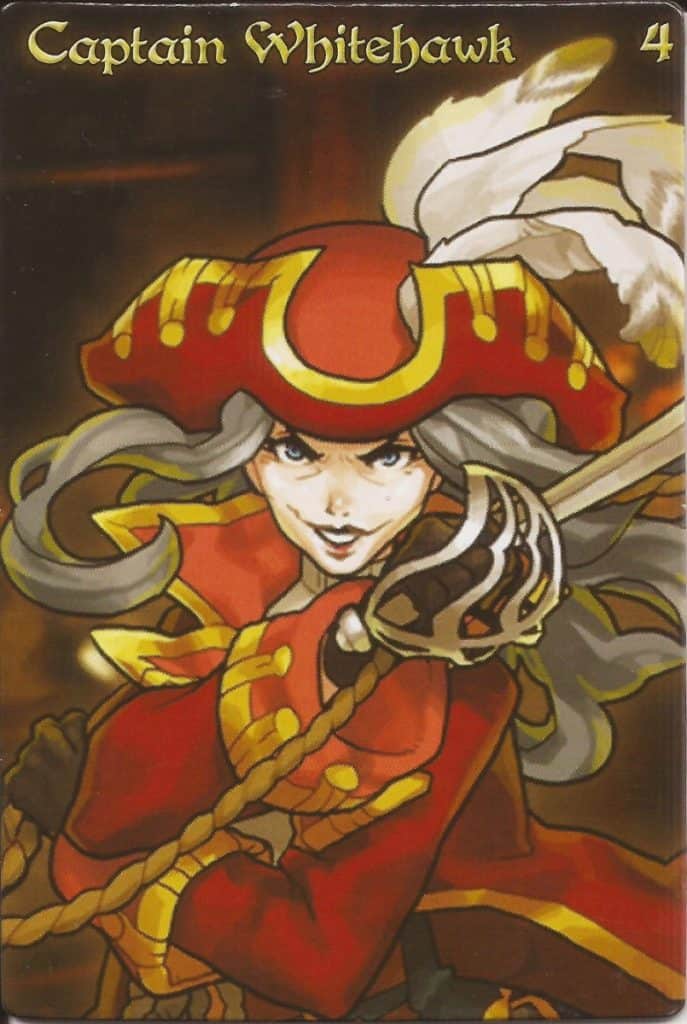
Leader of the crew aboard the Crimson Drake, Captain Whitehawk (fun fact – her first name is Elizabeth) knows how to wield authority and manipulate each situation to get the result she wants.
This showcases itself well in her Character Deck, providing you with a good mix of average, flexible offense on both fortitude and alcohol tracks, reasonable gambling capability and gold acquisition, some minor tricks, and a lot of cards that dictate what’s allowed to happen within the game.
That last category is what really brings the Captain up to B-Tier. She has a boatload of Sometimes cards for cancelling almost any type of card, Gambling cards that can’t be negated or ignored, AND the standard complement of counter cards like “I don’t think so!” and “The Wench thinks you should stop playing with the drinks”.
While there are a lot of good things to say about Captain Whitehawk, her strategic flexibility does have limits. Despite reasonably strong cards for all areas of gameplay, their effects tend to be very narrowly focused.
This sometimes makes exploiting a specific player weakness tricky and can also mean you’ll be holding the wrong type of counter card when a bad situation comes along. Take care when picking your battles, however, and your opponents will be walking the plank as they step out of line.
Cormac the Mighty (Found in The Red Dragon Inn: Allies – Cormac the Mighty)
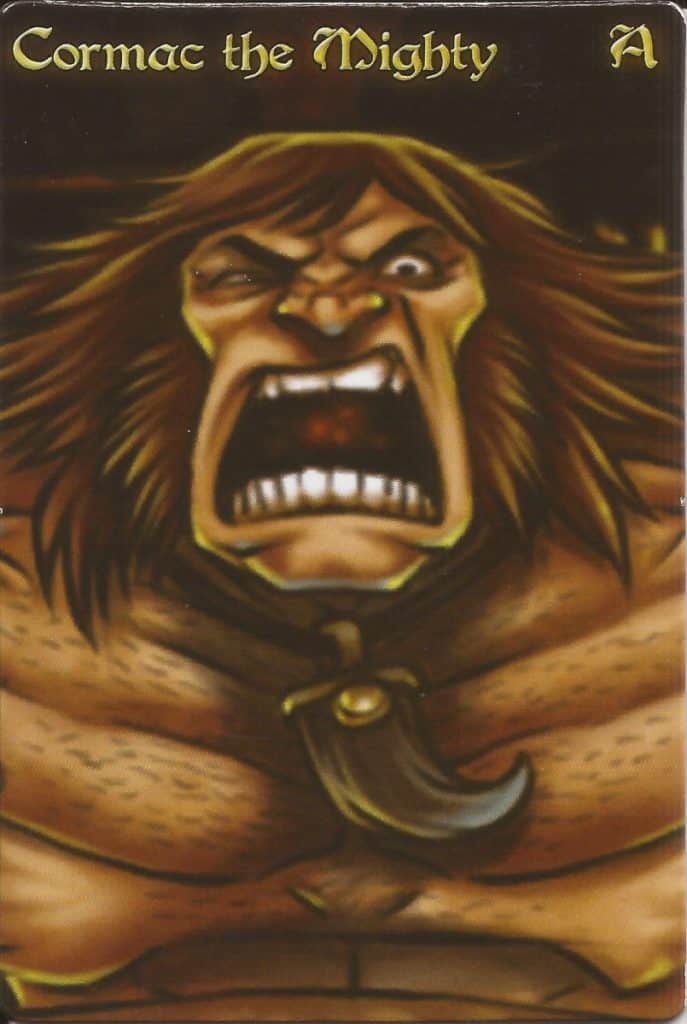
Not being responsible for your actions is just so…liberating. And if that irresponsibility just so happens to lead into a destructive rampage, well, it was beyond your control.
At least that’s how Sterling Archer…er…Cormac the Mighty would see it.
A barbarian prince with no mind for the tedious regulations of bureaucracy, he embodies the violence you’d expect of a fantasy barbarian, represented in his Character Deck through the use of Rage Tiles. These tiles are always set up to progress in the same order, and have the following effects:
- Stage A (Requires 2 cards to activate): Whenever you would gain alcohol content, increase it by 0; whenever you would cause a player to lose fortitude, that loss is increased by 1
- Stage B (Requires 3 cards to activate): Whenever you would gain alcohol content, increase it by 1; whenever you would cause a player to lose fortitude, that loss is increased by 2
- Stage C (Requires 3 cards to activate): Whenever you would gain alcohol content, increase it by 2; whenever you would cause a player to lose fortitude, that loss is increased by 3
- Stage D (Requires 3 cards to activate): Whenever you would gain alcohol content, increase it by 0; whenever you would cause a player to lose fortitude, that loss is increased by 2
Let’s break this down piece by piece, starting with the activation requirements for Cormac’s Rage. Whenever you play a card that has the skull symbol (usually found in the lower right), it always goes into Cormac’s Rage Pool, which is divided into 2 sections – Building Rage and Raging.
The Building Rage pile represents cards that will be used to activate the next stage of Cormac’s Rage, and is where any card sent to the Rage Pool starts. Once you have enough cards in the Building Rage pile to activate the next level of Cormac’s Rage, that stage is activated, then those cards are moved to the Raging pile.
If you play a card with 2 skull symbols, the card you played goes to Cormac’s Rage Pool, then you may place a second card in your hand into the Rage Pool (regardless of whether or not it has a skull on it). There are only 4 of these in Cormac’s Character Deck, and it is usually correct to sacrifice the extra card to level up your damage.
Cormac starts with no stage of his Rage activated, so it is important to get up to A or B as fast as possible so you can move from average damage per turn to some of the strongest damage capability in the game.
Naturally, this power comes with a couple of strings attached, and the first is an increased susceptibility to alcohol. Stages B and C allow you to hit for 4 or 5 points of damage per card, but when Dwarven Firewater turns into 5-6 alcohol for your track, it’s easy to find yourself in the precarious position you’re trying to force upon your enemies.
Additionally, it takes time to build Cormac’s Rage, and if you have to empty it to heal or duck a potent brew, you’re going to spend a turn or two building up your strength again.
Once you can make it to Stage D, you’re able to lay down some major risk-free beatings , but getting the 11 necessary tokens is extremely difficult – especially since your Character Deck only generates 14, and all those cards stay in the Rage Pool until sent to the discard pile through a card effect.
Additionally, every card in your Character Deck that deals fortitude damage has a skull symbol on it, so you can’t rely on using a smaller deck to quickly recycle attack cards.
As a result, Stage B is generally where you want to be, with a possible jump to Stage C at the tail end of the game to clinch your victory. Watch out for characters that can use cards to bump up your alcohol content without a drink – they’ll slip right through most of your defenses, so you need to get them thrown out of The Red Dragon Inn as soon as possible.
Speaking of barbarians if you love D&D content please consider checking out our article on Barbarian vs. Fighter 5E for the hack and slashiest of all martial classes.
Daareka the Mindbreaker (Found in The Red Dragon Inn 6: Villains)
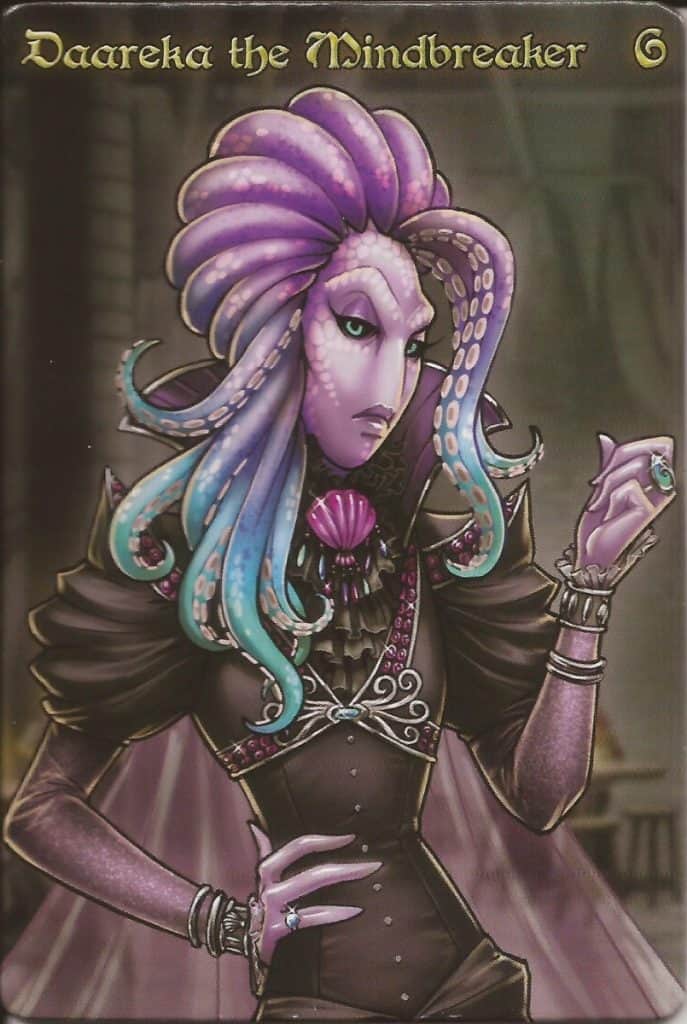
By far the weakest entry in RDI 6, this deck is definitely not one to underestimate. It has a very well balanced mix of offense, defense, and gambling, none of which is particularly above or below average.
Offensive capabilities in Daareka’s Character Deck are noteworthy in the fact they can hit an opponent’s fortitude and/or alcohol content, defensive cards are fairly flexible or just outright useful, and you have access to a few more Cheating cards than average for dealing with Winning Hands.
Balance and flexibility aren’t the only highlights of this deck, however. Several of Daareka’s cards also allow her to either gain information about the cards her opponents are holding, attack their hands, or draw extra cards as part of an Action or Anytime card.
While these are all powerful effects that can dramatically alter the course of a conflict, the ability to draw extra cards or see what an opponent is about to throw at you are the real prizes here. Sure, you’ll occasionally give extra cards to your opponents too, but that’s usually worth the price of admission when it comes up.
Dale the Mycologist (Found in The Red Dragon Inn 9: The Undercity)
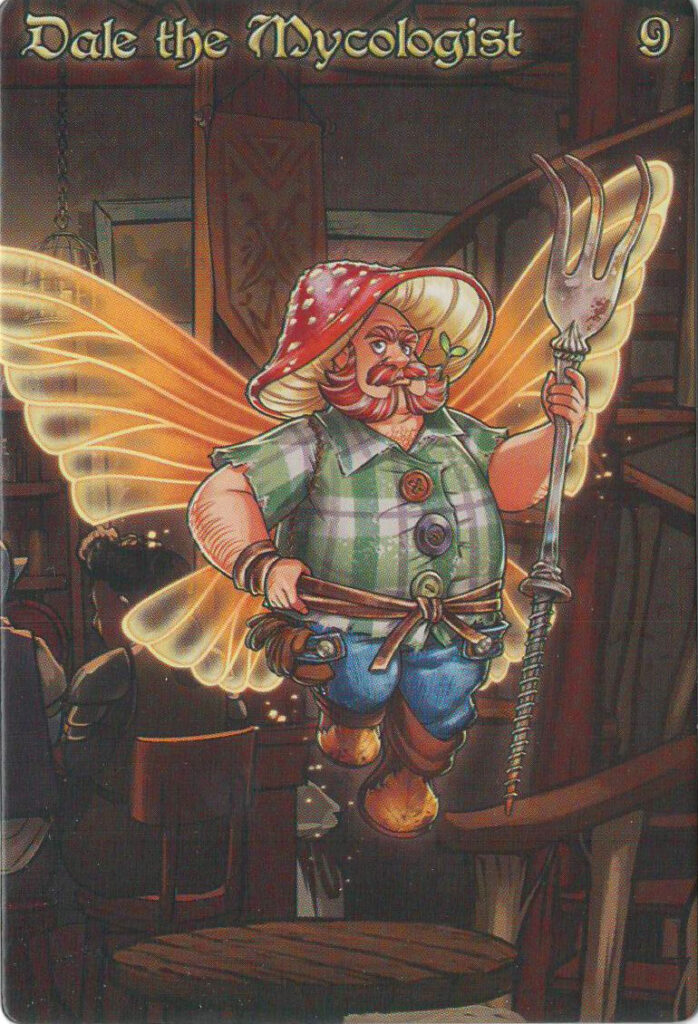
Dale’s deck is probably the best designed of those in The Red Dragon Inn 9. The deck itself looks pretty average at first glance, but its cards can frequently be bolstered through the use of Mushrooms grown from the 15 card Mushroom Deck.
Mushrooms reside in a Planter Box, which can hold up to 4 Mushrooms. At the start of your turn, all Mushrooms in the Planter Box grow, and then you plant a new Mushroom from the Mushroom deck. Newly planted Mushrooms start at the top number of their card, denoted by a Rake token.
As they grow, the Rake moves down to the next stage. If you would receive the opportunity to plant a 5th Mushroom, you may either discard the new Mushroom or discard an existing Mushroom in your Planter Box to make room for the new one.
These Mushrooms can be used two different ways. You may use them to pay Harvest costs on Dale’s cards, strengthening the potential effect, or you must Gather any that have reached their bottom number at the end of your turn. Those used for Harvest costs are not refunded if the card they are attached to is negated, and generally speaking, Harvesting is what you’ll use these for most of the time.
The only times you won’t Harvest a Mushroom by choice is if it has a Gather effect. these are treated as Action cards and have minor abilities, but they can come in handy when you’re in a jam.
Like many decks, this is another where I recommend aggressive discarding and drawing to find the 7 cards that let you plant extra Mushrooms or grow those you already have. While you do get 1 new Mushroom each turn, extras really aid in unlocking Dale’s full power.
With an emphasis on defense and attacking all players simultaneously, along with some decent offense to boot (some of which hits both Fortitude and Alcohol), you’ll find above average strength while also being able to duck punches and drinks from your opponents.
Eve the Illusionist (Found in The Red Dragon Inn 2)
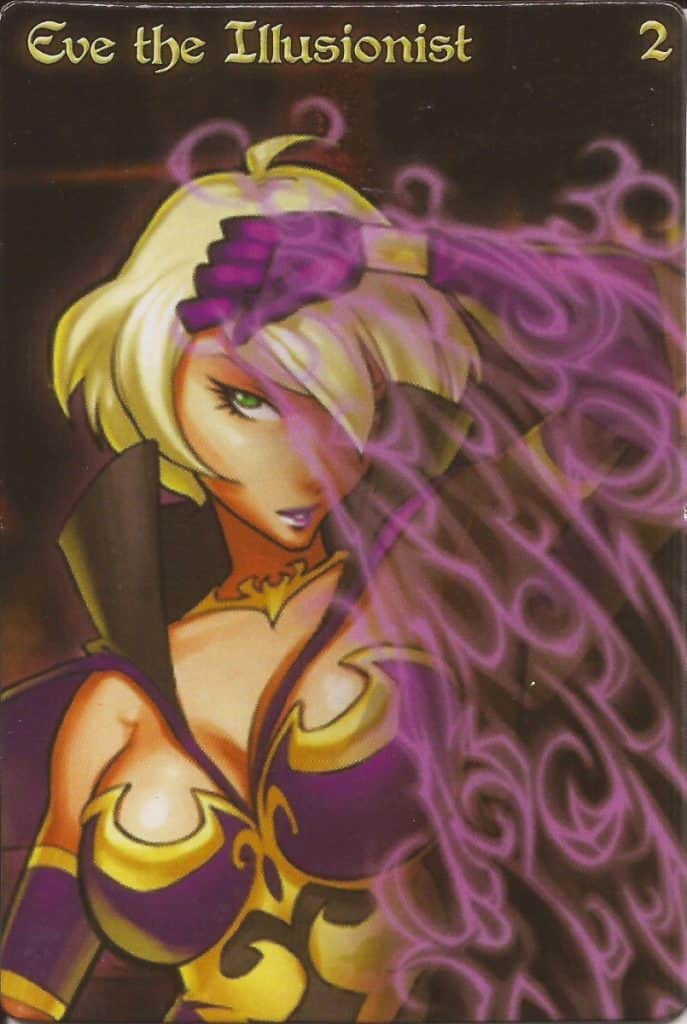
Few things bring me as much joy (or my opponents as much misery) as sitting down with Eve’s Character Deck when playing The Red Dragon Inn. A gambler who isn’t afraid to cheat or swindle folks between rounds of cards? Check. Above average damage options? Check. Attack cards that can hit alcohol content? Check. Defense cards that will make other players wary of messing with you? Check.
Truly a deck with a power level ahead of its time, though it does have a couple stinkers that remind you it was one of the first produced by Slugfest.
Regrettably, those stinkers are also found in Eve’s fairly weak pool of offense cards. While she does have a pair of cards that hit for 3 damage, she has a pair that hit for 1…and then that’s it.
Yes, she has a couple Actions that’ll bump alcohol content by 2, and a couple Sometimes cards that will redirect or split fortitude loss, you’ll occasionally wind up with a dead hand or one that relies on an opponent making the first move.
While the former really is rare and the latter doesn’t bother me in the least (particularly since Eve’s strengths are in gambling and defense), this isn’t a playstyle for everyone, and its power level can vary depending on who your opponents are playing as.
Evil Pooky (Found in The Red Dragon Inn: Allies – Evil Pooky)

As if the original wasn’t already vicious enough! Evil Pooky brings extradimensional shenanigans to the Red Dragon Inn in the form of Doppelgangers – different versions of 15 previous Red Dragon Inn characters who are their opposites in terms of alignment.
To summon one, simply play one of the 13 cards in Evil Pooky’s deck with the swirling blue portal in the lower left corner, then draw the top card of your 15 card Doppelganger deck.
Doppelgangers come in two varieties. The first simply have a single effect that Evil Pooky takes on immediately, then the Doppelganger is discarded. The majority are split cards, offering you the choice of either keeping the Doppelganger in front of you for yourself, effectively acting as an extra card in your hand until you use and discard it, or giving it away to an opponent, triggering a negative effect immediately or when a certain action is taken.
Once a Doppelganger is used, it is then discarded to the Doppelganger discard pile.
There are no limits on the number of Doppelgangers a player may have placed in front of them, but for each one beyond the first in front of Evil Pooky, his maximum hand size is reduced by 1.
Traditionally, this means you generally don’t want more than 1 Doppelganger in front of you at a time, but if you get 1 of the 2 copies of “Nastier biggier pointier teeth” early in the game, it might be worth taking several on to deal a huge amount of damage out of nowhere.
I bring this up because on the whole, Evil Pooky’s offense isn’t all that strong on its own. Some cards come up to average strength when there is a Doppelganger in front of you, but you’re going to be leaning on the effects of your Doppelgangers if you intend to put up a reasonable offense.
The bright side, however, is that you may not need to do that.
Thanks to the wide variety of effects on the Doppelganger split cards, Evil Pooky’s strategy can be very fluid. You can shore up poor offense, narrow defense, and slightly above average gambling as the situation calls for, all while maintaining a larger than normal hand size and giving away problems to your opponents for later.
Doppelgangers can be responded to as though they were Action cards, but much like other characters who split up their damage like Amundyr, it’s usually inefficient to do so.
First Mate Remy (Found in The Red Dragon Inn 4)
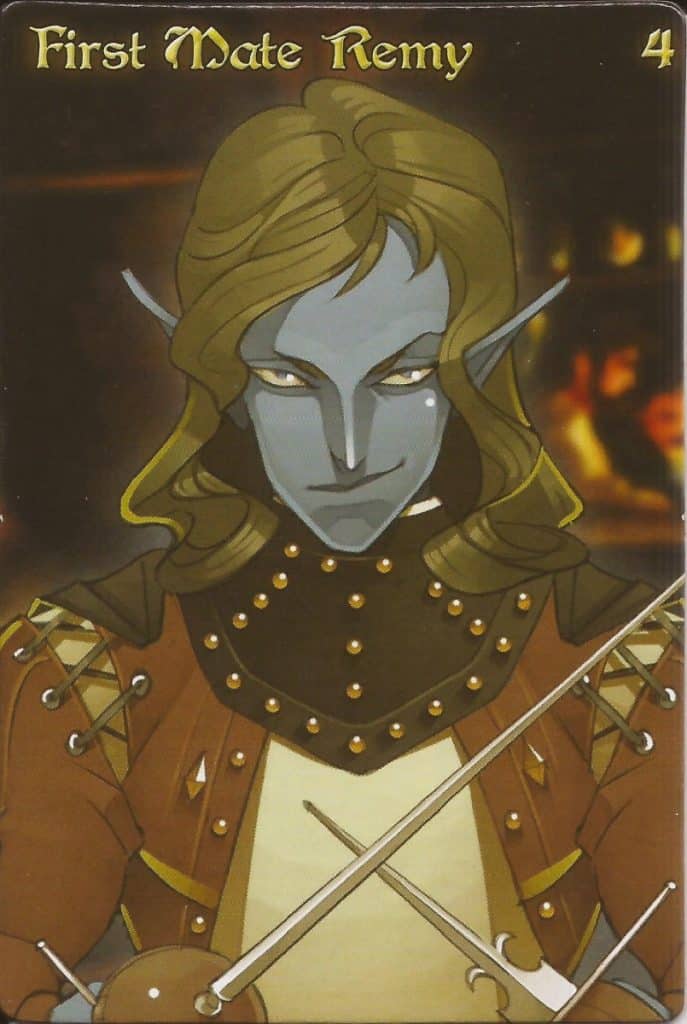
Few characters can claim to have the code of honor Remy lives by, and rest assured that nothing violating it escapes his notice. Naturally, this makes Remy’s deck pretty straightforward to play, but with a nice splash of strategic depth thanks to his Marks.
Many of Remy’s cards will instruct you to give these to a player as part of an effect, setting them up for extra trouble down the road. Note that each player can have a maximum of 1 of Remy’s Marks, and Remy himself cannot be marked.
This extra trouble can be found on 9 of Remy’s cards, typically making them hit harder, but occasionally offering a more unique effect instead. It is extremely easy to get these marks distributed to players, so you’ll almost never have trouble making use of these powerful abilities.
Not that Remy is exactly a slouch to begin with. He deals above average damage, is a slightly above average gambler, has reasonable if slightly subpar defense, and has a handy Action that makes everyone else pay you a gold.
Remy’s attacks are also fairly well divided between hitting individual players or hitting most/all opponents, including a couple especially nasty Actions that make all opponents gain 1 alcohol content, but marked players gain 2 alcohol content instead.
Frankly, the only thing keeping Remy out of A-Tier is that you do have to take a little time to set up for your heaviest hits, and then those victims typically become unmarked afterward.
As mentioned before, this isn’t hard to do, but when you have to spend an Action or wait for a certain circumstance to come up to hand out a Mark (or 3), it can be enough of a hindrance to impact consistency, and is a repetitive hurdle A-Tier characters don’t have to deal with to this degree in their play patterns.
Fleck the Bard (Found in The Red Dragon Inn 2)
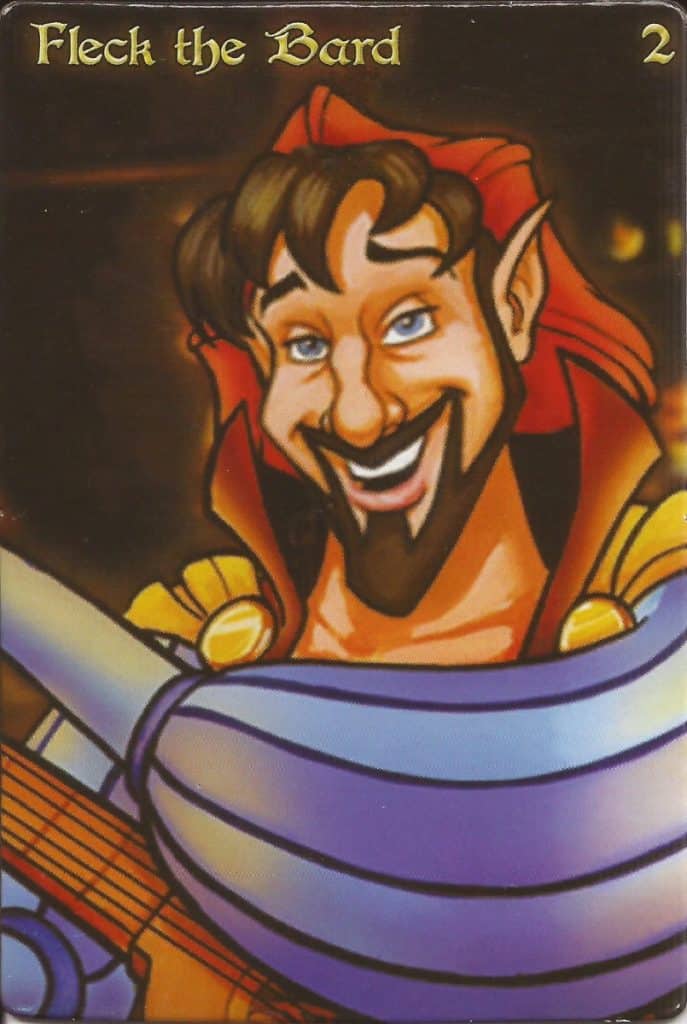
If you thought Eve was a tough customer at the gambling table, you’ve probably got no chance of dealing with Fleck. Easily one of the strongest gamblers in the game, Fleck’s Character Deck pairs his wide selection of Cheating cards with Actions that require players to pay him, hitting everybody for 1 gold or specific individuals for up to 2, the latter of which is an incredibly rare talent.
Frankly, the only thing holding him back is the fact that he can only gamble or play one of these actions on his turn, making him a little too slow to make A-Tier.
That said, if other players initiate gambling, Fleck can quickly become extremely dangerous, particularly as it may take 2-3 rounds before he’s out of gambling cards.
Experienced players will know better than to feed into this plan, however, and any strategy that relies on your opponents in this manner is going to have a substantial chance of coming up short.
While you’ll probably spend most games pursuing ways to part fools from their money, Fleck also has fairly average offensive and defensive capabilities if you have one or more opponents trying to play the gold game too.
On offense, you have options for either hitting everyone for a little bit or someone for up to 2 (including one of the dreaded Actions that only causes 1 fortitude loss to a single target), as well as options for making everyone drink (including yourself). On defense, you’ll find cards to split drinks and heal a little in addition to the standard fare of cards like “I don’t think so!”.
Definitely not tactics to rely on, but they can go far enough to subtly tip the scales in your favor when the need arises.
Gerki the Sneak (Found in The Red Dragon Inn 1)

Gerki is an all-around excellent character. Well above average in gambling, above average in offense, and relatively average on defense, there’s a clear path this deck wants to steer you toward, but without the feeling that you’ll be behind if you have to pursue an alternate route for victory.
Gerki’s extra gambling cards are primarily fueled by cheating, but the extra cheating cards you receive don’t have all the extra effects stapled to them you might find with characters released later on. Breaking apart Winning Hands is still an extremely useful skill though, so we won’t hold this against him.
Offensive cards deal either 2 or 3 damage per action, which is always nice to see, but on top of that, you also have multiple cards that will add 2 alcohol content to a drink, allowing you to sneak in some unexpected hits when the time is right.
Your defense cards are pretty pedestrian, but unlike better gamblers like Fleck, you aren’t going to be splitting drinks or putting yourself in harm’s way when trying to duck a bad card or get someone else to drink.
Gog the Half-Ogre (Found in The Red Dragon Inn 2)
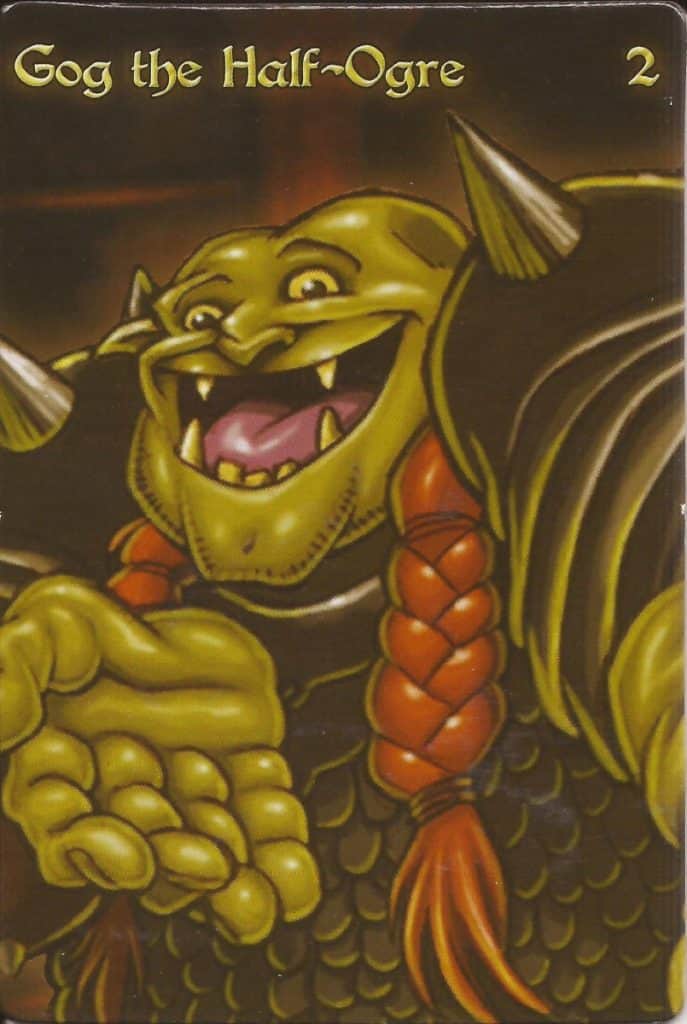
I’ll admit, I was torn between assigning Gog to B-Tier or C-Tier. His deck is decidedly average when it comes to gambling, defense, and a lot of his offense, but there are some fairly strong cards mixed in that C-Tier decks just don’t have.
Two of Gog’s Actions hit for 3 damage (and the loss of a gold) and 4 damage respectively, which I’ve seen turn the tide of a game by themselves. Add in an anytime card that heals 2 of your health, an anti-cheating card that wins you the current round of gambling, Sometimes cards that either hit an opponent that hit you or makes an opponent take an extra drink, and you start to see the punch Gog packs.
Sure, lots of decks have some combination of these same cards, but most don’t have all of them, which makes Gog a serious threat as long as he has cards in his hand.
Not that Gog would see it that way. As one of our Patrons is fond of saying, “Gog am tough but fair”, and that really sums up his Character Deck. Probably one of the weakest decks in B-Tier, but well deserving of the placement after seeing it in action several times.
Jasper the Bouncer (Found in The Red Dragon Inn 7: The Tavern Crew)
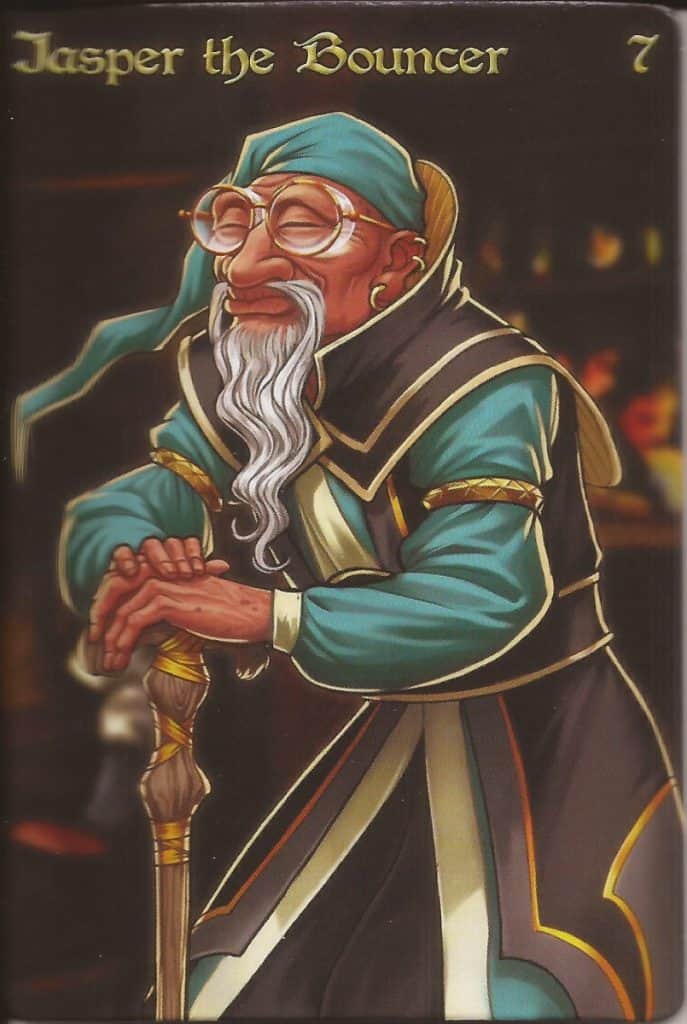
In Jasper’s day, adventurers must have been made of sterner stuff, because he’s tough on patrons that think they’re going to be rowdy or take advantage of easy marks. Card quality is average at worst and almost always above average or excellent as you work through his deck.
He has multiple cards that hit for 3 damage, fairly average gambling skills (though he does have a non-cheating card that can react to Winning Hand), solid defense against alcohol gain and fortitude loss, and a solid subtheme for attacking a player’s gold outside of gambling.
The primary tradeoff for all of these talents is that Jasper’s cards do tend to be narrowly focused. On the one hand, this allows you to adopt strategies for dealing with individual players pretty easily. On the other, it does mean you may be holding the wrong type of defense when the knockout punch or drink comes calling.
The lack of versatility in individual cards edges Jasper out of A-Tier in my book, as none of his areas of focus are quite strong enough on their own to carry a game by themselves, but he can definitely be a dangerous silver bullet for gamblers that focus on cheating, characters susceptible to gold loss, and those who have trouble taking a punch.
Joran the Trickster (Found in The Red Dragon Inn 5: The Character Trove)
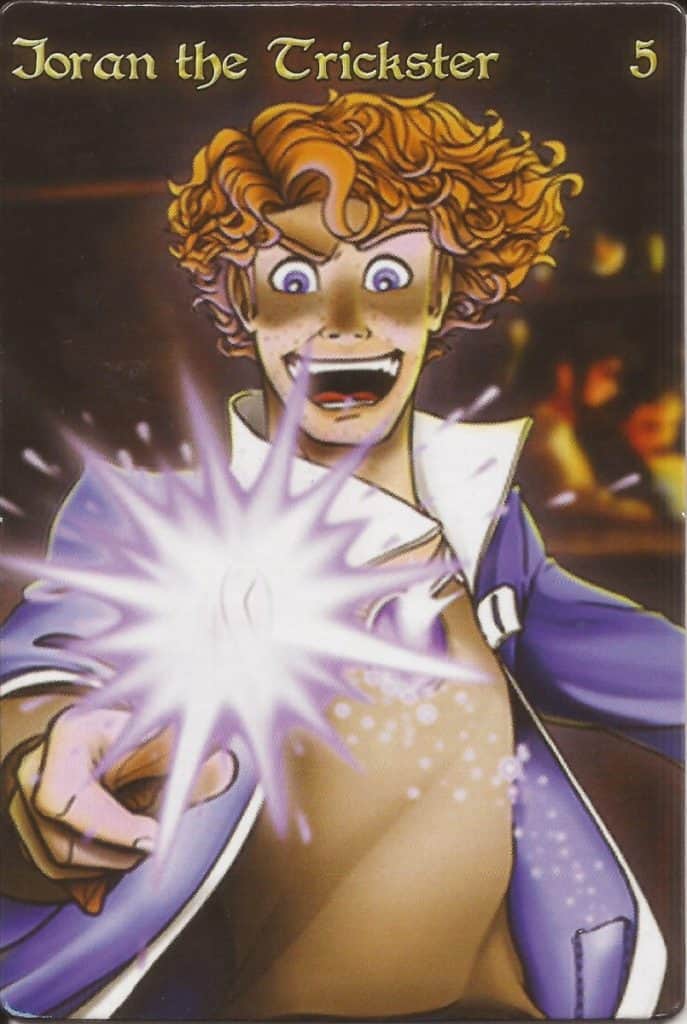
I’ve played a LOT of The Red Dragon Inn, but occasionally a character that was tailor-made for my brand of hijinks manages to evade my notice.
No longer is that the case for Joran.
While his offensive actions deal below-average damage, there are options mixed in that make this drawback worthwhile, including a card that targets alcohol content instead of fortitude, and a card that lets you rearrange the drinks on your “Drink Me!” pile.
This type of ability is extremely rare, so I started digging through the rest of the deck to see what other cool cards came up.
As you may have guessed, I was not disappointed. I even found a card that lets him manipulate the drinks he gives out! Granted, he does still have to take 1 of his own in the process, but it’ll be the best of the top 3 cards in the Drink Deck.
Joran’s Sometimes cards bolster a mediocre offense by letting him viciously sabotage enemy drinks, dramatically improve the effects of his own, and hit back when someone damages his fortitude. His defense is also top-notch, in that he can not only ignore cards, but also negate and redirect them.
Mix in a little sabotage for fortitude gain, slightly above average gambling, and a little bit of gold manipulation, and you have a character that is both a blast to play and is well positioned to combat a variety of strategies.
Kaylin the Renegade (Found in The Red Dragon Inn 3)
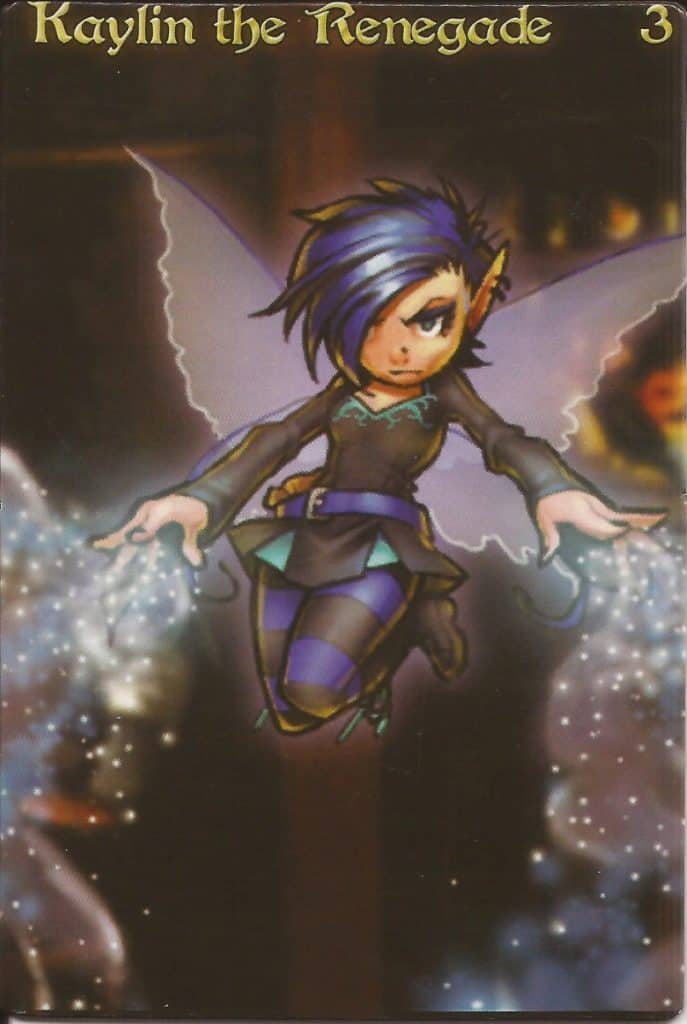
Awwww, who’s a cute little pixie? Hey, uhhh, that’s a really big wolf. Is he with you?
He is? Ah. How unfortunate.
Kaylin’s Character Deck is quite a bit tougher than her looks might suggest, dealing average damage (though there is one Action that deals 3 damage instead of 2) and featuring cards that can hit everyone else for 1.
This is bolstered by cards that add a little extra alcohol to drinks, cards that hit back when she loses Fortitude, as well as a surprisingly strong suite of defense and healing cards, including one of the rare ones that makes her untargetable for a turn. She’s also an excellent gambler, owing to her access to several Cheating cards.
But now it’s time to address the wolf in the room. Wulfric’s moods are fickle, changing at the end of each of Kaylin’s turns by discarding the top card of Wulfric’s Deck. Several of these are quite beneficial, giving Kaylin buffs that make her cards hit harder (especially fun with cards that hit everybody), improve her defense, block cards that would negate or ignore her cards, or even net her extra gold! A couple of cards in Wulfric’s Deck do nothing.
And then there are the 4 that can be problematic. If you don’t have the lone card in Kaylin’s deck that can skip you past one of Wulfric’s bad moods, their debuffs can mess you up in a hurry through extra damage, alcohol gain, and gold loss.
While you’ll generally want to assess the situation at hand before playing “I don’t have time for one of your moods, Wulfric.”, generally it’s best to prioritize skipping Needy, which costs you fortitude for playing Sometimes or Anytime cards, Rambunctious, which costs you fortitude when gaining alcohol content, and Playful, which increases your fortitude loss by 1 (but will usually hit the player injuring you for 1 as well).
Gold generally won’t be an issue for Kaylin, so Destructive isn’t often as big of a threat to you when it crops up.
Definitely a fun deck to pilot overall, but you’ll want to close out the game as soon as you are able – especially if you haven’t found the bad cards in Wulfric’s 12 card deck.
Keet the Treasure Hunter (Found in The Red Dragon Inn: Allies – Keet and Nitrel)
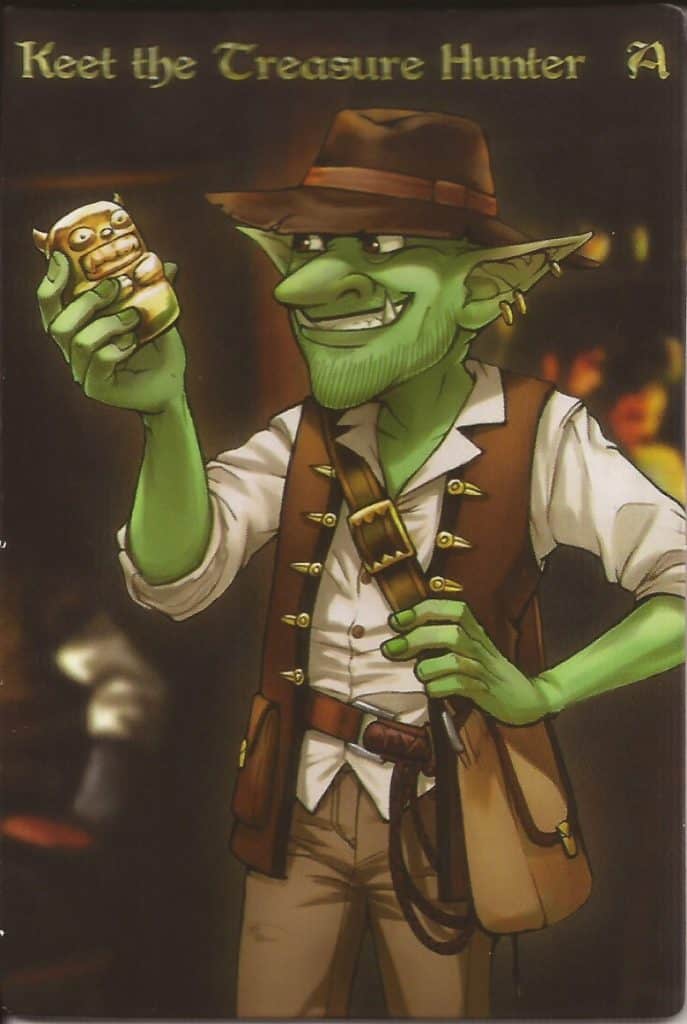
Playing as Keet is one of the most unique experiences The Red Dragon Inn has to offer. Rather than beginning with gold, Keet begins with an equal number of face down Artifacts that are randomly selected from a deck of 18 at the start of the game. These are each treated as a gold piece, and can be wagered or spent accordingly.
When turned face up (either by another player acquiring them or by Keet revealing them through cards in his Character Deck), they’ll either show a Triggered effect, have a continuous Static effect, or can be used as an Action, Sometimes, or Cheating card later on.
If you use an artifact as an Action, Sometimes, or Cheating effect, it is discarded to the Artifact Deck’s discard pile.
If you pay the Inn with an Artifact, then a player gains gold from the Inn later, they must take gold unless their card specifically allows them to take an Artifact.
Finally, since Artifacts are treated as gold, a player must be out of gold AND Artifacts to be considered out of gold. Artifacts are divided separately from gold if a player passes out, but follow the same rules of distribution (half to the Inn, rounded up, then equal distribution to remaining players, with any extras also going to the Inn).
Now that we’ve gotten the rules primer out of the way, we can talk about Keet’s actual cards. His character deck offers average offense and defense, slightly above average gambling capability, and a fair bit of gold acquisition. These last two components are the core pillars of Keet’s game plan, as he’ll want to reveal artifacts as soon as he can, toss any unwanted ones into rounds of gambling, and keep any that can get him out of a pinch.
Fortunately, Keet’s character deck does a reasonable job of letting him reveal Artifacts himself, with 8 cards offering this capability. He also has a few cards that let him reclaim beneficial artifacts given to others or pawn off unwanted or hazardous ones to suckers and/or the Inn.
If you choose to wager a face down Artifact for gambling, you also get to look at it as you do so to see whether it is worth your time to take the pot. Those with particularly good poker faces can also take advantage of this to scare others off and claim some extra gold with minimal effort.
The Artifact Deck contains a predominantly beneficial array of cards. 12 of the cards have extra effects that are useful, 2 do nothing, and 4 are hazardous or have unfortunate strings attached (looking at you, Medal of Revelry).
If you are fortunate enough to find either the Cursed Idol of Doom or the Gleaming Gem of Inebriation, you’ll want to give these away as soon as you are able. These dole out extra fortitude loss and alcohol gain, respectively, and can either create extremely entertaining games of hot potato or force players to waste resources dealing with them.
You’ll also want to be careful about overusing the beneficial Artifacts you reveal. Not only are they your primary source of gold, if funds get tight, the last thing you want to do is pay your debts with something useful like the Helm of the Great-Grandfather.
Of course, you can also take advantage of this to also play kingmaker. Since Artifacts don’t leave the game when Keet does, your decisions during the game may be extremely influential in determining who walks away with the win.
Lizwick the Collector (Found in The Red Dragon Inn 5: The Character Trove)
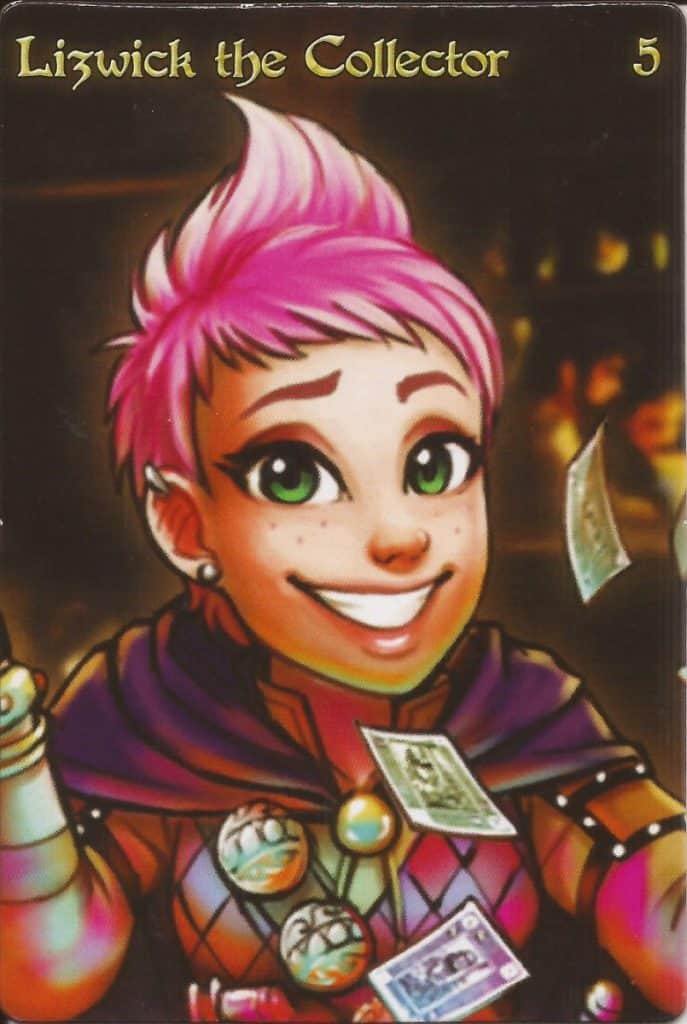
Like Keet, Lizwick has an extensive bag of tricks in the form of her Item Deck. 11 cards in Lizwick’s Character Deck let her draw the top card of this special 18 card deck and either take on an Immediate effect, or equip it for use later.
Lizwick can only have up to 3 items equipped at a time, and must discard an equipped item if a 4th equippable item comes up. Additionally, her maximum hand size is reduced by 1 if she has 2 items equipped, and reduced by 2 if she has 3 equipped.
Naturally, this means you’ll want to use items pretty quickly, so if you aren’t into walking Keet’s strategic tightrope, Lizwick is probably going to be right up your alley. She’s also an excellent gambler and good at demanding gold from players and the Inn, so you probably aren’t going to be worrying about your coffers too much throughout the course of a game.
In exchange for her fiscal prowess, you’re taking on fairly poor offensive capability. Several of Lizwick’s Action cards only hit for 1 point of fortitude damage, and while a couple also let her take a gold from the player she’s attacking, this constrains your strategic options a bit. A couple of her items can slightly supplement this, but you’re realistically going to be playing a fairly defensive game from the start.
Luckily, many of Lizwick’s items are ideal for doing exactly that, allowing her to supplement her Character Deck’s defense with tools to minimize the effects of drinks and even occasionally shrug off the loss of fortitude or gold. Just watch out for the items that either do nothing or have extremely negative consequences like the Cursed Relic of Torpor.
These can cut down on your available cards in a big way, transforming Lizwick’s strength of having access to extra cards into a weakness that will hold her back until you can either draw a fresh hand or unload the albatrosses.
Lucky the Scofflaw (Found in The Red Dragon Inn 8: Pub Crawl)
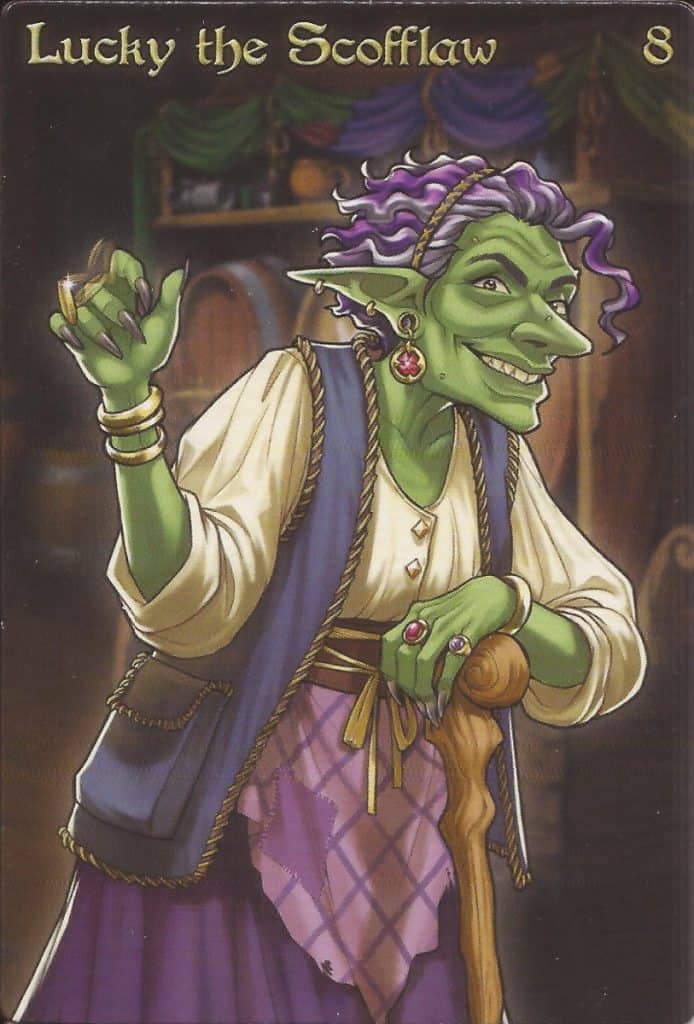
If you’re looking for a character that has the potential to rival Fleck’s gambling prowess, Lucky’s your lady. In addition to a massive suite of Gambling and Cheating cards, Lucky has a lot of cards that permit her to perform in an above-average capacity in defense (her secondary strength) and offense.
That said, this prowess often comes at a cost – Heat. When you collect 3 Heat, you have to choose one of the following:
- Lose 2 Fortitude
- Gain 2 Alcohol
- Pay 2 Gold to the Inn
Fortunately, you get to make the call of how you interact with the authorities as your loose ethics catch up with you, so you’ll always be able to pick the option that is least harmful in the moment. Unfortunately, since 16 of your cards can give you Heat, and many of them are not optional, you will be inflicting a non-zero amount of harm to yourself to play at your full potential.
Oh well. That’s simply the cost of doing business.
Marah the Maledictor (Found in The Red Dragon Inn: Allies – Melvyn vs. Marah)
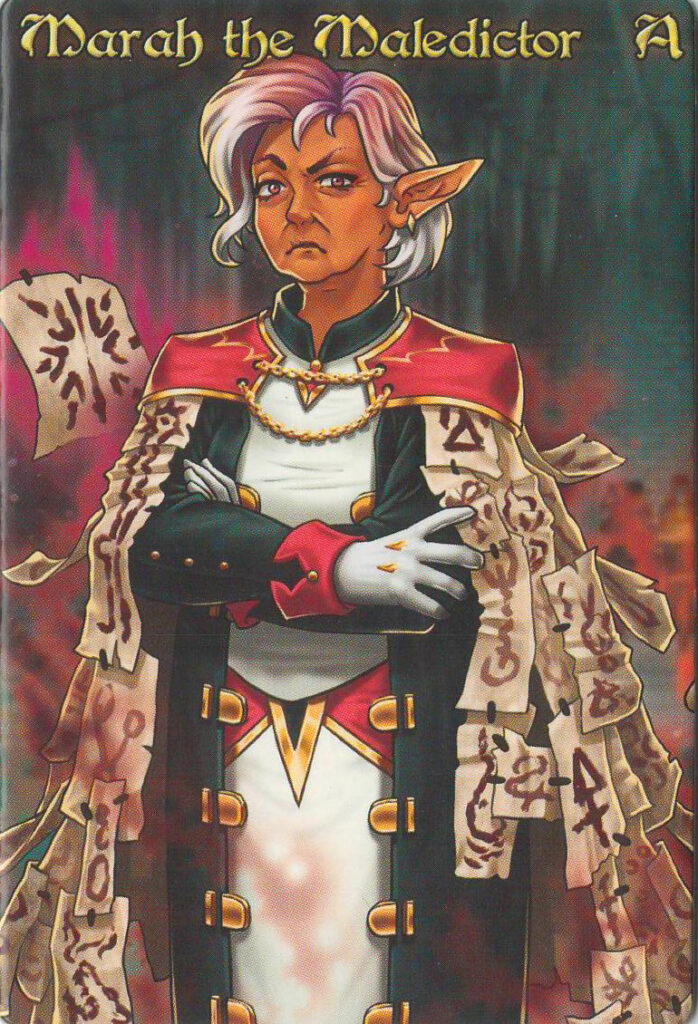
Reading through Marah’s rules and deck made me unbelievably happy. I imagine my opponents have different feelings.
The gimmick of this deck involves the use of Marah’s 15 Maledictions. Unlike most extra decks provided for specific characters, this one is placed in the middle of the table, as all of your opponents are going to need to be able to reach them as you start doling them out.
As the name suggests, these are almost universally bad for your opponents, causing them extra harm or inconvenience when they play them from their hand. So why would your opponents play these awful cards you’ve put into their hand? Well, it’s probably the only way they’ll get rid of them!
You see, Maledictions cannot be discarded unless a card specifically allows them to be, which means they start to clog up opposing hands if left ignored. Since a player’s hand limit is normally 7 cards, this can become a problem very quickly as Maledictions count toward a player’s hand limit, reducing the effective number of cards that can be drawn during a Discard and Draw phase.
And Maledictions can be handed out VERY easily.
Fortunately, you can also play table politics with this deck, as many of Marah’s cards also allow opponents to discard Maledictions in exchange for a boon of some sort to Marah. This can be very useful, as her base attack strength is subpar, and while Maledictions bridge that gap, you’ll probably need to make at least 1 friend to make it to late game.
This might be difficult, as Marah’s primary strength is in Gambling and attacking Gold totals. Additionally, several of her cards hit all players and potentially dole out Maledictions. Like Amundyr’s scarabs, Maledictions also linger after you get knocked out, so player removal only stops more from being added to the game – your opponents will still have to address the havoc you wreaked on their hands after you’re gone.
Melvyn, Collegium Archivist (Found in The Red Dragon Inn: Allies – Melvyn vs. Marah)
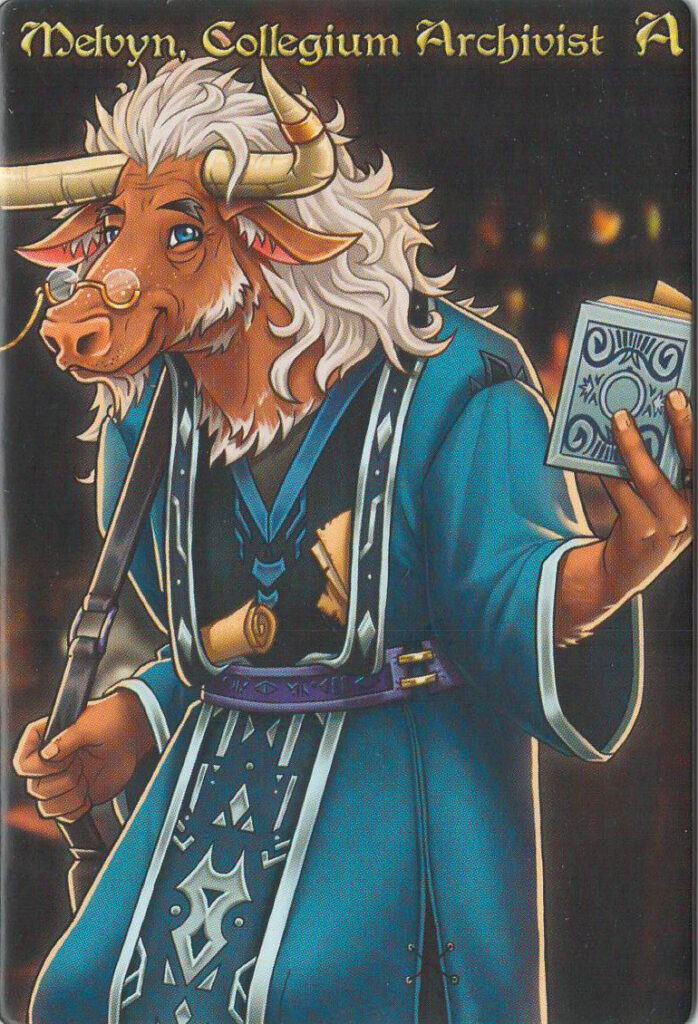
Melvyn’s deck encourages a very reactive style of gameplay, which is something I tend to appreciate when the table gets fed up with my nonsense. Like Eve, there are a lot of Sometimes and Anytime cards with comparatively few Actions (7 in total), and while these tend to be balanced between attacking fortitude and alcohol content, there is unfortunately an action mixed in that only deals 1 point of damage.
Unlike Eve, however, Melvyn can strengthen the potency of some of her cards with Runes. The Rune deck contains 3 copies of 4 different symbols (Fire, Shield, Ice, and Chaos), and you get to draw one at the beginning of each of your turns to place next to your player mat. There are also 6 cards in Melvyn’s character deck that let you draw an extra rune, and 1 that can be treated as a rune of any type – aggressive discarding and drawing for these is critical.
This is because many of Melvyn’s cards require 2 or more runes to upgrade, and you definitely want that capability, as most of her worst cards become pretty good with some Rune-based assistance, and her better cards become absurd, such as a Draw 3 Anytime card that would normally make you discard 2 cards, but for the price of a Fire rune, you get to keep all 3 instead.
As far as Gambling goes, Melvyn’s what I would consider average – but she has an edge because the quality of her Gambling cards skews higher than other average decks thanks to some of her cards having access to Rune powerups.
Pacing yourself and choosing your moments is ultimately what will separate a good Melvyn player from a poor one. Since Runes have to be paid up front if you want to use them with your cards, I Don’t Think So! effects and other negation can blow out big plays, and like I alluded to before, some of her cards are pretty awful without Runes to boost them.
Further, getting access to the right symbols for your cards can also be tricky – you could have 6 runes in front of you, but if you need a Fire Rune and don’t have it, those other runes might well be worthless. Fortunately, there’s no limit to how many you can have in front of you (barring the 12 in your deck), so if you need to bide your time, you certainly can.
Molly the Stablehand (Found in The Red Dragon Inn 7: The Tavern Crew)
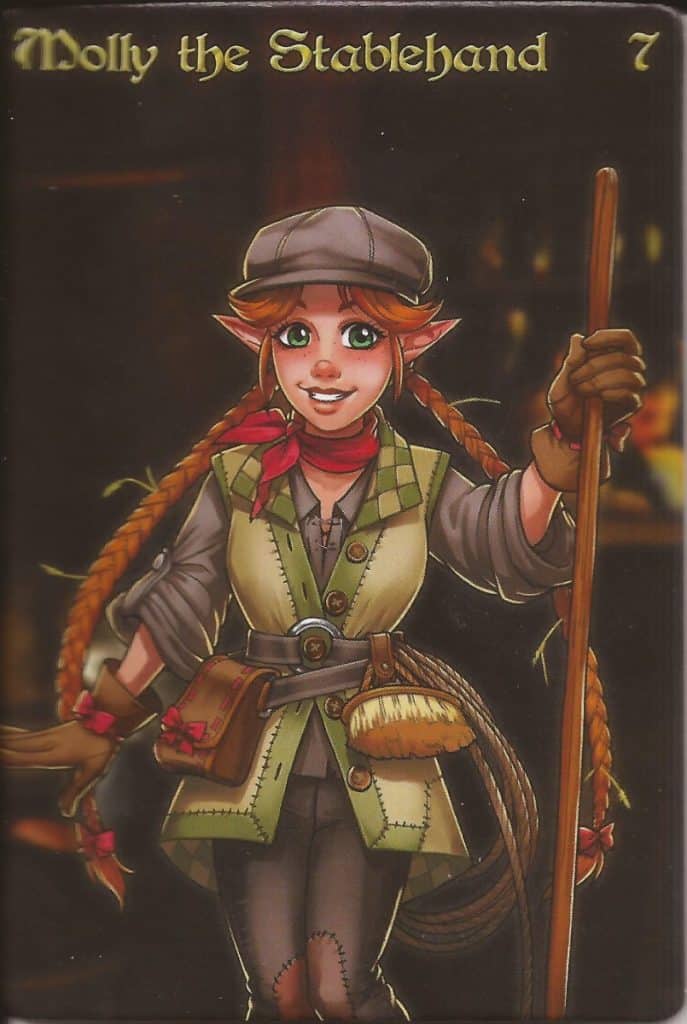
Evaluating Molly is a little difficult at first glance because her cards have a lot going on. Much of her Character Deck deals average damage, but she has several excellent cards mixed in that can hit multiple players, ignore drinks, and deal out extra drinks – if you have the gold to pay for them. She also has a pretty strong gambling theme on offense and defense, so you can often pick your moments to ensure your coffers stay full.
A few of Molly’s cards also give you access to the mounts under her care, which can play a big role in her survivability over the course of a game. These aren’t super common – you’ll average 1-2 per full hand of 7 cards – but they offer a number of useful passive boosts and single use effects that effectively increase your hand size by up to 3, assuming you don’t come across any rivals.
If you draw a mount whose rival is already in play, you take on the rival effect before the mount’s usual effect. This usually results in discarding the mount or its rival, as well as a possible parting shot to your fortitude, but if your mount is somehow still in play after that, then you can apply its normal effects.
If you draw Pooky, however, you lose all your other mounts, which can instantly rip you out of a strong board position and put you back on the defensive. I’d personally say Molly is one of the weaker B-Tier decks due to high variance, but when she shines, she really does put on quite the dog and pony show.
Nerodia the Petrifier (Found in The Red Dragon Inn 8: Pub Crawl)
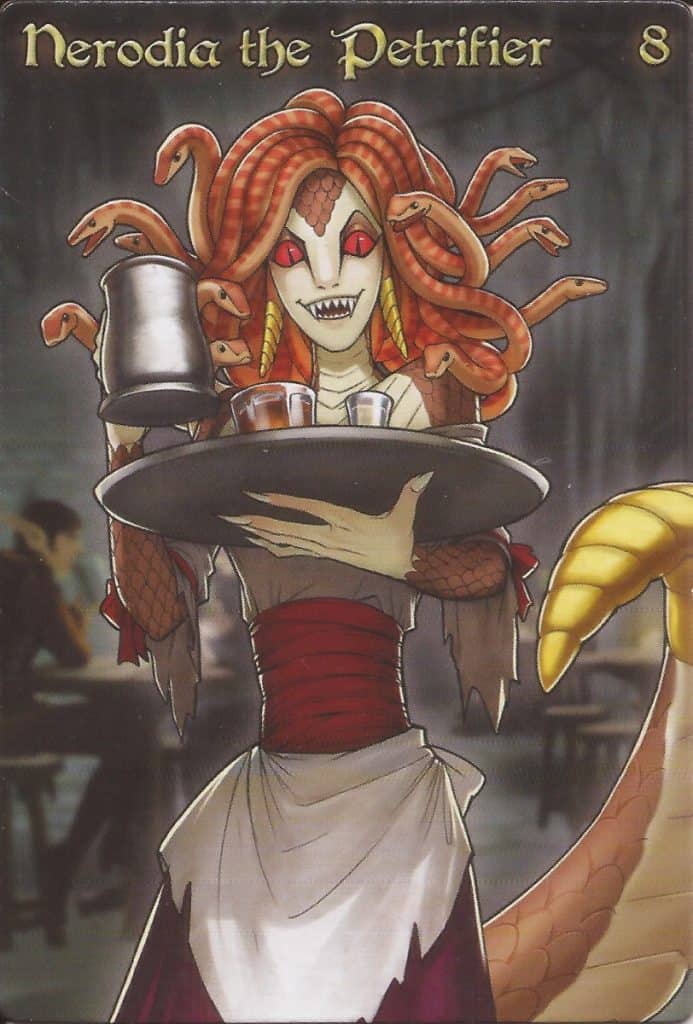
My eyes got really big when reading over this character’s deck. Hand disruption is one of my preferred strategies in CCGs, and Nerodia is surprisingly the first Red Dragon Inn character to embrace this avenue of gameplay.
This is done through use of the Petrify mechanic – whenever you Petrify X cards, your opponent selects X cards from their hand and places them face-down on the bottom of your Petrification Pile in a random order. At the start of Nerodia’s turn, the top card of this pile Decays, returning it to its owner’s hand.
You can never Petrify your own cards, even through redirected effects. Petrification also does not pass through subordinates like Gizmos or Minions, meaning no cards are Petrified when targeting them.
Petrified cards are intended to fuel the other unique mechanic of Nerodia’s character deck: Glare. When playing a card with Glare X, you declare whether or not you are paying the Glare cost (up to once), then if you do, place a number of face-down cards from the top of your Petrification Pile under the card you’ve played.
When the played card goes to your discard pile, cards spent for the Glare cost, regardless of whether they successfully resolve, go back to their owners’ hands. The notable exception is with Murgath’s Blessings, which are simply discarded.
There are a lot of ways to Petrify cards and ample opportunities to use them on Glare effects throughout Nerodia’s deck. Some Glare effects are very expensive, however, costing as much as 4, and not a single one costs less than 2. Most Petrify effects take 1 card, with some taking as many as 2. Add in the Decay suffered each turn, and my primary opinion is that Glare should only spent to optimize defense or deal a finishing blow, and even then, that cost should be debated carefully.
Nerodia’s deck excels in defense, so this strategy plays well to her strengths. She can avoid problematic cards and keep her Gold up with relative ease, especially if small amounts of Glare are spent here and there. She’s also an average gambler, and a poor damage dealer, requiring 2-3 Glare to deal any damage that is considered above average, which can only be done on 3 of her Action cards.
These traits make Nerodia an ideal assassin, as you’ll be very well equipped to win any 1 on 1 feud, or deliver disruption to players who are many turns away from a hand refill in larger games. The long game is generally your ally as well, since defeated players will leave any “donated” cards in your Petrification Pile when they’re thrown out of The Red Dragon Inn, potentially affording you a free Glare effect or two without the fear of turbocharging someone else’s hand.
Nerodia can also be an adept table politician, taking cards away from an ally in the short-term, then handing them back after they have a chance to refill their hand, getting around the typical hand limits – especially since players choose which cards in their hand get Petrified.
While this might tempt you to betray someone who “banked” their best cards, bear in mind that you only have so many cards yourself, and once you run out, you can easily take a beating with limited options for recovery or recourse.
Attacking players with smaller hands of cards is also likely to yield better results, as a Petrified player will normally throw away their worst cards. The worst of 7 will usually be much less impressive than the worst of 1-3.
Nitrel the Sapper (Found in The Red Dragon Inn: Allies – Keet and Nitrel)
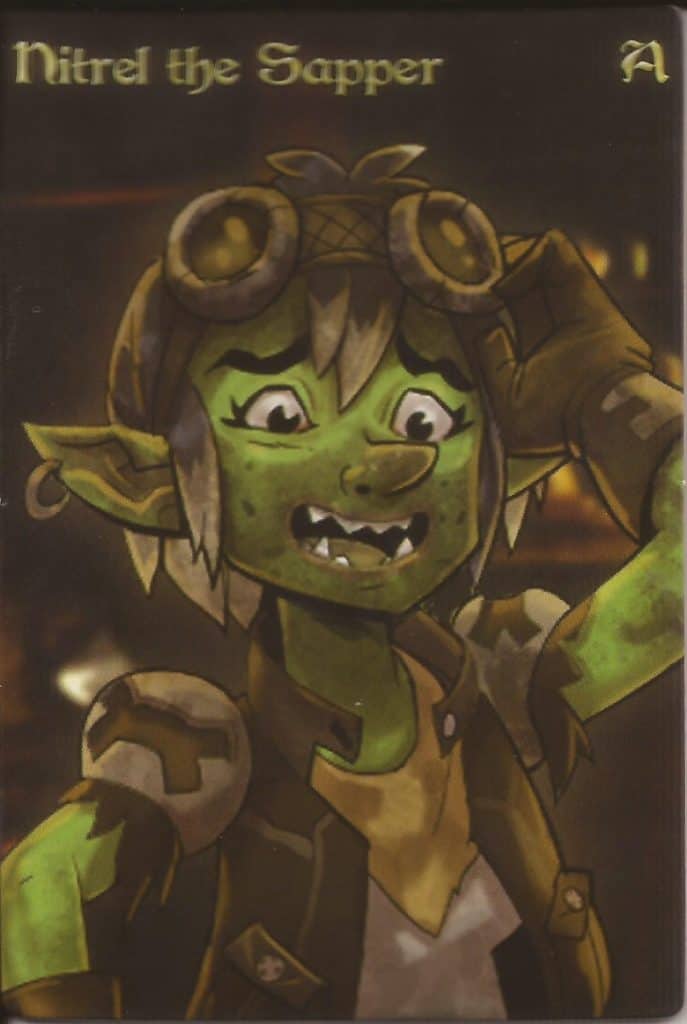
Boy, does this gal bring on flashbangs…er…flashbacks. Phil’s favorite Red Dragon Inn character can be an absolute menace due to her astounding array of explosives, represented by an 18 card Bomb Deck. While you may receive one of these through one of Nitrel’s Action cards, you’re about as likely to see them in gambling pots, in response to attacking Nitrel, as a substitute for gold payments, in or around various drinks, you get the idea.
These bombs do an excellent job of supplementing Nitrel’s mediocre Character Deck offense, often putting her on par with an A-Tier deck. The tradeoff for this impressive amount of power comes in the form of occasional duds as well as the chance that Nitrel is going to take some damage from either taking an occasional Bomb herself or having part of a Bomb’s effect sent her way.
Newer players will often find this style of gameplay a little overwhelming to deal with, particularly after the 3rd or 4th round of gambling that results in an explosion, but Nitrel is actually a bit of a glass cannon, lacking exceptional qualities in terms of gambling or defense.
Sure, you’ll still have the usual suspects to deal with, as well as a little bit of drink tampering and healing mixed in, but if you throw a punch Nitrel’s way, it’s going to land more often than not. And it isn’t going to be hard to convince the table that punches need to be thrown Nitrel’s way after a couple turns.
Petra the Devious (Found in The Red Dragon Inn 9: The Undercity)
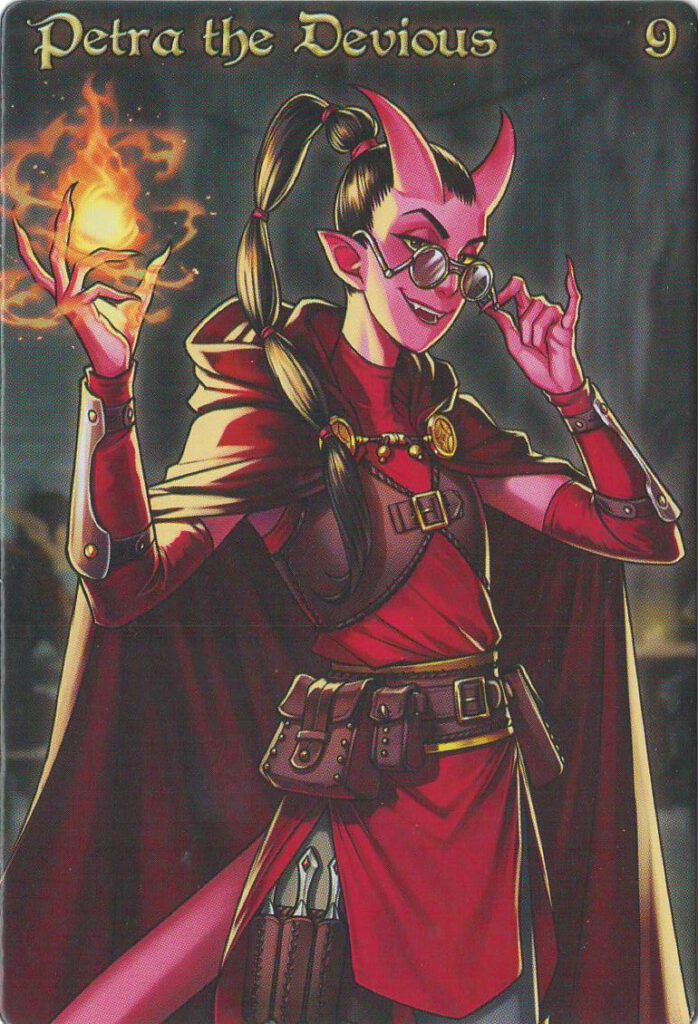
Petra’s deck is very unique, in that it rewards longer-term planning in ways we haven’t see from a Red Dragon Inn character to date. Her primary mechanics involve plotting cards from your hand (placing them face down and protecting them from potential discard effects and other interactions) and Hellfire, which is effectively an extra Action that deals 2 Fortitude damage for every 4 points you gain.
Plotting cards is pretty simple – after your Discard and Draw phase, you may pick a card in your hand to Plot. You may look at this card anytime, and if it’s one of the 12 in your deck with a purple card symbol in the text box, you may play it and receive its alternate effect!
Sometimes, you can also plot extra cards through the effects of cards that permit it, so you can hide a few nasty surprises in a pinch, or simply get rid of dead cards you’d discard anyway to fuel your Hellfire.
Before you Discard and Draw on your turn, any Plotted cards are discarded, and you gain 1 Hellfire for each. Managing your Hellfire is very important, as some cards either scale off it or require you to have a certain amount to gain additional benefits.
Then, when the time is right, you can play cards that give you extra Hellfire and push some extra damage onto an unsuspecting opponent! Petra’s also a good gambler, but her defense is poor unless it is being fueled by a plot or Hellfire, so she’s a pretty easy target when her shields are down.
Or maybe that’s just what she wants you to think.
Piper, Eagle-Eyed Sniper (Found in The Red Dragon Inn: Allies – Piper vs. Ripsnarl)
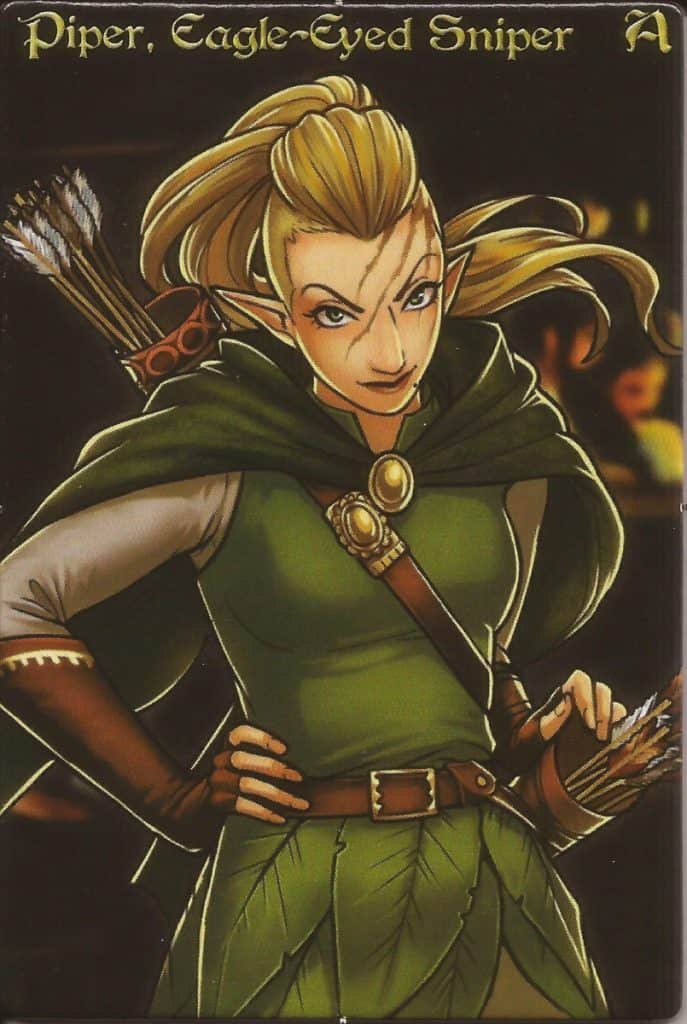
Piper’s deck is pretty average, with a focus on gold and the honest side of gambling. She has multiple cards for stopping cheaters and picking her moments to clean out the table’s coffers, and a reasonable arsenal of cards in her Character Deck for defending herself and dealing average damage. Ordinarily, this would drop her in C-Tier, but she’s going to have 2 or 3 turns that can dramatically alter the course of the game, courtesy of her Quiver.
During the Discard and Draw phase of Piper’s turn, the first card she draws will be an Arrow card from her Quiver. Most of these will be Actions, though 3 are Sometimes cards, and they are treated like regular cards for the purpose of hand limitations. If the Action you play for your turn is an Arrow, you may play any number of Arrow Actions during that phase of your turn.
Naturally, playing 3-5 Actions, even if they’re mediocre, is extremely powerful, but there are a few other things you can do to ensure you’re setting yourself up for success:
- Try to wait on firing your Arrows until you have at least 1 in your hand that lets you draw an Arrow. This lets you get some extra mileage out of your explosive turns and ensures they have the highest possible impact on the game.
- Keep an eye out for the Character Deck cards “Quick draw holster” and “So that’s what was rattling around in my quiver!”, as these will allow you to quickly snag a couple extra arrows to fill out your rapid-fire barrage.
- The Character Deck card “Yes, they are razor sharp!” is an excellent tool for reusing arrows that let you draw cards, which can often let you reset an Arrow barrage more quickly. Once your Quiver is empty, you don’t get to draw new Arrows during your turns, so this is also a good card for gaining access to the right Arrow for a targeted attack on a player’s fortitude/gold or a stronger defense for yourself if the game goes long.
On average, I personally try to wait until I have access to 4 Arrows plus a card that draws an extra, but this can be very taxing on your hand, so if you have to fire a smaller barrage of 3 to keep cards flowing, do not hesitate to do so.
You’re also going to burn some bridges with other players at the table after larger barrages with relatively meager means of defending yourself, so be prepared for either some significant blowback or for your heroic attack to be a last hurrah to stick it to someone else on your way out the door.
Serena the Pious (Found in The Red Dragon Inn 3)
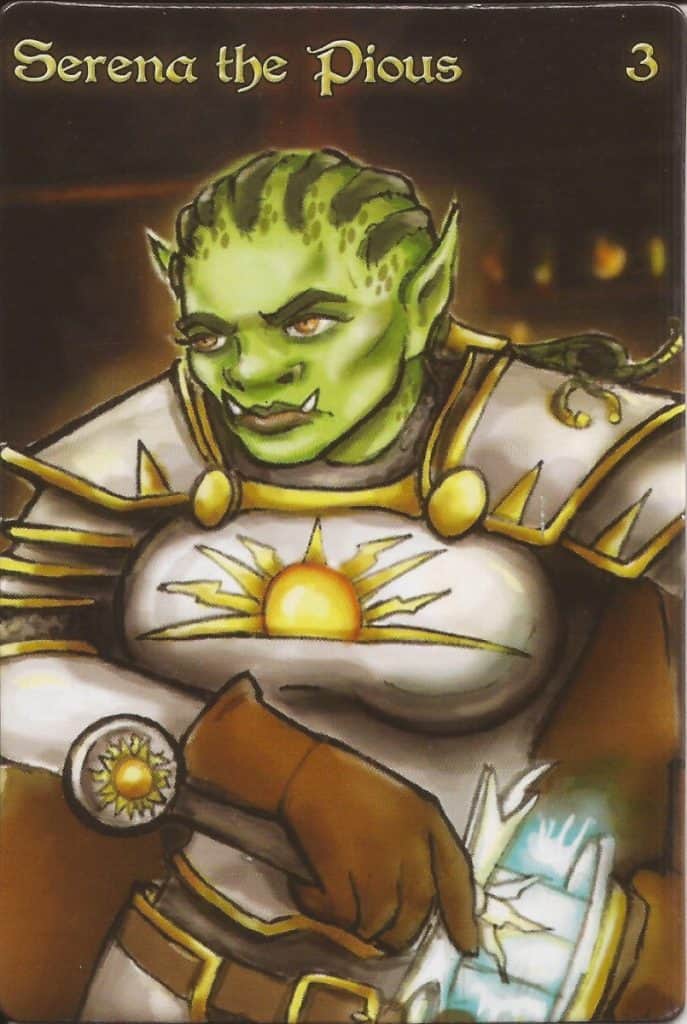
Whatever you do, don’t play this deck blind. Serena’s Character Deck is designed with 2 very distinct strategies in mind that reward min-maxing, and if you try to play to both of them or figure it out as you go, you’ll almost certainly end up with a C-Tier strategy.
Both of Serena’s strategies are tied to her Piety – a number that falls on a scale between 1 and 8, and can never go below or above those numbers, respectively.
Once you determine your strategy, I encourage aggressive use of your Discard and Draw phase to maximize your chances of finding the cards you need. You’ll also want to pay close attention to the lower right corner of Serena’s cards – these will often have one or more arrows pointing up or down, and will impact your Piety accordingly after your card’s other effects have resolved.
A few are also noted with an “X”, which means the card has a variable effect on Piety instead.
Serena’s Piety starts at 8, so if you’re planning to keep it at or near that level, you’re playing a very defensive game. Actions that directly attack other players will be extremely weak, Sometimes cards that react to other players or Drinks will be strong, you’ll have access to some top-notch healing, and you will generally want to minimize your involvement in any Gambling.
Periodically bouncing between 7 and 8 Piety is ideal to help shore up potential gold shortages, but you’ll never want to go below 6 Piety if it can be helped.
If you’re aiming to hover around 1 Piety, you’re aiming for a hell on wheels offense that will take advantage of Serena’s slightly above average gambling to help you get there, and then trying to find the 5 Actions that deal up to a whopping 4 fortitude damage each as consistently as possible.
Naturally, your healing and defense get sacrificed to do this, and if you use cards that will drop your Piety below 1, you’ll have to atone by giving up a Gold or taking a point of fortitude damage each time, so keep that in mind if you have a lot of cards with downward arrows.
As with the defensive strategy, bouncing between 1 and 2 Piety is ideal, but you should be striving never to go above 3 in those cases where you can’t. It will also take either 2-3 rounds of back and forth gambling and/or a little goldmongering over a few turns to get to a low Piety score, so do your best to either bait out gambling cards or aggressively dig for cards that let you take gold from other players/the Inn if you want to go this route.
The extra work is worth it though – consistently swinging for 4 is on par with the nastiest A-Tier decks, and will quickly put away a lot of opponents.
Tara the Navigator (Found in The Red Dragon Inn 4)
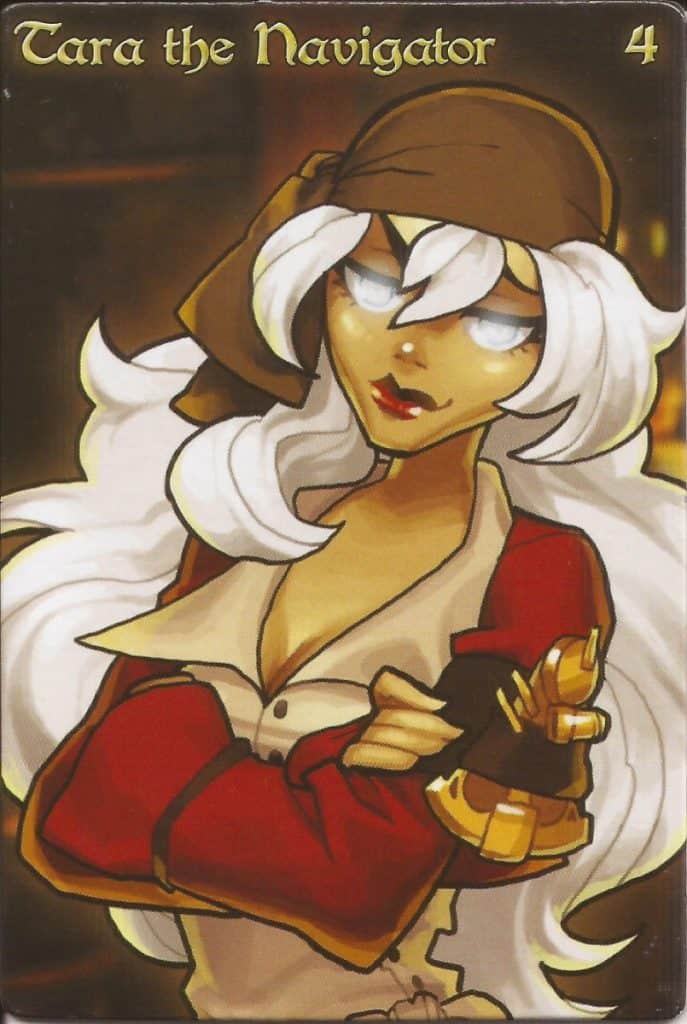
You wouldn’t expect a blind seer to be an excellent gambler, but Tara is full of unlikely surprises. Her offense is divided to impact both fortitude and alcohol content, and while her fortitude attacks range between awful and above average, her ability to dole out drinks is excellent.
Sure, you could settle for adding to someone’s alcohol content with an action, but when you can have them drink the top card of the Drink Deck, receive extra drinks from the Drink Deck that Tara gets to see first, or take a drink you’d have been stuck with instead, the futures of your opponents are going to look bleak.
Tara also has access to a couple good healing cards in her deck that will aid her fortitude or alcohol totals by 2 points, and an especially nasty Sometimes card that puts her in a 1 on 1 match with the winner of a round of Gambling to try and steal the pot after they win the initial round.
Mix in some defense cards and a couple extra ways to acquire extra gold, and you’ll find that you’ve got a little something to stay a step ahead of many Characters.
The Magnificent Adonis, Bard of the Ages (Found in The Red Dragon Inn: Allies – Adonis vs. The Lich King)
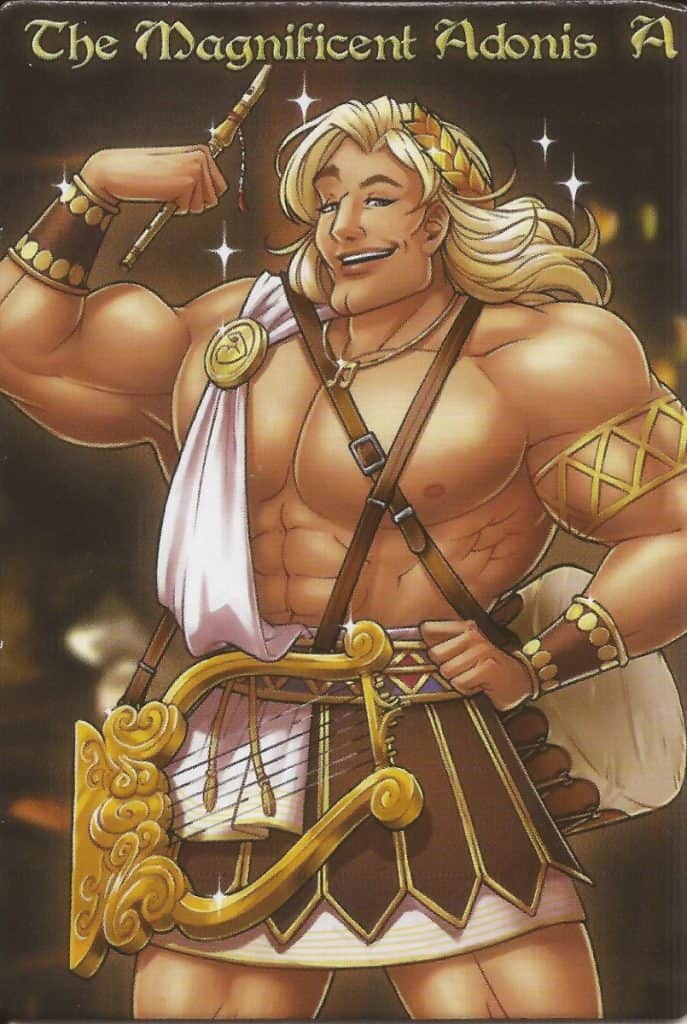
There’s a lot to like about Adonis (not to be confused with Shane’s troublemaking bard of the same name). He has the capability to hit like an absolute freight train, with several cards that deal 3 or 4 fortitude damage a swing, a couple that can hit everyone for 2, a card that raises his hand limit by up to 3 for a turn, and a standard suite of defense and gambling cards. There’s a catch for this brawny bard-barian, however, and it lies in his instruments.
In order to get access to his best card abilities, you have to smash 1 of the 3 instruments Adonis brings with him. If you get access to both the cards that allow Adonis to replace an instrument in a timely and/or regular fashion, you’ll probably be able to hang out with the A-Tier decks. If not, you’ll fall as far as D-Tier at times.
Why, you ask?
Because in addition to his SMASH cards being relatively weak without an instrument, Adonis also has cards that care about whether you have an unbroken version of specific instruments, and while they’re not anything special when you get these perks, they’re often atrocious without.
Generally speaking, this dependency lends itself to the strategy of being extremely aggressive during your Discard and Draw phases to do well with Adonis – keeping his instruments accessible plays such a huge role in his power level, so you’ll want to dig through his deck as quickly as possible to access the 2 copies of “I always keep a few replacements handy!”.
Failing this, you can also keep a low profile very easily with this deck, and pick key moments to really lay on the hurt for problematic opponents.
The Wench (Found in The Red Dragon Inn 7: The Tavern Crew)
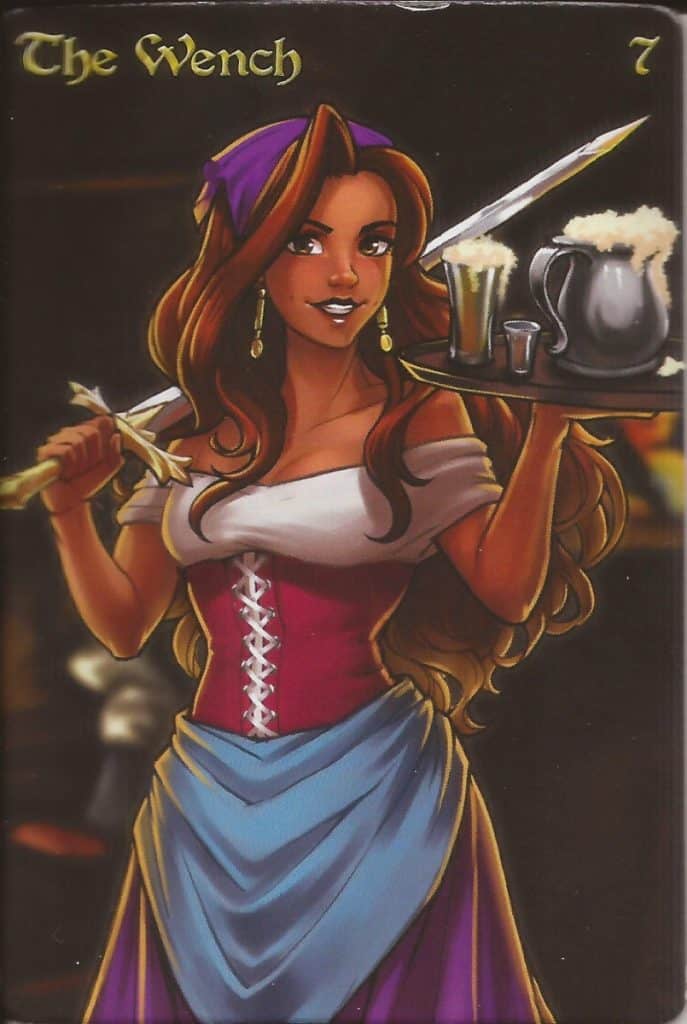
It took over a decade, but The Wench arrived on the scene in 2018 with a deck that revolves around drinks – including a Special Reserve Deck that has some truly spectacular concoctions. Many of her unique cards contain references to staples of character decks from expansions past, and she also packs both a standard gambling arsenal and solid defense that will keep coin coming in and booze flowing out.
While these traits make her Character Deck pretty strong, the Special Reserve Deck has a little too much hospitality mixed in for The Wench to really get above B-Tier. While you could hand out Dragon Breath Ale with a Chaser, you could just as easily hand out Greater Holy Water with a Chaser, a slew of Elixirs that offer benefits to your opponents after they’ve been consumed, or even a Drink Event that impacts everybody (though The Wench does have cards to duck this particular issue).
None of these often double-edged cocktails will stop you from having a ton of fun throughout a game, but I’ve seen the Special Reserve Deck backfire in spectacular fashion at critical moments, so you should be prepared for that possibility before you start taking drink orders.
Warthorn Redbeard (Found in The Red Dragon Inn 7: The Tavern Crew)
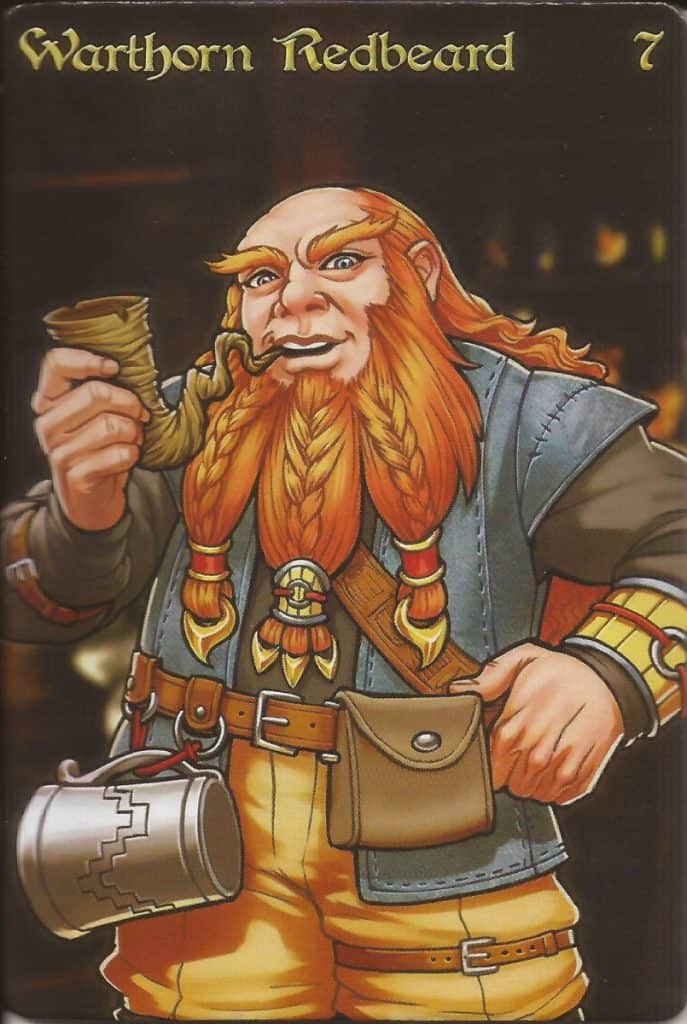
Credit where’s it’s due – the power level of RDI 7 is pretty consistent for all its inclusions. Warthorn Redbeard is the proprietor of The Red Dragon Inn, and easily my personal favorite to play anytime this game hits the table.
His focus on fortitude loss is fairly average, as is his gambling (though he has a few cards that are excellent for upending cheaters and Winning Hands), but he’s got some excellent defense cards, including the ability to look at his drinks and give away the most potent ones among them.
What really pushes Warthorn to B-Tier though are his story cards. Any card with a pipe on it has you draw a card from his Story Deck, regale the table, then add its effects to the card you played.
This often turns average offense into something well above average, but if your opponent has a card to ignore/negate your original card, your story gets dumpstered too.
While this can be a bit of a bummer and will make you the target of a lot of “I don’t Think So” cards, there’s always time for another tale if the last one gets cut short, and you’ll often be the life of the party until The Wench guides you to the other room to sleep it off.
Wizgille the Tinkerer (Found in The Red Dragon Inn 3)
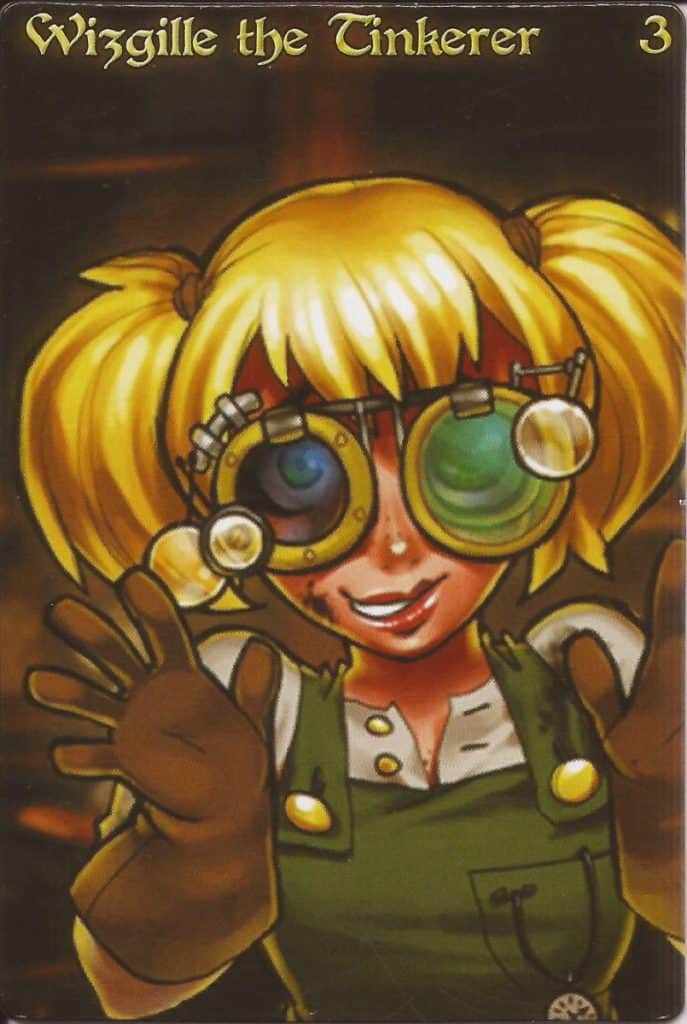
Wow, Wizgille is a lot to take in. While much of her deck is average, she is an excellent gambler made for gamblers who love to take risks outside the use of gambling cards. This is done through use of Wizgille’s 18 card Gear Deck – just play a card that has little gears in the corners, flip the top card, and see what effects are added to your invention…er, card.
Good scenarios including boosting numeric effects by up to 2 or dealing extra damage, sometimes your invention works as intended, other times it works but harms you, still others don’t work, but have another useful effect, and occasionally your invention will simply be a dud.
As should be no surprise, this wide array of effects will result in Wizgille’s power level fluctuating wildly throughout the course of a game. Sometimes she will pull off effects more powerful than most A-Tier decks, others she may effectively skip her turn, and often she’ll fall somewhere in between.
Your fate isn’t entirely entrusted to the winds of chaos, however – some of Wizgille’s unique cards are actually very powerful and a couple, including an action that heals you for 3 and lets you play another action and a Sometimes card that will help you skip over a bad Gear, aren’t tied to her gears.
Overall, you’ll usually end up on the better side of average, so it’s definitely worth leaning into Wizgille’s antics, but an extra 4 -leaf clover or a rabbit’s foot (not Pooky’s!) might go a long way toward helping your cause.
Zariah the Summoner (Found in The Red Dragon Inn: Aliies – Zariah the Summoner)
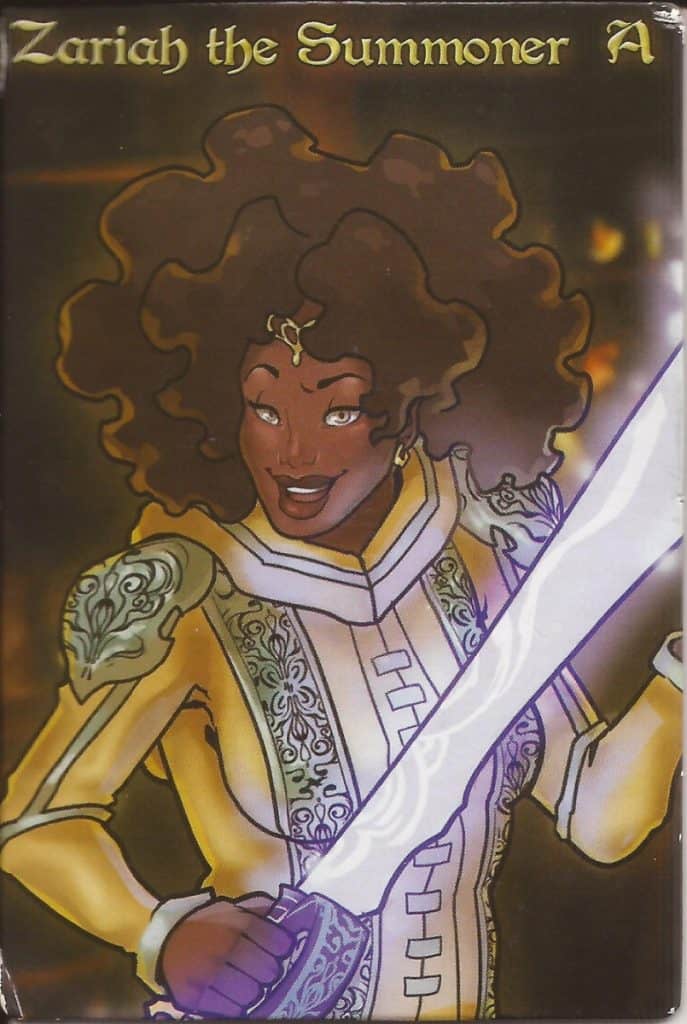
If you mess with Zariah, you’re messing with her summoned friends as well. Scrappy the Lion, Bandit the Ferret, and Amber the Alemental can be found on a wide selection of Zariah’s cards, allowing you to place their summon counter on a mysterious face-down card if it isn’t already out. Collect all 3, and the face-down card reveals that they’ve become the mighty Chimera, a creature who can either deal 3 fortitude damage to a player as an Action or dispelled to make an average card become extraordinary.
Each summon has 5 cards that can summon it in Zariah’s deck, and the group has 6 available wildcards that let you play a token of your choice, so if you’re willing to be a bit aggressive when discarding and drawing, you should have virtually no trouble creating the Chimera several times in a game. Cards that have a Chimera ability have a variety of different effects, making Zariah pretty strategically flexible, especially when you consider that she’s also an excellent gambler to boot.
The primary hurdle you’ll face throughout the game is that when you aren’t using the Chimera, Zariah’s deck is pretty average in terms of offense and defense, which while not inherently backbreaking, means that you won’t always be as consistently powerful as other decks in this tier.
I’d honestly be a little concerned if this wasn’t the case though – the Chimera can attack you in a variety of different ways, so being good at everything plus being able to exploit weaknesses would make her incredibly strong even in A-Tier.
C-Tier Red Dragon Inn Characters
C-Tier characters are relatively average. They usually have a discernable strength, but it is often offset by a weakness in another area. Actions deal an average of 2 damage, and deck composition either has nothing particularly special to highlight, or can have a potent strength that is poorly executed or difficult to understand.
Average does not mean bad though – you’ll still enjoy playing the majority of these characters and can still put in a good showing or win with them if you play your cards right.
Beastsergeant Ygella (Found in The Red Dragon Inn 9: The Undercity)
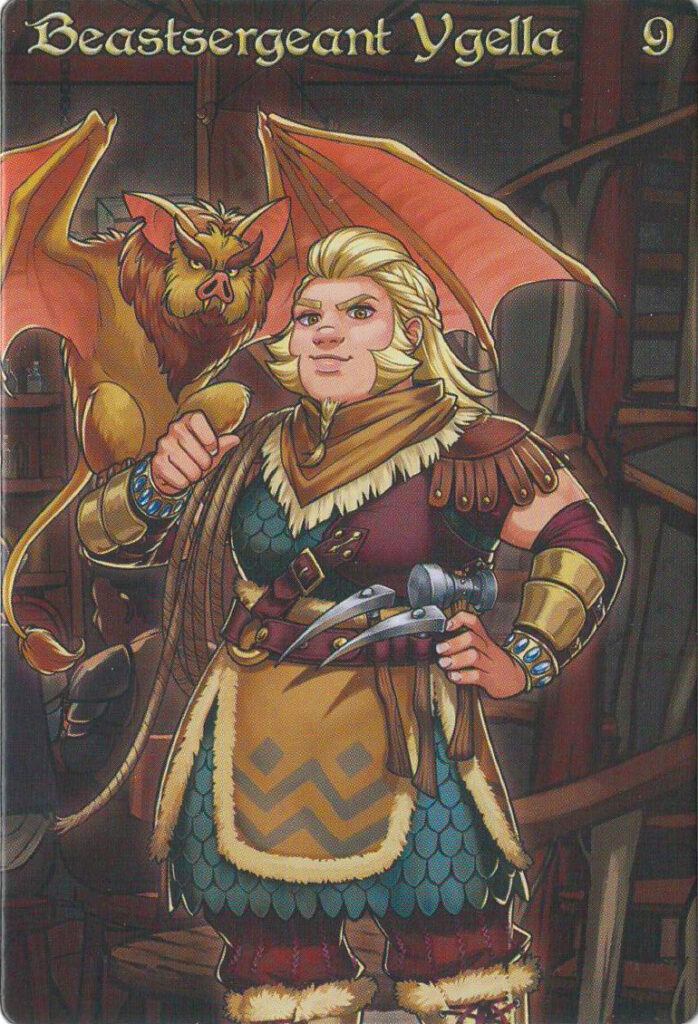
Beastsergeant Ygella is very reminiscent of Bryn the Boatswain from Red Dragon Inn 4. Pretty average damage and gambling, the uncommon ability to evade events, and a fairly strong focus on defense. You get a taste of the law and order style of cards that punish cheating by handing victory to you in gambling, and a little extra card synergy via Pet cards.
Pets are a special subtype stapled onto many of Ygella’s cards and have a few cards that interact specifically with them, including the ability to recur cards from your discard pile, take extra actions, and find them from the top of your deck.
While this sounds good on paper, in execution this design honestly feels like an afterthought. Even with aggressive discarding and drawing, there just isn’t enough support in Ygella’s deck to make the Pet synergies remotely consistent, so while this will be among the better C-tier decks, there’s no escaping the fact that this is an average deck.
This theory is reinforced by the fact that this deck has a mere two paragraphs of rules – the next smallest character rules section in the RDI 9 rulebook takes up twice the space, with the others exceeding that handily.
Bryn the Boatswain (Found in The Red Dragon Inn 4)
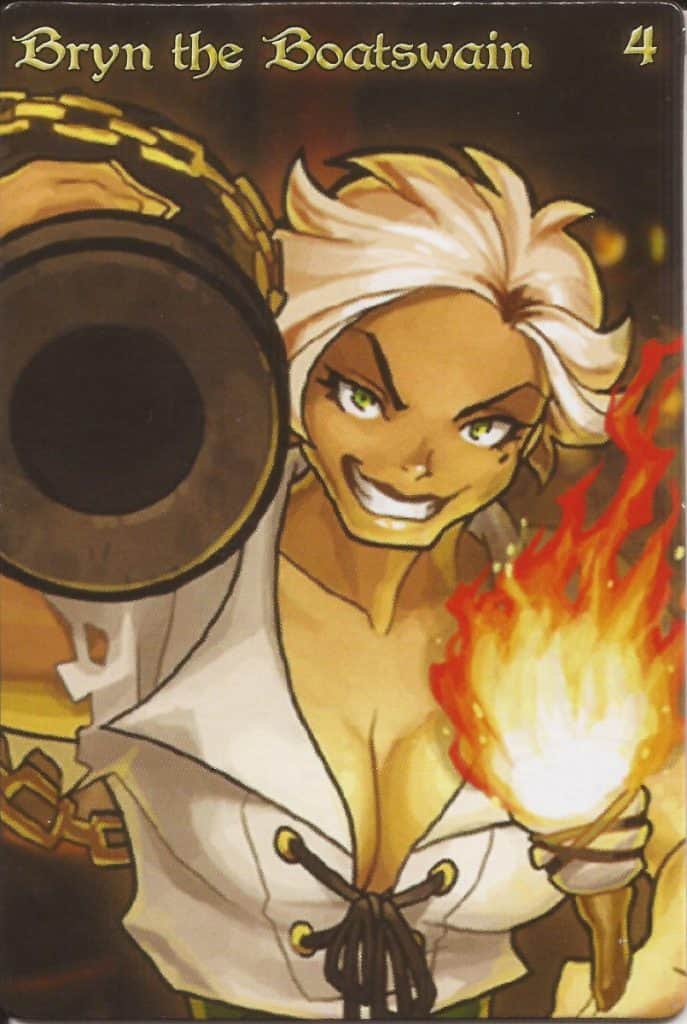
Bryn is going to be toward the top end of what you’ll get out of a C-Tier deck. She has a card that can deal 3 fortitude damage, a number of useful defense cards that can do helpful things like ignore an Event (which is pretty rare), reduce her alcohol track by 2, and even pick up a little extra gold in addition to the standard suite of defense and gambling cards you’ll find with most characters.
She also has Action cards that deal 2 damage (the average) or 1 damage (abysmal and basically a waste of an Action) to a single target.
The good cards definitely outweigh the bad here, but despite a focus on defense that includes cards that cover fortitude loss, drinks, and gold, her deck is going to struggle against anyone who hits harder than she does.
Gamblers, on the other hand, will find her infuriating – she can duck out of antes with ease, find gold pretty much anywhere she wants to, and sneak in the occasional gambling card to steal a round after the heavyweights have exhausted their hands.
Chronos the Time Mage (Found in Battle for Greyport)

Chronomancy is always a subject I’ve found fascinating, and coincidentally (I swear!), it also leads to some of the more interesting and powerful options in games like Smash Up.
Naturally, this means I tried Chronos pretty quickly after acquiring his deck, really wanting and expecting to like it. His unique cards reuse cards you’ve already used/discarded and repeat the phase of a turn, his actions tend to emphasize fortitude loss, and he has a reasonable mix of gambling and interaction.
Unfortunately, he isn’t really above average in any area of gameplay. Most of his damage output is in increments of 2, his gambling cards are standard fare, and even if you are lucky enough to reuse the best cards in his deck, they really aren’t anything especially spectacular.
The art cracks me up at least – watching young, adult, and elderly Chronos team up and make mischief on the card art is almost worth the price of admission on its own.
Deirdre the Priestess (Found in The Red Dragon Inn 1)
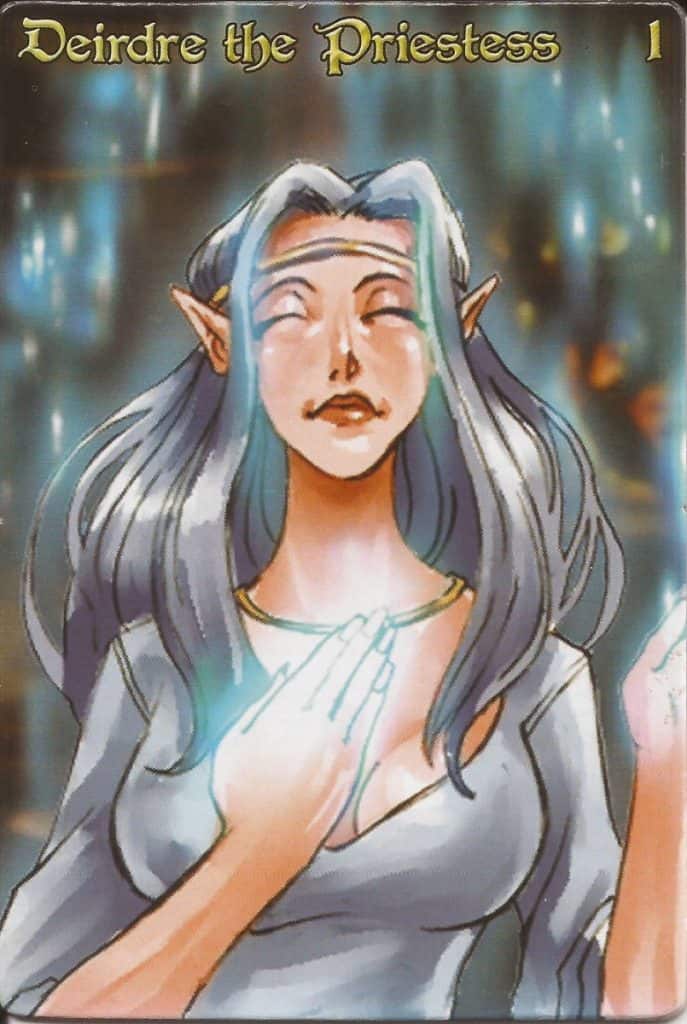
The original adventuring party from the first Red Dragon Inn game probably won’t win many toe to toe battles with most recent characters, but that shouldn’t stop you from taking them for a spin.
Deirdre’s deck is average or worse in terms of offense, average in terms of gambling, and average on defense, but she does have some excellent healing cards mixed in. A shame some of them also heal others.
Don’t get me wrong – the subjects of your healing will be paying you gold for your services, and if she were an above average gambler, that could push her to B-Tier. Unfortunately, she just doesn’t have the right blend of cards to reliably clean out everyone’s coffers, which means you’re trying to play a grindy attrition game with the gamblers and slow roll those focusing on offense with your healing.
On the bright side, that does mean you can help the gamblers bankrupt the bruisers and nudge their attention toward the better gambler(s), which is going to be your best route for coming out on top.
Erin the Ever-Changing (Found in The Red Dragon Inn: Allies – Erin the Ever-Changing)
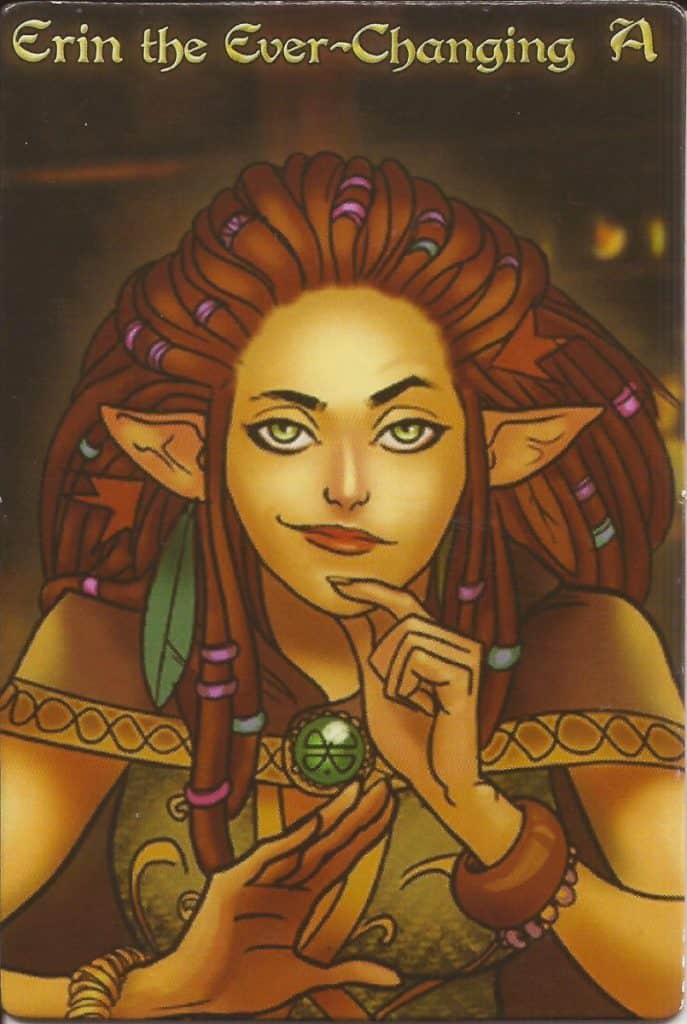
Erin is an elven druid who can transform into different forms, each with their own abilities:
- Elf: No effects
- Bear: Whenever another player would lose fortitude from a card you play, that loss is increased by 1. At the start of a round of gambling, ante 2 gold instead of 1.
- Raven: Whenever you add gold to your stash, gain an extra from the Inn. Whenever you ante gold in a round of gambling you started, pay with gold from the Inn instead. Whenever you would gain alcohol content, increase that gain by 1.
- Tree: If you turn into a tree on your turn, your turn ends immediately. If you would lose fortitude or gain alcohol content, reduce that loss or gain by 2. When you play a card, you must become an Elf immediately.
During your Discard and Draw phase, you may turn back into an Elf if you are a Bear or Raven, and must turn back into an Elf if you’re a Tree. I will also acknowledge that all of these abilities are quite good, and can give you some great flexibility in deciding how you want to attack players and defend yourself.
If you can access the form you need when you need it.
Erin has 4 cards that will turn her into a Bear, 5 to turn into a Raven, 2 to turn back into an Elf, 1 to become a Tree, and one card that lets you chose a form at any time.
On the whole, this means you’ll have plenty of access to cards that will transform you, but you’ll sometimes have to aggressively discard and draw to find the form you want. If that wasn’t bad enough, Erin’s offense is often below average when she isn’t a Bear, she isn’t a stellar gambler, and her base defense lineup is pretty average outside of her Tree form, which you will have very limited access to.
Simply put, when things are going well for Erin, they’re probably going great. Above average damage, skipping out on most gold payments, and picking up extra gold when gaining gold are all pretty sweet deals.
Getting double charged by gamblers or wrecked by drinks and Character Deck cards that influence alcohol content…not so much. This often leads to very swingy games where you’re either in control and blow it or are riding the razor’s edge to steal victory from the jaws of defeat. Either way, it’s going to be a wild ride.
Father Farai (Found in The Red Dragon Inn 8: Pub Crawl )
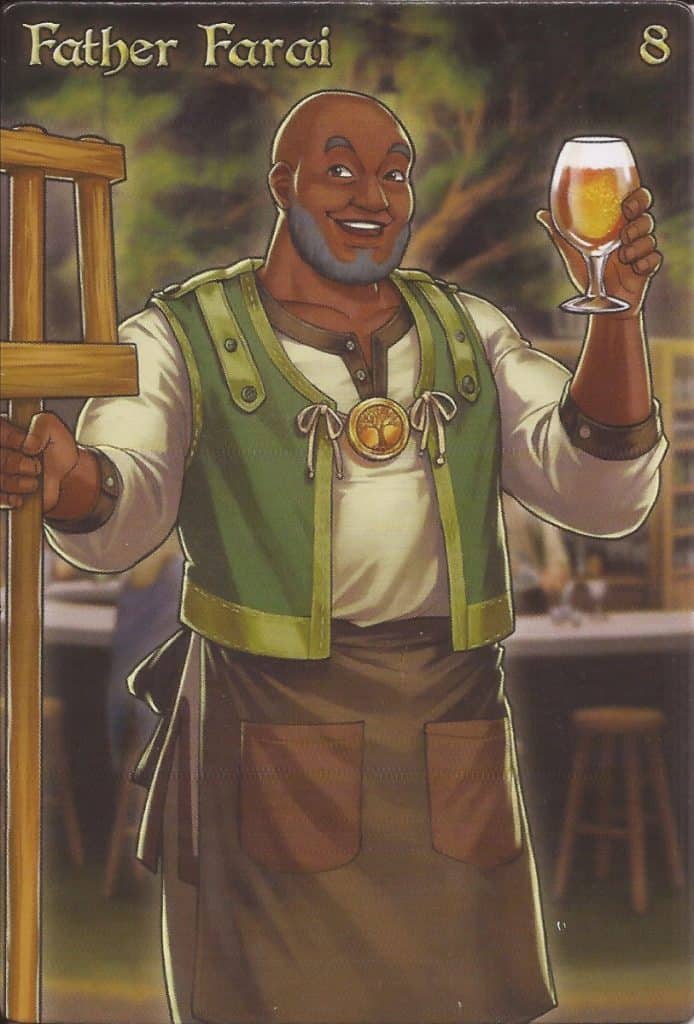
Father Farai’s character deck reminds me a bit of Roxana’s and Halden’s – you’re piloting an average to slightly below average deck that is trying to accumulate the right combination of cards to perform stronger moves through use of Farai’s Brews.
Your Brews are divided into Beer, Wine, and Spirits. Each deck has 4 brews that do not replenish, and you have a token next to the one you’re working on. When you play a card, you’ll be looking for a symbol in the lower left (all but 6 of his cards have these). The symbols correspond to Beer, Wine, Spirits, or a Mash Paddle.
If your card’s symbol matches the drink you’re working on, you add a Progress Token to the drink. If not, you move your token to the drink ir corresponds to, but do not progress it.
The Mash Paddle lets you do either. When a Brew if finished, you play it immediately (it is treated as an Action for interaction purposes), then you can move your token to whichever Brew Deck you want afterward.
Beers are easy to complete (2 Progress Tokens), Wines are a bit more difficult on average (2-3 Progress Tokens, and Spirits are the most difficult (3-4 Progress Tokens). Since you’ll be able to see all 3 of your options simultaneously, you have a fair bit of strategic flexibility, furthered by the fact that your offense can attack both Fortitude and Alcohol with ease.
While far less fragile than Halden when it comes to assembling these combos, Father Farai really doesn’t excel at anything, and while you’ll have a few solid turns as you complete some of the more taxing Brews, if the game runs long and you run out, your power drops off considerably.
Fiona the Volatile (Found in The Red Dragon Inn 1)
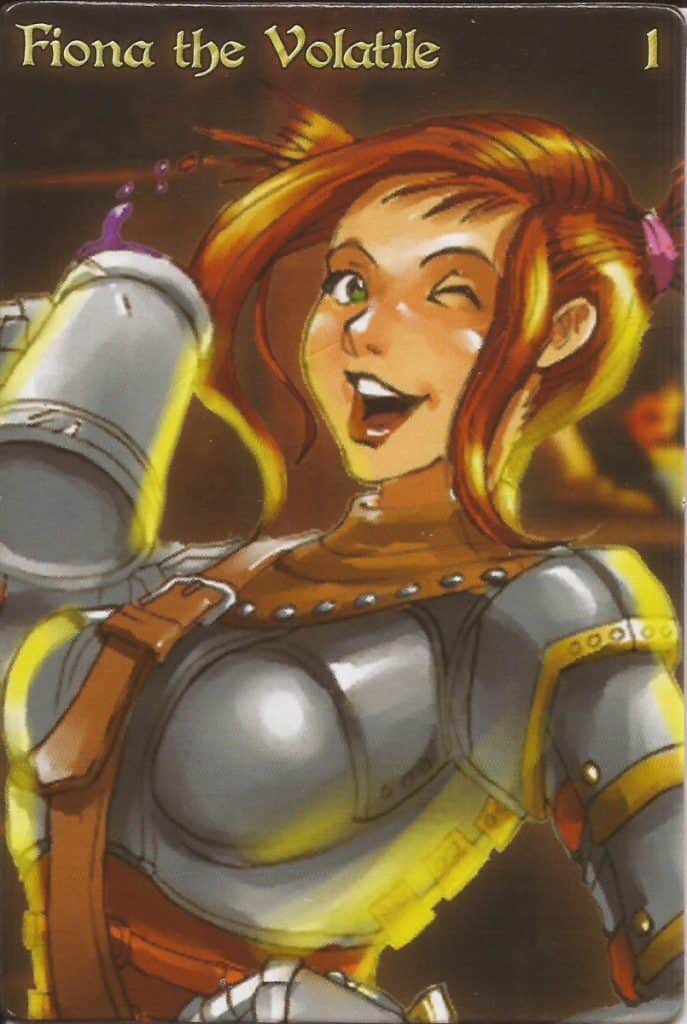
A character who focuses on fortitude loss, yet somehow has 3 Action cards that only deal a single point of damage. Ordinarily, I’d chuck Fiona in D-Tier and lament the potential lost by the fact she is one of the first RDI decks, but despite her deficiency in what is supposed to be a “strength,” her cards actually have more to offer than my initial gloomy prognosis suggests.
For starters, her defense cards are actually pretty good.
Yes, they’re narrowly focused, but getting to add a drink’s alcohol content to your fortitude instead is pretty sweet, and she can tank a lot of cards that target her fortitude before you put her in any kind of danger.
She’s also an average gambler, and has several cards for avoiding payments or acquiring gold outside of gambling, meaning her alleged “weakness” also isn’t as bad as advertised.
Overall, this makes Fiona solidly average – though her temper is legendary when it comes to chain mail bikini jokes.
Fun fact: This C-Tier Red Dragon Inn character is the Corrupt Overlord’s favorite from the first deck.
Flower (Found in The Red Dragon Inn: Allies – Spyke and Flower)
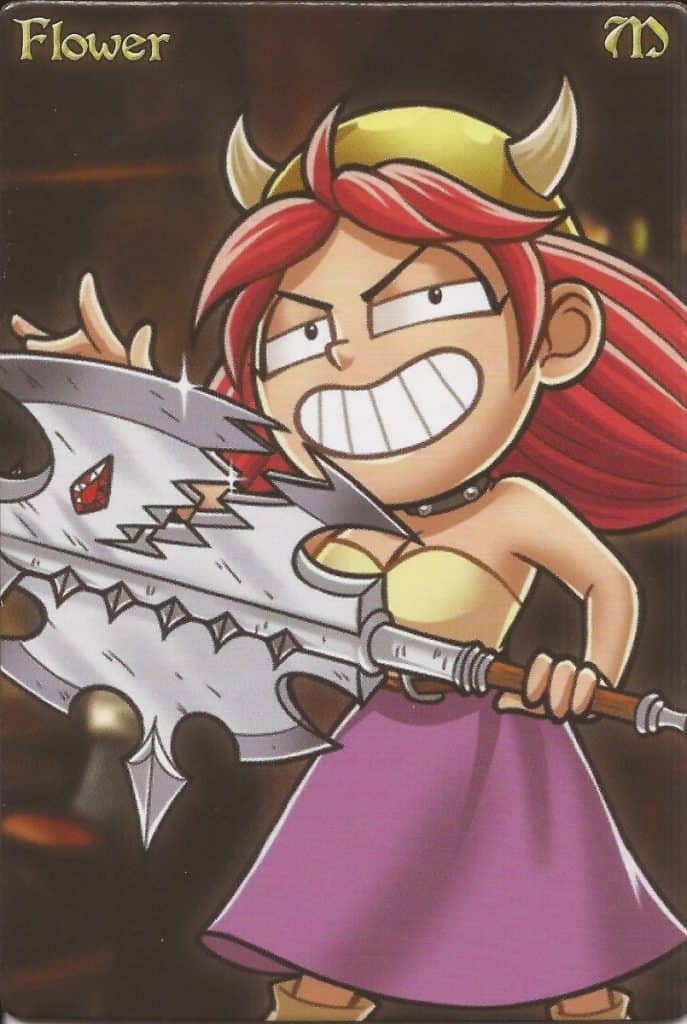
The Munchkin crossover decks were a delightful inclusion to Slugfest’s crazy crew of tavern patrons, and if you’ve played Munchkin, I think you’ll agree these decks are pretty true to form.
Flower’s deck focuses on accumulating gold through gambling, cheating, and use of other cards, as well as dealing damage to one or more people around her (though some of her cards are fairly subpar here). However, as I’m sure most Munchkin players have guessed, Flower’s cards can also improve based upon the level of the treasures she has equipped.
The floor for starting to gain access to her cards’ more powerful effects is level 3, which can usually by met with just 1-2 Treasures. While she does have a card that gets its best abilities at Level 10, if you can make it to Level 6, you’re almost at full power for the deck.
Don’t despair though – Flower’s Magic Missile Launcher or the Spudded Leather Armor and Boom Stick Treasures can help cover for her few higher level cards).
Unfortunately, she only has access to 4 cards in her Character Deck that can give her treasure, so the early part of your game is going to be spent aggressively discarding and drawing to get to that point.
Once you’re at a good level, you may also have to decide on whether or not to use the abilities of your treasures since doing so forces you to discard them, which often lowers your level.
I generally recommend getting Flower up to Level 6 or 7, then ignoring your Treasures and using your now above-average cards to either slug it out with the table or seize all their hard earned gold.
You may periodically have to gamble with the Treasure Deck after this point, but the less time you spend there, the fewer risks you take of drawing 1 of the 2 curses that forces you to discard Treasures. Each of these can set your power level back significantly, and generally aren’t worth the risk at this point.
If you (or Spyke) were unlucky and drew these curses early, however, you can also feel free to continue aggressive Treasure acquisition for levels and extra card effects – there are a couple other curses that can deal you damage, but the potential gains are usually well worth a couple of extra lumps.
Jett the Courier (Found in The Red Dragon Inn 9: The Undercity)
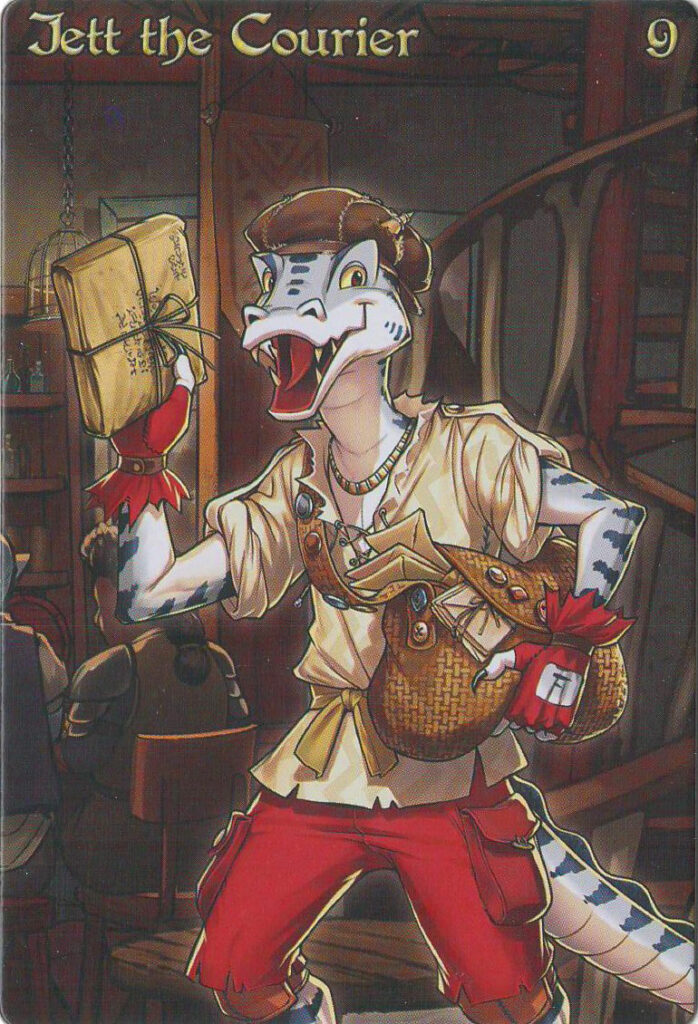
If Beastmaster Ygella’s deck underutilized her signature deck mechanic, Jett’s overutilizes its Momentum in the worst possible ways.
Momentum is tracked on a separate card and ranges from 0-3. At the start of each of your turns, before you Discard and Draw, you gain a Momentum. If a card that would have you gain or lose Momentum is negated, that gain or loss is also negated. If you have to spend it, that cost is paid up front and not refunded if your card is negated.
Makes sense so far.
Many of the cards in Jett’s deck also allow you to gain a little extra Momentum, and some of the other cards support that by having their effects scale based on your current momentum.
So why do several of the cards included in most decks have momentum loss stapled to them?
Cards that reduce Fortitude loss by 2, ignore things that affect your Fortitude, Alcohol, or Gold, or even deal 3 damage as an Action are really common – yet all of them strip you of your Momentum if they resolve. Was there some reason we couldn’t have more cards that allowed you to use Momentum as a kicker for an added bonus?
Not that I can see. Instead, you will often have cards pulling you in two different directions, and several cards virtually every other character gets to rely on are going to be hindrances more often than not for Jett. The deck seems reasonably strong if it can get going, but having a bunch of duds you’d only use as a last resort really holds this idea back.
Disappointing – I liked this idea quite a bit. At least he’s a decent gambler.
Ozrik the Adept (Found in The Red Dragon Inn: Allies – Ozrik the Adept)
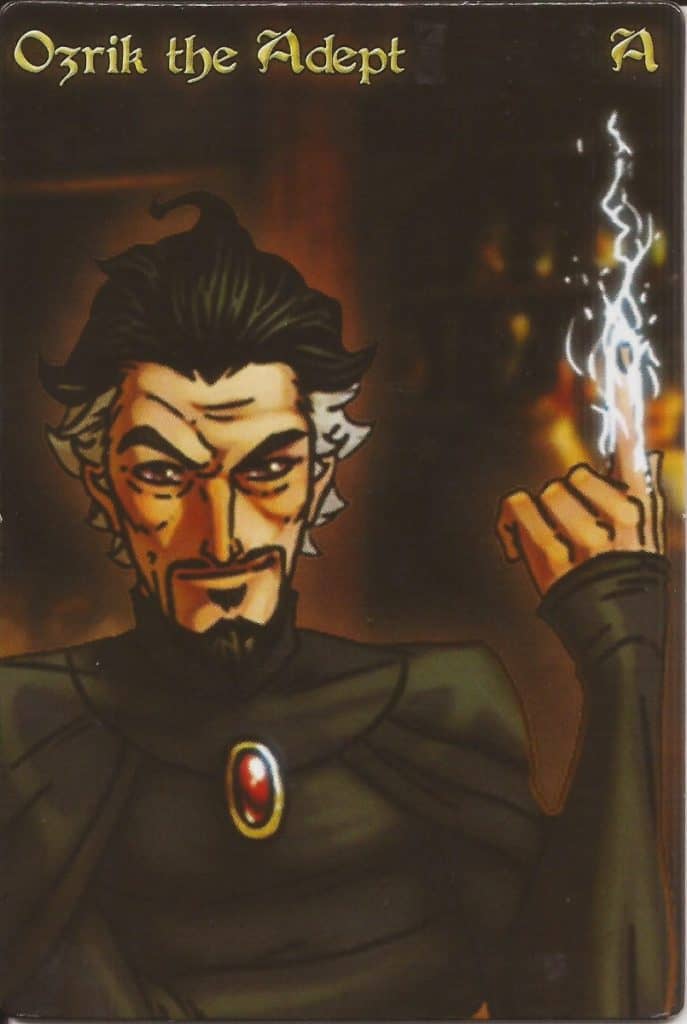
Ozrik’s deck is one of, if not the single most, complicated Character Decks to pilot in a game of The Red Dragon Inn, and I’ll preface my thoughts on him by stating that in the hands of a skilled player who can think multiple moves ahead, Ozrik is worthy of B-Tier status.
New or average players will have a fair bit of difficulty piloting Ozrik’s deck at first, and I speak from experience when I say you’ll have some tough games before you get the hang of this character’s playstyle.
At base value, Ozrik’s cards contain somewhat mediocre, but flexible offense, average defense, atrocious gambling options, and several relatively unique and useful card effects. Many of his cards can be boosted, sometimes dramatically, by sacrificing specific types of elemental cards in his hand.
Costs for upgrading a card’s effects are in the text box of the card being played, with each upgrade option available for use up to one time, denoted by symbols for earth, fire, water, or a wildcard that can be paid with any element.
If one of the cards in your hand has an element attached to it, it will have a symbol in the upper left hand corner and the card’s background will be colored to match it. Any elemental upgrades you wish to use must be paid as you initially play the card containing them, before your opponents get a chance to respond.
Ozrik’s deck contains 8 cards attuned to each of the elements of earth, fire, and water, making up 60% of his deck. This means acquiring elemental cards will be inherently easy. Getting the right combination of elements, on the other hand, is sometimes quite a bit harder.
This is frequently further complicated by your hand presenting a couple different powerful plays, but offering only enough resources for one and/or requiring you to sacrifice a useful card to make your chosen move.
Naturally, this means Ozrik’s card economy is often going to be bad at best and horrendous at worst. It also means that cards that ignore or negate effects are going to hurt a LOT if someone pulls an untimely counter card. If you’re able to read the table or leverage table politics, however, some of the things you can do as Ozrik can swing the game with power comparable to B-Tier or even A-Tier decks.
Additionally, many of Ozrik’s cards have multiple elemental upgrade options with vastly different effects, making his deck incredibly adaptable to a wide variety of gameplay scenarios. Some of these are inexpensive, only requiring a single element to utilize. I very strongly recommend limiting your elemental upgrades to these affordable options wherever possible to help preserve your hand as long as possible each round.
Many of the upgrades requiring 2 or more element cards just aren’t worth the price of admission anyway, as they’re blowing through approximately half of your maximum hand size. Save those flashy moves for finishing blows, and take the time to think ahead and sculpt your cards with what you need for those moments when they inevitably arrive.
Phyll Startusk (Found in The Red Dragon Inn 8: Pub Crawl)
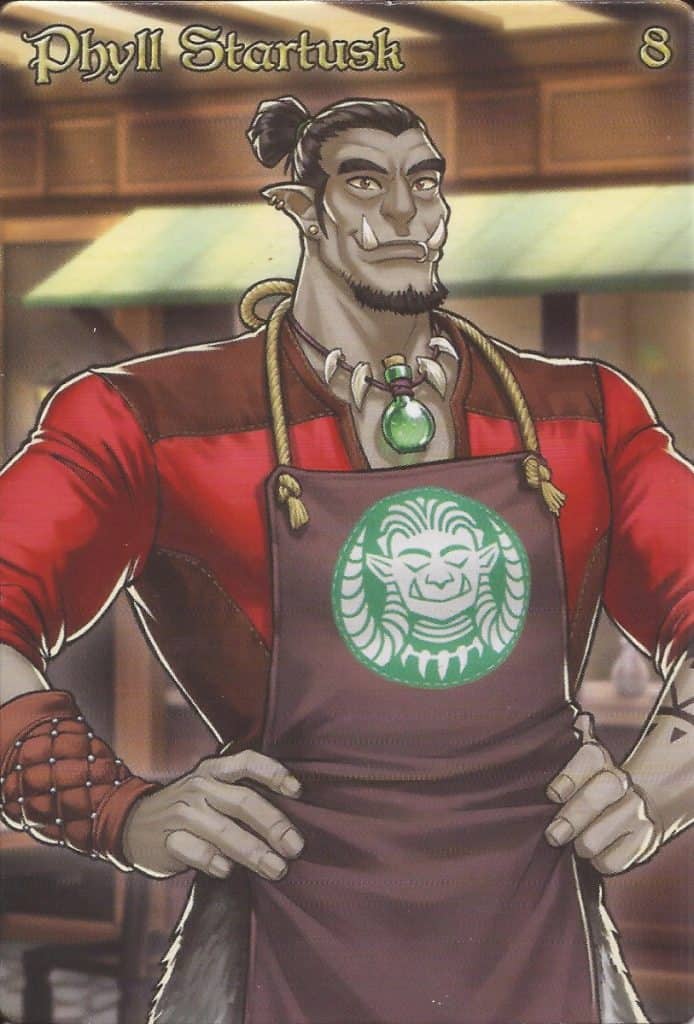
Phyll’s deck is decidedly average in most aspects, including offense, defense, and gambling, though there are multiple cards that offer a bit of healing, which is always appreciated. His deck’s gimmick is interesting, however, as it includes 7 “Mix-ins”, any 1 of which can be added to a drink. It’s rare for a mechanic like this not to be its own deck, but I’m not convinced this execution is a good thing.
When you draw a Mix-in, it goes on your Mix-in shelf immediately, which will cut down on your other available hand cards for that turn.
Mix-ins do not count against your maximum hand size, and there’s no limit to how many go on the shelf, so if you are aggressive about drawing and discarding, eventually, you’ll find yourself with access to a lot of cards.
Unfortunately, in a vacuum, their effects aren’t terribly strong unless you’re attacking someone’s gold total, as many of Phyll’s mix-ins require the drinker to pay him. This means that your early hands are going to be weaker than average in many cases.
You do also have the ability to retrieve Mix-ins from your discard pile and your deck, but the former is the one that will prove most useful, as it allows you to reuse effects that force players to pay you, allow you to play extra Action cards, sneak in a little extra booze, or protect yourself from your own drinks.
This means that aggressive discarding and drawing can be very helpful in the early game for filling your shelf, but you must be mindful of when you allow your discard pile to be reshuffled into your Character Deck so you can both maintain full access to your Mix-ins and minimize your odds of drawing them on a second run through your deck.
Pooky the Vicious (Found in The Red Dragon Inn: Allies – Pooky)
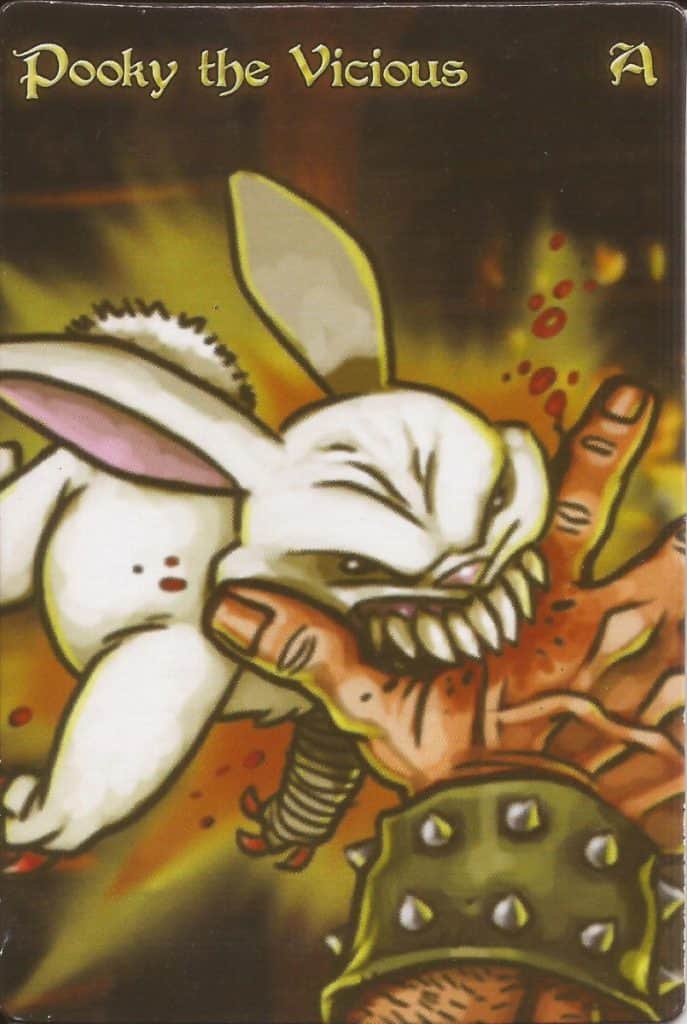
I cannot begin to tell you how excited I was to play Pooky for the first time. Zot was one of my favorite early characters, and I was expecting ample opportunities for mischief and drunken rampages that would take the table by storm.
Well, at least the art on the cards lived up to the hype.
The strength of Pooky’s cards is often dictated by how bad a mood this rabbit-thing is in (Calm, Manic, Crazy, or Psychotic). Pooky’s mood starts at Calm and worsens under any of the following conditions:
- A card from another player’s hand makes him lose fortitude
- He gains 3 or more alcohol from a single drink (note that a drink with chasers is 1 drink)
- He plays in a round of gambling but doesn’t win
- A card effect is used that specifically worsens Pooky’s mood
Many of Pooky’s Character Deck cards scale in 2 distinct ways:
- They have different effects based on his exact mood
- They have additional effects only if Pooky is Psychotic
If Pooky’s mood isn’t at least Crazy, the cards that scale based on specific moods are average at best, which does not pair well with an already mediocre offense scattered across Pooky’s Actions. Fortunately Pooky has an excellent array of healing cards and is an above average gambler, so the idea of playing a more defensive game with Pooky is pretty viable.
Regrettably, this also means you’re going to be waiting a long time for your shot at playing Pooky’s best offensive cards. While this would normally make Pooky an excellent character for closing out games, 7 of Pooky’s cards, including 1 defense card, 2 healing cards, and 4 of the scaling offense cards, set Pooky’s mood back to Calm.
Meanwhile, a meager 3 cards worsen Pooky’s mood by a stage, and they’re tied to 2 awful Actions and a Gambling card that gives an opponent the choice of taking that effect.
There are just so many contradictions between Pooky’s cards and unique mechanics that the deck just doesn’t ever feel like it can excel. In a way, this sort of reminds me of Xanathar from the Lords of Waterdeep board game; both characters primarily draw strength from taking on negative effects, yet neither really executes this strategy all that well.
Granted, you don’t have to look much further than your neighbors at the table to find trouble in The Red Dragon Inn, but it is also sometimes comically easy to work around Pooky’s psychotic tendencies.
The one bright side of this chaos is that you’ll always have ways to put opponents in a variety of lose-lose situations, but the consequences just don’t have the bite to make them more than inconvenient most of the time.
Roxana, Adventurous Chef (Found in The Smorgasbox)
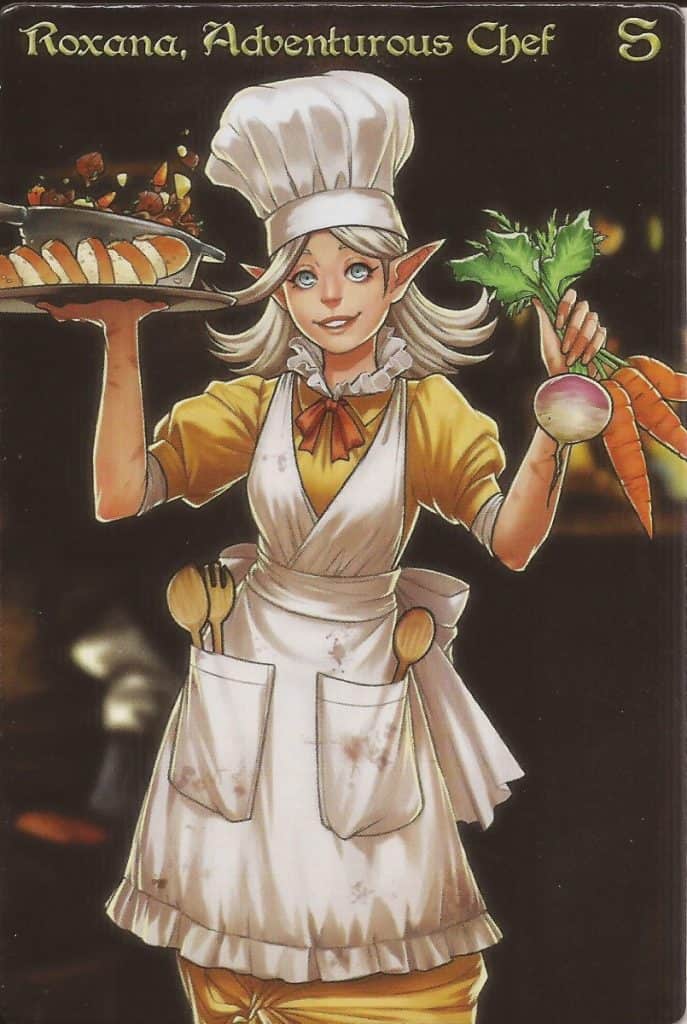
Hope you like to gamble, because Roxana’s deck is loaded with gambling and cheating cards galore. She also has a pretty solid complement of defensive cards (including a couple that let you ignore events!), though conversely, not much to work with in terms of offense – at least at first.
Through the use of her recipes, Roxana can buy more powerful cards from her Recipe Deck throughout the course of the game. Purchasing these requires you to spend cards you’ve already played or discarded to her Cutting Board that have the appropriate ingredient symbols in the lower left corner of her Character Deck’s cards.
Once purchased, these recipes basically become part of your Character Deck for the rest of the game, so they can shore up your built-in deficiencies over time.
If you find yourself with a hefty stockpile of ingredients, you can also just spend three of them from your Cutting Board to draw a card from your Character Deck. This gives you the option to go all-in on gambling by just drawing the cards you have, which can net you a fair few extra cards compared to other gamblers over the course of the game.
Unfortunately, if you really need access to your recipes and just can’t get the right ingredients at the right times, you’re going to be at a severe disadvantage in many matchups. Yes, you can spend extra ingredients to dig through your deck, but doing so may leave your pantry barren in future rounds, so you’ll often find this desperate strategy just doesn’t cut the mustard.
Samantha the Bookie (Found in The Red Dragon Inn 8: Pub Crawl)
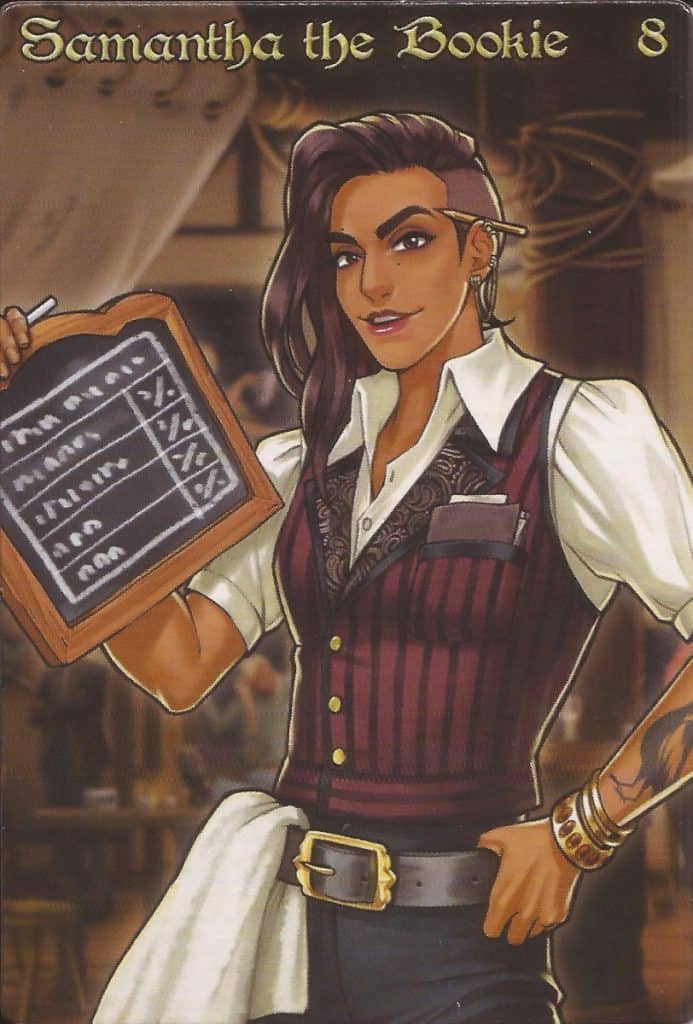
RDI 8 did a wonderful job exploring new design space, and that is to be commended as they were adding characters 51-55 to the roster on its release. Some of the characters end up playing quite well without being overpowered.
Regrettably, Samantha definitely feels underpowered compared to entries like Nerodia and Lucky.
To her credit, Samantha’s a decent, but not excellent, gambler. Sadly the rest of her deck ranges from weak (offense, some defense) to standard fare (defense, gold totals). This weakness is clearly intended to be offset by her Brawl deck, a 14 card deck that is drawn from when one of Samantha’s cards says to start a Brawl.
At best, Brawl cards will bring Samantha’s offense up to average, as several of her Actions that start Brawls have no additional effect of their own, other than possibly allowing you to start a second Brawl if you accumulate “In this corner…!” and “…and in that corner!” in your hand, but with only 2 copies of each in the deck, the odds of assembling this combo aren’t super high unless you’re willing to wait a few turns.
The reason I say “at best” owes to the fact that all of the above average cards in Samantha’s Brawl deck offer your opponents a choice. They can either taking a huge hit to Fortitude, or pay gold, discard cards, or take a drink to get out of some or all of the damage. Punisher mechanics like this almost always look stronger than they actually are, because your opponent will select the option that does them the least harm.
This doesn’t mean you won’t get some solid hits in, but it’s going to take both timing and luck to make it happen.
As the game progresses, you do receive some menial benefits from starting brawls (removing a point from your Alcohol total, gaining a gold), and if you make it to 10 Brawls (which is potentially possible through 1 cycle of the character deck) you get to order 2 drinks instead of 1 each turn. While this sounds very cool (because it is), it doesn’t mean your opponents will actually drink them.
RDI 8’s Drink Deck does have a lot of chasers, however, and I suspect this ability is why. Drink Decks similar in composition can make Samantha unexpectedly dangerous if she survives to endgame, but if you’ve accumulated a large collection of drinks like our playgroup has, there’s no guarantee you’ll have access to excess chasers.
Sera the Fleetfooted (Found in The Red Dragon Inn 5: The Character Trove)
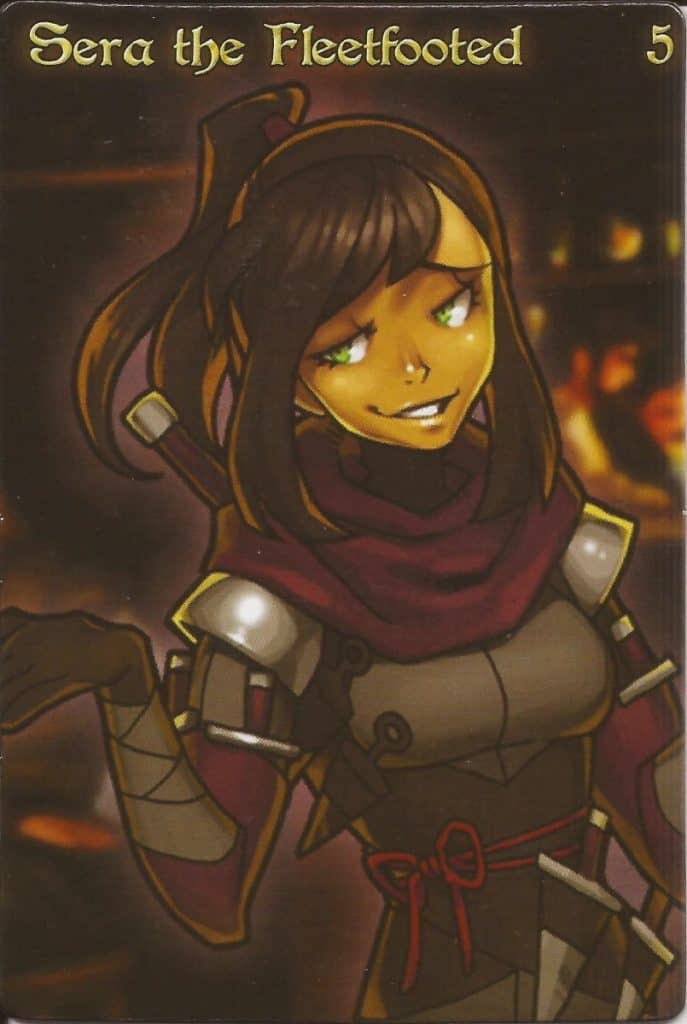
Drawing extra cards is one of the most powerful things you can do in many card games. As I was rifling through the early portion of Sera’s Character Deck, I was confident this would be a B-Tier deck with the light subtheme of card drawing to show off her fleetfooted skills.
Imagine how disappointed I was by the time I finished looking over the deck.
Don’t get me wrong; Sera’s a good gambler, deals relatively average damage when you factor in most of her single damage actions let you draw a card and play another action, and has an okay pool of defense cards. She even has a couple of really cool cards with potent effects like clearing her Drink Me! pile and drawing extra cards while cheating during Gambling.
Unfortunately, it feels like this deck is pulling in a couple different directions, and mechanically doesn’t pull off the “flurry of blows” strategy of stacking multiple little attacks abundantly well.
If there had been a little more generosity with the card draw and extra actions, I honestly think this idea could have worked as a B-Tier deck. That said, engineering this type of strategy presents a very tough tightrope to walk, because compensating too much in the other direction would make this deck incredibly overpowered, so I understand why the conservative approach was taken.
It also may have played too well with more than 4 cards allowing extra draws (including 3 Actions that deal 1 damage and let you play another action).
I may never know how this deck’s final composition was reached, but I’d be lying if I said I wasn’t extremely curious.
Witchdoctor Natyli (Found in The Red Dragon Inn: Allies – Witchdoctor Natyli)
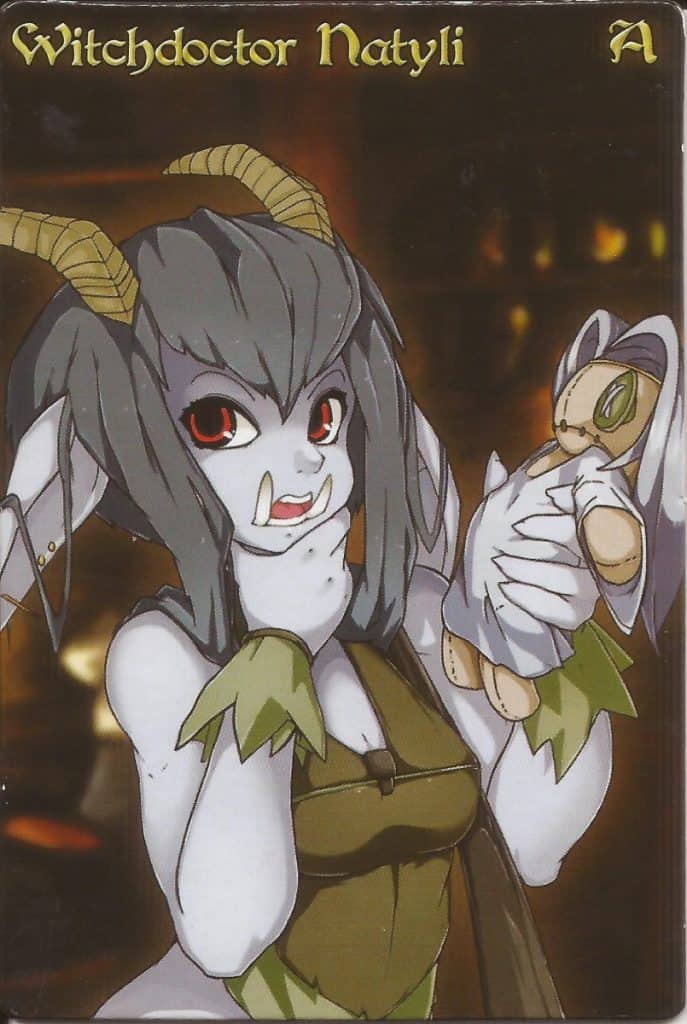
A mischievous adolescent, Witchdoctor Natyli loves her pranks, and this is wonderfully showcased through her use of Debuff Tokens. She begins the game with access to 2 each of the following:
- Pain Curse: When a player with this debuff loses fortitude, they lose an additional fortitude for each Pain Curse they have, then return their Pain Curse tokens to Natyli
- Mind Hex: When a player with this debuff gains alcohol content, they gain an additional alcohol content for each Mind Hex they have, then return their Mind Hex tokens to Natyli
- Power Jinx: A player with this debuff has all numerical values on their Action cards reduced by 1 for each Power Jinx they have during their Action Phase. They return all Power Jinx tokens to Natyli at the end of their Action Phase.
The idea behind this deck is to utilize these hexes to weaken threats and sneakily slip in some extra damage when someone gets hit or takes a drink. Regrettably, this doesn’t end up being executed well for a couple reasons.
First, these debuffs are used in place of raw damage on a lot of Natyli’s cards. Hit back cards merely dole out 2 debuffs instead of doing damage, Actions deal 1 fortitude damage and give a debuff, etc. This nets a pretty average offense, but with some of it being delayed for an undetermined amount of time, it isn’t abundantly impressive.
As if that wasn’t bad enough, Natyli’s Debuff Tokens also leave the game when she does, so there aren’t even any posthumous hijinks or last ditch efforts you can pull to play kingmaker.
Additionally, with access to only six Debuff Tokens, Natyli scales pretty poorly with larger games of The Red Dragon Inn. Players can often work around tokens for a turn or two with little to no issue, making it easy for her to run out of debuffs, which in turn will pull a lot of punch from many newly drawn cards.
To her credit, Natyli is an above average gambler, so you’ll be able to hold your own when it comes to gold, but the rest of her deck works out to be pretty pedestrian. Personally, I don’t think this makes her less fun to play, but I’d also be lying if I said there weren’t other characters who execute Natyli’s brand of mischief more efficiently and effectively.
Wrench (Found in The Red Dragon Inn: Allies – Wrench)
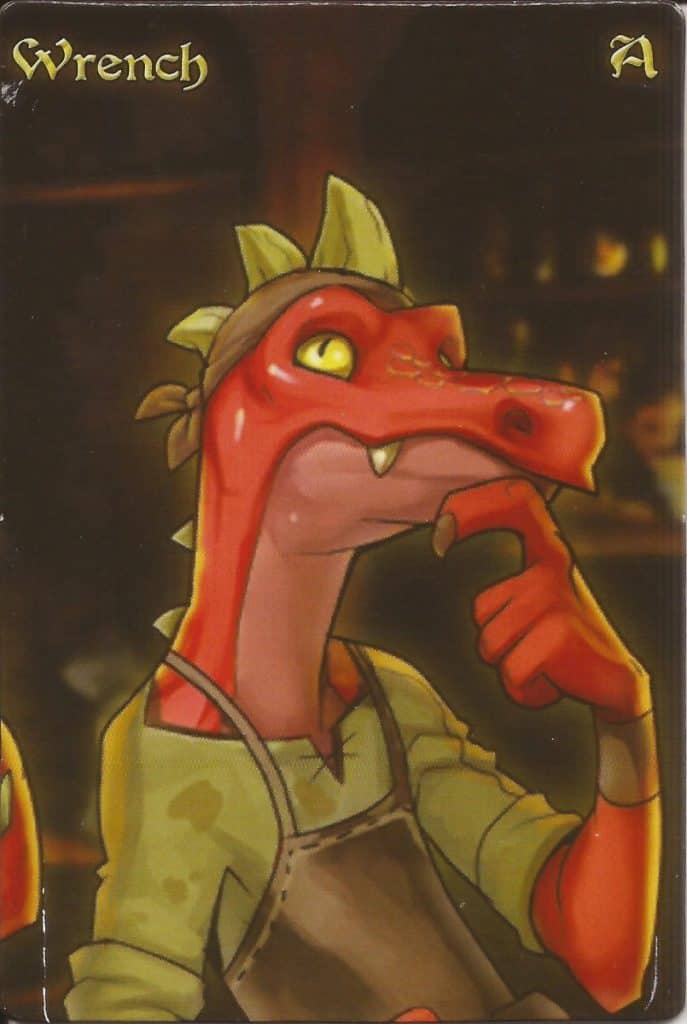
This is a deck I really wanted to put in B-Tier, but after playing some games, I just can’t bring myself to do it. Wrench’s unique mechanic is designed to build to a crescendo over time through use of his Gizmos.
Gizmos are Actions that stay in front of Wrench after he plays them, and start at the highest health noted on them. At the end of each Action Phase, they tick down one point of health, and if they are Active Gizmos, they trigger. Some Gizmos are also Passive, meaning their effects are continuously applied until they are discarded.
While you can only play up to 1 new Gizmo during each Action Phase (unless you have access to a card like Parallel production), all of your Gizmos will do their thing each turn. Those that deal with offense range from having a lot of health but doing minimal damage to having minimal health but hitting for up to 3 damage.
There are also a variety of other useful effects for defense, gold generation, handing out drinks, and more. Get 3 or 4 of these going at once, and your turns are going to be pretty awesome.
Unfortunately, Gizmos can be the target of attacks (or redirections) that hit fortitude much like players. If a Gizmo’s health is reduced to 0 in this way, Wrench takes 1 point of unavoidable fortitude damage when it is discarded.
This can be especially dangerous with cards that hit all players, resulting in wrench taking anywhere from 1-4 extra damage that cannot be reduced or ignored, making a powerful, but precarious offense a severe liability. Fortunately, if a Gizmo naturally reaches 0 health during an Action Phase, Wrench does not take this damage.
Wrench’s character deck also doesn’t do him many favors. He’s an atrocious gambler, some of his defense cards require him to sacrifice a Gizmo to use them, and he doesn’t really have any other consistent game plan that doesn’t involve his Gizmos. Additionally, debuffs like Remy’s Marks or Natyli’s curses/hexes would hit a Gizmo, they pass to Wrench instead (especially bad when receiving something like a Power Jinx).
This diminishes the “additional” defense Wrench receives by having players target Gizmos instead of himself, which is really the other major strength going for him.
Zot the Wizard (Found in The Red Dragon Inn 1)

Much like his troublesome familiar Pooky, Zot is a blast to play, but offers a pretty average experience in terms of power level. Unlike some of the early character descriptions, however, you’ll find Zot performs pretty much as advertised.
He’s a good gambler, Pooky’s shenanigans are all over the card art, and his offense and defense are reasonable, if average. As with any character that has Actions that only deal 1 fortitude damage to a single player, aggressively pitch those at the start of your turn, as they’re almost never worth playing.
I also didn’t realize The Lich King was referenced this early in The Red Dragon Inn (check out Zot’s Cheating card “Look over there! It’s the Lich King!”).
I’ve got to give Slugfest props here – their worldbuilding is on point, and their ability to take a single detail and make a fun character that doesn’t feel shoehorned in years down the road is impressive – and actually demonstrated pretty often throughout releases the more I think about it!
D-Tier Red Dragon Inn Characters
These characters are the weakest in the game, and are culprits of poor deck synergy, underpowered capabilities, and/or unique abilities that are slow, risky, and/or poorly executed. You can still win with any of these characters, but it is very difficult to do so, and you’re probably going to feel like you’re behind and at the mercy of the table for most of the game.
The fact that only 4 characters are in this hall of shame after well over a decade is a testament to how good the overall design of characters has proven over the course of over 10 years.
Dimli the Dwarf (Found in The Red Dragon Inn 2)
For some time, the only Red Dragon Inn expansions I had were the first 2 games. We’d often randomly roll to see which character we got to play, and I absolutely dreaded getting Dimli. He’s got average to below average offense, average gambling skill, and so-so defense.
He also has some cards for splitting or spiking drinks, but splitting drinks usually results in you taking at least 2 alcohol content, and spiking drinks can easily be cancelled out by someone electing to ignore the spiked drink after you spike it.
Additionally, Dimli is advertised as a character who is supposed to be particularly good with gold, but he’s really just average when it comes to acquiring or hoarding it.
Some might argue Dimli for C-Tier based on what I’ve outlined so far, but the part that really pushes Dimli down to D-Tier for me is that his cards just don’t mesh well together. He doesn’t excel at anything, in fact struggles to be average at anything, and is pushed in several different strategic directions, and has no real route to victory.
At least he’s got his great-grandfather’s helmet, and is willing to loan it out to stronger characters.
Halden the Unhinged (Found in The Red Dragon Inn: Allies – Halden the Unhinged)
Halden is a character with a lot of potential. He’s an excellent gambler due to his wide selection of cheating cards, but his offense is atrocious and his defense is just a hair below average. His Character Deck does come with a second deck to help offset his deficiencies – the Totem Deck.
At the start of each of your turns (before you discard and draw), you reveal the top card of your Totem Deck. You can also receive additional Totems by playing one of the 6 cards in Halden’s Character Deck that has a totem icon in the lower right corner or by using the Bothersome Totem as part of a Totem Combo.
A Totem Combo consists of 2 or more totems that are linked from left to right. The totem furthest to the right does not activate its effect (if any), but all others activate their effects as though they were played as a single Action.
You don’t have to spend all revealed Totems on a Totem Combo, and best of all, you can play a Totem Combo AND an Action card on the same turn. Sounds great, right?
So why’s he in D-Tier?
First, Totems can only be linked to specific types of totems (as noted by the colored icons on the left and right sides, meaning you will come across scenarios where you can’t optimally go off (or at all).
Second, Halden’s Totems do very little to support his gambling strengths, and when paired with an Action, will frequently just net an average attack.
Third, because you need at least 2 Totems to use a Totem Combo, you’ll either need a minimum of 2 turns or a mediocre action/the lone Cheating card with a Totem symbol to fire off a combo – assuming you don’t mind wasting approximately half your totems playing it safe.
Why would you play it safe you ask? Remember when I mentioned all of the cards in a Totem Combo are treated as a single Action? That means a single card can ignore the entire combo, or worse, negate it.
Sure, you can have each of your totems target different opponents, but that diminishes Halden’s ability to alpha strike an opponent, meaning he’s often not going to have the impact of a character like Piper, whose Arrows are dealt with individually, when he goes off.
There’s also no mention in the rules of reshuffling the Totem deck when it runs out, so once your 18 Totems are revealed, they’re what you’ve got to work with for the rest of the game. Granted, the odds that you’ll actually run out are low, but it removes some of the incentive to aggressively discard and draw to put them out faster.
In conclusion, while you might get the perfect moment to come along so you can ruin someone’s career, your ability to control the impact of that moment is nonexistent. You’ll almost always have to focus exclusively on your gambling to do well and rely on how others at the table are playing to fire off even a moderately strong Totem Combo. Too many variables outside your control + minimal flexibility = a hard pass.
Spyke (Found in The Red Dragon Inn: Allies – Spyke and Flower)
Ah, the other Munchkin crossover deck. Spyke’s deck is decidedly average in most regards, with several of his cards being subpar. As with Flower’s deck, however, his cards can dramatically improve based on your level, which is determined by the type of equipment you have equipped courtesy of their shared Treasure Deck.
The primary focus of this deck is defense, but if well equipped, you’ll pack a pretty decent punch too.
Spyke’s deck also emphasizes Treasure a lot more, so you’ll often find yourself with much more treasure (and curses) than Flower as the game progresses. Since Treasures often have additional effects you can employ in the game, this means you’ll often effectively have access to an extra card or two, which can definitely save you in a pinch.
The ceiling of what his cards can do is also dramatically higher than Flower’s, enabling the ability to give away drinks, attack an enemy’s hand, and play extra actions.
The problem, unfortunately, is getting to that ceiling. Your floor for starting to get better mileage out of your cards is Level 5, with the truly cool stuff coming up at levels 9-11.
Realistically, unless the game drags on a long time AND you manage to duck the multiple curses in the Treasure deck, getting to that level is going to be all but impossible most of the time. If you can make it to Level 6, this deck is decidedly C-Tier, but it may take 3-4 treasure to get to that point, assuming you haven’t had to sacrifice them to curses, for card effects, duplicate equipment slots, or using the special abilities of your Treasures.
This is a really cool and fun idea, but the designers were clearly concerned about easy access to the powerful side of this deck, and it shows.
Zakhan the Drunken Master (Found in The Red Dragon Inn 5: The Character Trove)
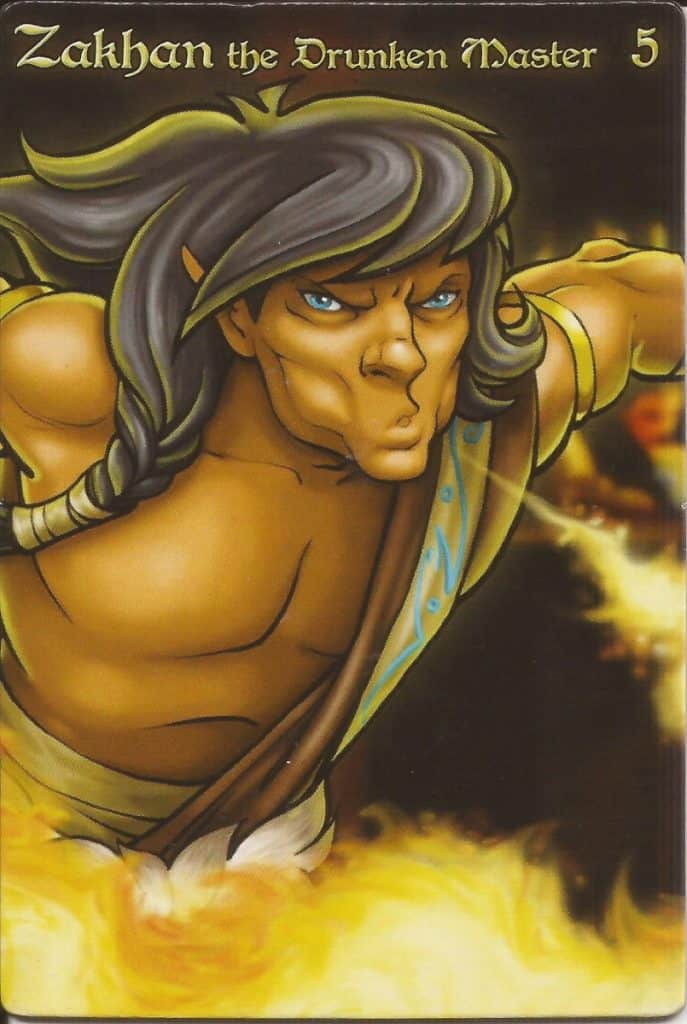
Zakhan’s Character Deck represents the pinnacle of high-risk, high-reward, but the odds of walking away with anything but a hangover aren’t especially good. Many of his cards revolve around the use of Drunken Chi, which can be acquired either from card effects or optionally increased by 1 whenever he gains alcohol content from a Drink.
Drunken Chi is also used to determine Zakhan’s Drunkenness, which is the sum of his current alcohol content and Drunken Chi – but if this number ever meets or exceeds his fortitude, he is eliminated.
Drunken Chi can either be spent using 1 of the 4 cards in Zakhan’s deck that allow him to do so, or it can be reduced by 1 at any time by discarding 2 cards from his hand. If you’ve read all the other character reviews to this point, you probably know what I’m going to have to say about the poor card economy here, so I’ll spare you my vitriol.
To his credit, 3 of Zakhan’s cards that let him spend Drunken Chi are exceptionally powerful, letting him attack all players or heal a variable amount based on what was spent. The last just makes a damage card unavoidable, which is neat, but mostly useful as a cheap way to dump excess Chi, which will be VERY easy to pick up as you play cards in his deck or take Drinks.
The rest of Zakhan’s deck is pretty average, but as the game progresses, it becomes harder and harder to use your cards – especially in the late game, because so many of them effectively bump up your alcohol content by adding Drunken Chi.
If all goes especially well, you’ll get to pull off up to 3 really cool effects throughout the course of the game, but to have a deck with fairly average strength actually go downhill because you’re either avoiding Drunken Chi or throwing away tons of cards to offload it is only going to result in a spectacular crash and burn.
To help avoid this, I recommend planning to only going for a splashy play once, then assessing whether you’ve really got the health pool left to try for a second. You should also be aggressively discarding and drawing until you have access to at least 1 of the 3 cards that let you spend any amount of your Drunken Chi so you have a way to quickly backpedal if the tables unexpectedly turn against you.
As rough as the gameplay is though, that spectacular Monk’s fireball or Thousand-palm strike is going to feel amazing – assuming it isn’t negated.
A Red Dragon Inn Character’s Tier or Raw Strength Isn’t Everything
I know I just finished breaking down characters with strength in mind, but it’s critically important to remember that this game has 62 different characters to choose from, meaning there is an exponentially higher number of party combinations that can show up from game to game.
Everyone is usually going to have at least 1 weakness to exploit during the course of a game, can be surprised by a potent Drink with a string of Chasers, or can be saddled with some unlucky draws.
That said, there are definitely other things you can do to improve your odds of victory in any game:
- Review your deck before you start playing: Getting a feel for your character’s strategies is a good way to start preparing a game plan, and it gives you a chance to see what your deck’s best cards are. Don’t be afraid to aggressively discard cards that aren’t going to help your game plan either – doing so gives you more chances to get cards you need or would rather have on hand.
- Monitor table politics: Flaunting how well you’re doing or being unpleasant is a good way to turn all of your opponents against you at once. It doesn’t matter how strong your deck is; when combined, your opponents have more cards than you, as well as more opportunities to play them. On the other hand, defending another player or helping them deal with a rival can be a great way to gain an ally and reduce the number of potential attacks you receive each round.
- Pay attention to what your opponents are doing: If you can’t remember what your opponents are good at or weak against, pay attention to the cards they play in their early turns. These can offer vital context clues about where you can safely engage them as well as confrontations you generally want to avoid.
- Don’t spend all your cards during your turn: Most characters have to wait until the start of their turn to draw more cards. Burning through all of yours during or right after your turn will show observant players that you’re an easy target and that they don’t need to fear immediate retribution when attacking you.
Needless to say, we’re also very excited to break this game back out post-pandemic, and if you want to see why our gaming group enjoys it so much before picking it up for yourself, you can check out a couple of our gameplay streams and a couple unboxings we did for recent expansions:
- Red Dragon Inn Gameplay – This Reminds Me of a Story!
- Red Dragon Inn Gameplay 2 – This Still Reminds Him of a Story
- Unboxing Piper vs. Ripsnarl
- Unboxing Evil Pooky
- Unboxing The Red Dragon Inn 8: Pub Crawl
Note: If you character deck has cards with dragon heads in the upper corners, make sure to remove them from your deck before starting. These are used for the Boss Battle variant of The Red Dragon Inn, and we maaaay have forgotten to do so during these early streams. Don’t forget to like and subscribe while you’re watching!
What are the Best Red Dragon Inn Expansions?
With over 2 dozen different products containing characters for The Red Dragon Inn, picking up every expansion all at once isn’t going to be viable for the average board gamer. While I would say it’s well worth it in the long run, as you get virtually unlimited replay value through the sheer number of characters and strategies, some expansions are simply better than others.
You might also be looking for a specific type of experience when playing The Red Dragon Inn with your friends and family, so I’ve hand-picked some recommendations to help you start your night at The Red Dragon Inn off right!
Best High Power Expansions: The Red Dragon Inn 6: Villains & The Red Dragon Inn: Allies – Ohava vs. Murgath
There’s not a bad character among the 6 included in these expansions, netting you 5 A-Tier characters and 1 B-Tier Character that can definitely hang out in the same league. All characters have a lot to recommend them individually, employing powerful cards and strategies for fast paced gameplay in different ways.
The Red Dragon Inn 6: Villains is easily the more important of these two, as it will provide you with twice as many characters as Ohava vs. Murgath, but the Red Dragon Inn scales to 6 players quite nicely and picking up the pair is only just above the normal price range for a brand new board game.
Best Balanced Expansions: The Red Dragon Inn 3, The Red Dragon Inn 4, & The Red Dragon Inn 7: The Tavern Crew
RDI 3, RDI 4, and RDI 7 bring solid collections of above average, but fairly well balanced characters. Bryn the Boatswain is the only C-Tier among these 12 characters, but I’d argue she’s probably the strongest C-Tier character, so you’re unlikely to notice a significant disparity in her Character Deck’s power level.
Brewmaster Phrenk’s A-Tier status also shouldn’t be too big an issue – while the strongest character of these 3 sets in my opinion, he’s not so far above the 10 B-Tier characters that he should significantly unbalance games. Bryn and Phrenk also have little defense against the other’s strengths, so they can also safely inhabit the same game.
Each group of characters in these expansions is a blast to play with too, offering interactive gameplay and a wide variety of playstyles that will engage gamblers, table politicians, players who like to brawl with their opponents, players who prefer to subtly control the flow of gameplay, and those who just want to engage in crazy schemes and shenanigans.
Best Low Power Expansions: The Red Dragon Inn 1 & The Red Dragon Inn: Allies – Spyke and Flower
Gerki is easily the strongest character among these 6, but with Zot and Deirdre to keep him in check, he isn’t likely to dominate tables oppressively, and with enough time, Spyke and Flower can fight him on more even footing.
While Spyke is pretty clearly the weakest character among these 2 Red Dragon Inn expansions, the lower power level of these characters ensures he will usually have enough time to gear up to a comparable power level. On the rare games where he’s able to explore his full potential, he’ll even be a downright threat!
Games with RDI 1 and Spyke and Flower will usually progress at a slower pace, relying more on the drink deck than raw damage to cross fortitude and alcohol totals. Gambling also remains perfectly viable, preserving more of The Red Dragon Inn’s originally intended power level and style of gameplay than you’re likely to see with later releases.
Other Articles You May Love
- Ranking Every Lord in Lords of Waterdeep
- Arcane Focus Vs. Component Pouch in 5E
- Sorcerer vs. Wizard 5E D&D
- Our Favorite Munchkin Expansions Ranked
Braden is a founder of Assorted Meeples and has been a gamer & writer with a vivid imagination all his life. Don’t believe us? Check out his excitement when meeting Goosebumps author R.L. Stine as a kid! An avid Magic: The Gathering spellslinger for over 15 years, you can always convince him to shuffle up for a game (or three!) of Commander.