
A huge shoutout to Lanabean for lending her expertise to create this post. She is the author of this fantastic guide for A Link to the Past Randomizer (ALttPR) enthusiasts who prefer to cruise through Hyrule’s greatest treasure hunt on a Super Nintendo. Make sure to stop by her Twitch channel and give her a follow – if you enjoy ALttPR, she’s one of the best I’ve seen!
Content has been edited for clarity.
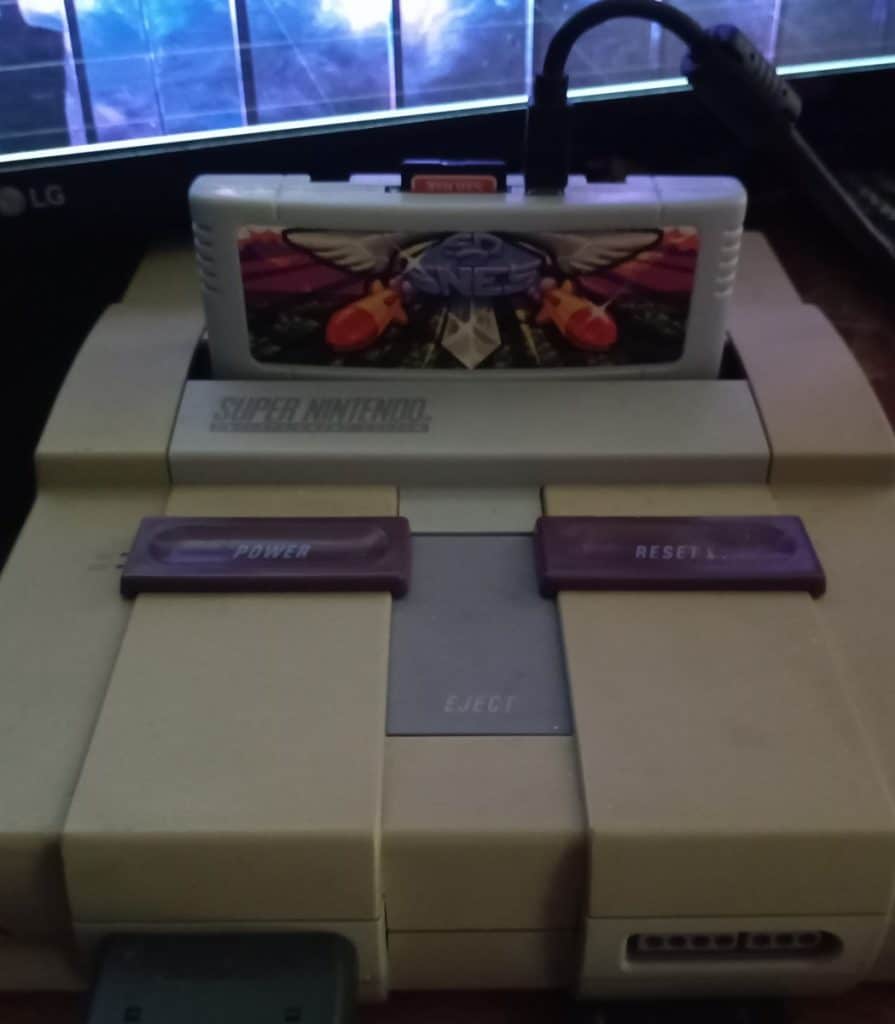
Welcome to a tutorial on setting up auto tracking through your SD2SNES/FXPAK Pro. If you do not know what these letters mean, this is simply what is called a flash cartridge or flash cart, and is primarily used to play Super Nintendo (SNES) games loaded onto an SD card on real hardware.
If you do not use a Super Nintendo/Super Famicom or Super NT, flash cart compatibility varies, so I would recommend you research to see if the system you use to play your Super Nintendo games on is compatible before you make a hefty purchase.
Either way, I would go with the SD2SNES/FXPAK or the Pro version as it has the highest compatibility of any of the flash carts out there, and many of the cheaper flash cart options can have unwelcome issues.
What Do You Need to Auto Track on a Flash Cart?
- Console (again, Super Nintendo/Famicom or Super NT are the ones I am aware that are fully compatible)
- SD2SNES or renamed FXPAK Pro – they are the same thing, but due to legal issues, the creator of the flash cart had to change the name.
- Mini USB cable (this goes from the top of the flash cart to your computer)
- An SD Card Reader with a Micro SD slot
- Micro SD Card (I recommend 32GB if you plan on using MSU’s with your randomizers as they are rather large!)
- A computer to communicate with (A laptop should be fine)
Now that your gear has been assembled, here’s a basic rundown of what we’ll be doing:
- By default, the USB port on the flash cart is disabled, as it is normally used by developers for their shenanigans, so we’re going to use some custom firmware for the flash cart to activate it. This custom firmware still uses the same core firmware the developers have released, so there’s no need to worry about it creating issues.
- Install Usb2Snes on your computer, so that your computer can communicate with the flash cart.
- Set up EmoTracker on your computer so you can auto track.
While this looks complicated, it is easier than you can possibly imagine, so let’s do this!
How Do You Activate the USB Port on a FXPAK or FXPAK Pro?
You simply download the current version of Project SD2SNES’s custom firmware and unpack it into the micro SD card in the ‘sd2snes’ directory – it will replace the files it needs to, but won’t replace everything, so be sure NOT to delete the entire sd2snes folder by mistake – we’re simply replacing a few files.
NOTE: If you do mistakenly delete the original firmware on your flash cart (or have acquired the flash cart without a micro SD card), and you need to reinstall it, you can simply download a fresh copy of the current firmware, then replace/overwrite the required files on your flash cart’s micro SD card.
How Do You Set Up Usb2Snes?
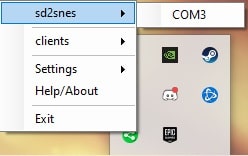
Usb2Snes is the software for your PC that will communicate with the flash cart to send info back and forth. Simply unzip it to your preferred area (I keep a Usb2Snes folder on my desktop), and run the usb2snes file. It’s now running in the background, no real configuration needed. You should be able to see it running by looking for the little green circle icon (as seen below) running on the lower right hand corner of your screen.
NOTE: You will need an extraction program like 7-Zip to unzip the Usb2Snes download. It’s free to download if you don’t already have it.
At this point, if you have the appropriate firmware running on your flash cart, the Usb2Snes program running on your computer, and the flash cart plugged into your computer, you are now ready to turn your console on.
Once turned on, you should be able to either hear the ‘USB connected’ sound your computer makes when a USB device is plugged in (as well as the disconnection noise when you turn off your console), but if you have that disabled, you can also manually check to verify you’re connected.
To do this, right-click the little green Usb2Snes icon near the lower right hand corner of your screen, then near the top it will say ‘sd2snes’, If your console is on, it should expand a bit to the side when you mouse over it, and it should say something like COM3, telling you that you’re nearly good to go!
How Do You Set Up EmoTracker?
Home stretch now, we’re nearly there! If you haven’t read Braden’s prior information about setting up Emotracker for ALttPR, now is the time to do that. Once you have EmoTracker installed and have set up your tracking package in the Package Manager, you can either skip ahead to the Usb2Snes section in his guide or come back here for your final steps!
While your console is on, set up EmoTracker the way you want it, then simply right-click the little robot head icon on the lower right hand corner of EmoTracker (it should be white). At the bottom will be an option for SNES, then it will expand to the side, and instead of clicking on Lua (for Snes9x-rr auto tracking), you’re going to click on SD2SNES.
If done right, it should pause for a few seconds, then the little robot icon should change to cyan, telling you that you’re good to go!
NOTE: While Usb2Snes will work on Windows, Mac, and Linux operating systems, EmoTracker is only compatible with Windows.
Things to keep in mind with auto tracking for ALttPR on a console:
- EmoTracker will track items, but it will not track what dungeons are crystals and pendants, so it’s still up to you to right click those to mark them as they are.
- Auto tracker will keep track of dungeons you’ve beaten.
- Not all tracking packages will update item-specific locations when checked – such as the Mushroom, Shovel, and Magic Powder – it’ll still be up to you to to right click those items to check them off.
Is There Anything Else That is Needed to Start Playing My Randomizer?
Nope, this is pretty much it! If you’re having issues, just reread the tutorial to make sure something wasn’t overlooked. Most complications in this process are caused by simple things, so no worries if you need to look things over an extra time or two!
Braden is a founder of Assorted Meeples and has been a gamer & writer with a vivid imagination all his life. Don’t believe us? Check out his excitement when meeting Goosebumps author R.L. Stine as a kid! An avid Magic: The Gathering spellslinger for over 15 years, you can always convince him to shuffle up for a game (or three!) of Commander.