
Richard Garfield has created several games I’ve logged many hours playing over the years, including Magic: the Gathering (MTG), RoboRally, and King of Tokyo (including the significantly improved Dark Edition). I personally enjoy how relatively simple each of these games is on its surface when compared to the strategic potential found within, and consider this trait a pillar of good game design when evaluating games.
Bunny Kingdom, especially when paired with its expansion Bunny Kingdom: In the Sky, is another Richard Garfield game that exemplifies this “simple to learn, difficult to master” style of gameplay by delivering a card-drafting experience that is easier to access than MTG, but robust enough for it to hit our board game table time and again.
That said, if this is your first experience with a card drafting game, Bunny Kingdom can be a little daunting, especially if you’ve been through an explanation of how to play Magic. Don’t let that stop you, however; Bunny Kingdom is surprisingly easy to learn, and the skills you develop will also serve you well in other card drafting board games like 7 Wonders and Sushi Go Party!
Don’t believe me? Take a look at my quick rules explanation, play a game or two, and you’ll be diving into the meat and potatoes of Bunny Kingdom‘s strategies in no time.
How to Play Bunny Kingdom
Player Count: 2-4 (2-5 with expansion)
Estimated Play Time: 45 minutes
Bunny Kingdom Rules PDF
Bunny Kingdom In The Sky Rules PDF
Bunny Kingdom and Bunny Kingdom In The Sky Rules PDF
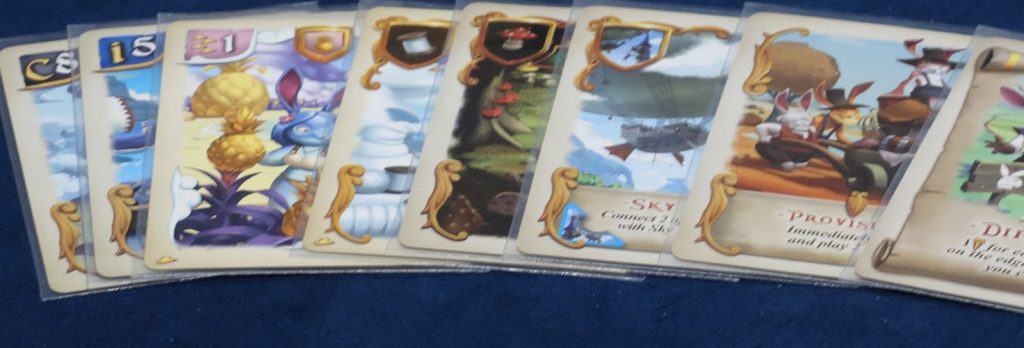
Bunny Kingdom‘s gameplay is broken down into 4 rounds. A typical round involves the following phases of play:
- Exploration Phase: Each player is dealt a hand of cards. They then choose 2 cards to play (3 in 3-player games with the expansion), and pass the rest to the player on their left (rounds 1 and 3) or right (rounds 2 and 4). Repeat until all dealt cards have been drafted.
- For 2-player games, both players have a hand and a Reserve Pile. Draw a card from your Reserve and add it to your hand, draft 1 card, then discard one card from your hand face-down before passing your hand. Repeat until all cards have been drafted or discarded.
- Construction Phase: After all the cards for a round are drafted, you may place any buildings (including luxury resources, cities, sky towers, etc.) that you collected during this round or previous rounds. Remember, only one token or city can be on a tile at any given time, and you don’t have to play a building in the same round you collect it!
- Harvest Phase: Each player collects any points (Golden Carrots) produced by their fiefs (a territory or group of connected territories). A fief scores points equal to the number of resources (basic, luxury, and wondrous) multiplied by the number of towers in its cities.
After the end of the 4th round, any parchments (which are played face down to keep them secret from your opponents) are scored, and whoever has the most Golden Carrots is the winner!
For more detailed information regarding cards, gameplay, or 2-player games, please consult the full rulebooks for the Bunny Kingdom base game and the Bunny Kingdom: In the Sky expansion.
Bunny Kingdom’s Best Strategies
The cards you draft in Bunny Kingdom are intentionally designed to steer you toward certain strategies, or draft archetypes, and to get the best experience from the game, I highly recommend playing with the Bunny Kingdom: In the Sky expansion if you have the option. The game is great on its own, but the expansion really does take the game to the next level.
The expansion does an excellent job of adding additional draft archetypes, balancing previously overpowered strategies, and even opens up play to a 5th player without complicating the setup or bogging down gameplay. I’d even go so far as to say it fully completes the game, and I personally hope no more is added to it.
That said, you or your board game group may not have the expansion, and that’s also completely okay! We got along for quite a while without it existing, and would still recommend Bunny Kingdom as a standalone game – with the understanding that your strategies will need to adjust accordingly.
Naturally, this means that as I cover each of the available draft archetypes, I will be discussing how viable they are both with and without the Bunny Kingdom: In the Sky expansion so you can get a feel for what works in your draft environment. Afterward, I’ll be going over some additional tips and tricks to help you get a leg up on your competition!
Ready to become a world power in the world of Golden Carrots? Read on, or check out our Unqualified Experts episode covering our favorite tips and tricks below!
Building 1 Really Big Fief
Available in Bunny Kingdom & Bunny Kingdom: In The Sky
Building a giant fief with as many resources and city towers as possible is a tried and true strategy that has won me many games at the Assorted Meeples table. Generally, the earlier you can start putting buildings into place, the better off you’ll be, as you can start scoring points as soon as you get them placed.
You’ll want to be careful about how many risks you take when building early, however. If you have two fiefs splitting your Luxury & Wonderous Resources separated by an empty territory on the board, consider whether you really want to risk going all in with a Camp card or building in rounds 1 and 2 if the upside is just a handful of extra points.
Especially if an opponent hate drafting the territory card you need could have been worked around by building one of your fiefs in a different direction.
In the Bunny Kingdom base game, this is consistently one of the two strongest strategies you can pursue. It won’t win every time, but almost always puts in a strong showing if you see a couple of early Luxury Resources. Even if you aren’t pursuing this route to victory, picking any Luxury Resources first is never a bad play to stop the player(s) who is.
The expansion’s introduction of Wondrous Resources on the Cloud Board, plus a few extra Luxury Resources, allows multiple players to successfully pursue this strategy simultaneously. This comparable abundance also takes a lot of pressure away from the table’s need to pick luxury resources first, and allows the other newly introduced strategies to flourish.
After Luxury and Wondrous Resources, you will want to prioritize Territory cards that produce basic resources and are near each other as well as city cards. 2 tower cities are best for flexibility, but don’t let that deter you from 3 tower castles if your fief has some mountains, or 1 tower castles if there isn’t anything better.
The Parchment Game
Available in Bunny Kingdom & Bunny Kingdom: In The Sky
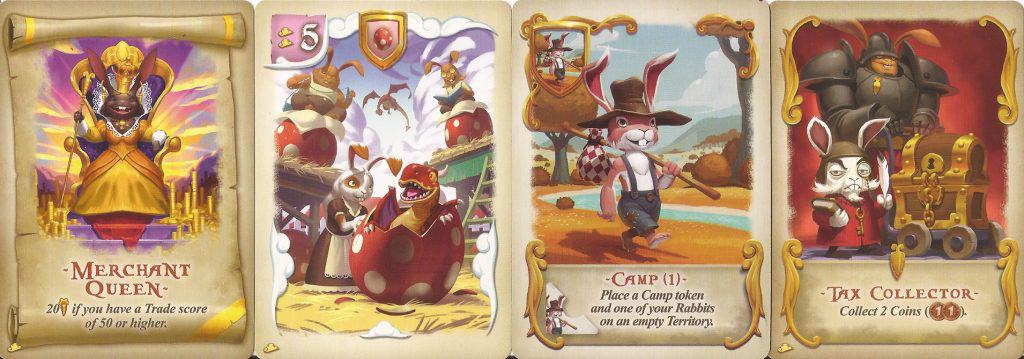
Parchment cards, unlike every other card in the game, are not revealed to your opponents after you draft them. You instead place them face down in front of you and score them at the very end of the game. As the number you collect grows, so too will the dread of your opponents. After all, you could be hiding enough points to steal the game.
And no, that isn’t hyperbole.

Parchments are the other extremely strong strategy of the Bunny Kingdom base game, and retain that strength when adding Bunny Kingdom: In the Sky. This strength comes not only from the raw points you can score, but the flexibility of how you can play the Parchment strategy itself.
For example, you can go all in, simply taking every powerful Parchment that comes across your path from the start of the game and completing any objectives they require to score major bonuses. If you’re looking for a secondary strategy to supplement your endgame, Parchments often work well in that capacity too.
Or you might just grab 3 or 4 to give you that last push to first place.
The flexibility of Parchments doesn’t end there, however. Parchment cards also have a very wide range of effects, some of which can be achieved through the course of normal gameplay, others of which are intended to support specific draft archetypes, and more still lend aid to very niche strategies.
Finally, Parchments have 3 distinct substrategies all their own, each of which can score you big points if enough of them cross your path.
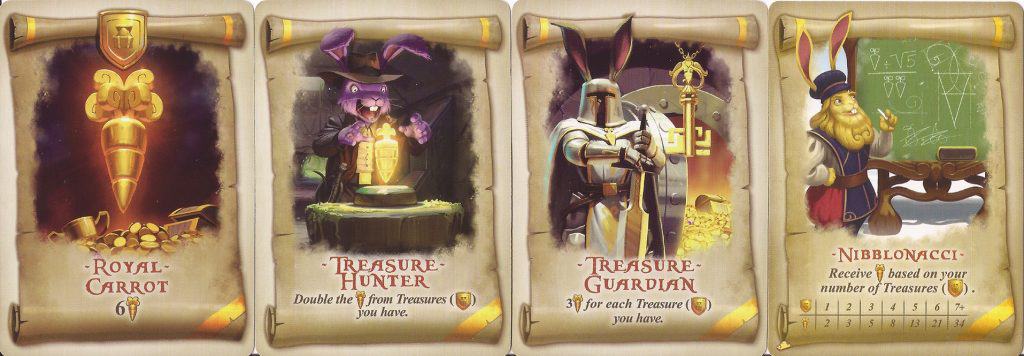
Treasure
Treasure cards don’t look like much on their own, with most scoring 1-6 points each (a few in the expansion can scale to exceed this though). If you come across Treasure Guardian or Treasure Hunter, however, the value of these trinkets can skyrocket quickly and add some solid value.
Territory Management
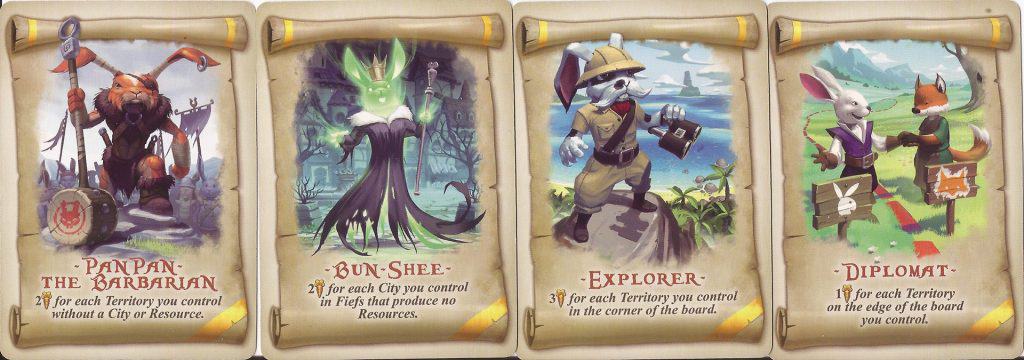
Some parchments care about where your bunnies are in play, looking for things like the corners or edges of the board, how many fiefs you have, or territories under your control that simply don’t do anything. These can be worth big points if you build fiefs integrating these areas of play, and can catch the table completely off guard at the end of the game.
Resource Management
These parchments score based on the number of a specific resource, building, or resource type you control. Some scale, others just pay out a big bonus if you have enough of a given resource. All are worth keeping an eye out for, as their importance is easy to underestimate in early rounds when you aren’t established.
Building Several Small Fiefs (The Little Prince Strategy)
Available in Bunny Kingdom & Bunny Kingdom: In The Sky
I have successfully implemented this strategy with the namesake card exactly once. I also did not win that game.
Don’t let that discourage you though – Little Prince actually isn’t required for building a lot of small fiefs and can be anything from a surprising dud to an absolute powerhouse, even if you do an amazing job implementing this game plan.
Case in point: During a game we recently streamed on Twitch, I actually was going for small fiefs and passed Little Prince partway through round 4.
This ended up being a small error – my two best fiefs were tied at generating 15 points each, and Little Prince still lets you harvest one of these in a tie (which I didn’t realize at the time). The cards I took instead were still pretty valuable, so it only cost me 10 points, which would not have impacted the final standings.
Therefore, while useful (and often strong when built around), I maintain Little Prince is usually a classic case of “Looks better than it actually is.”
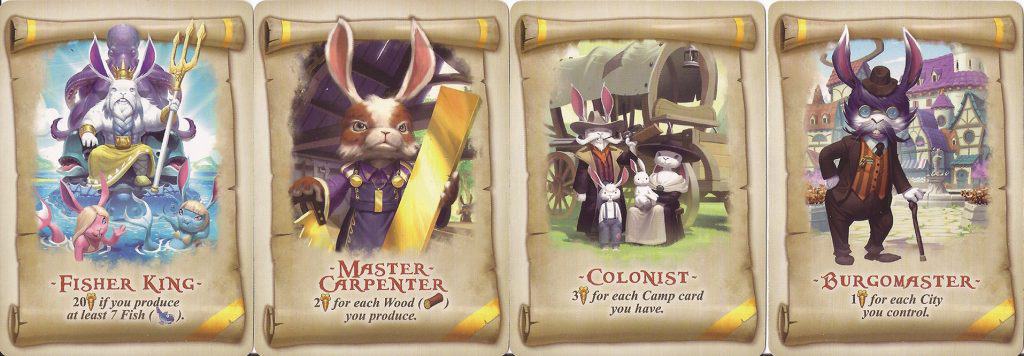
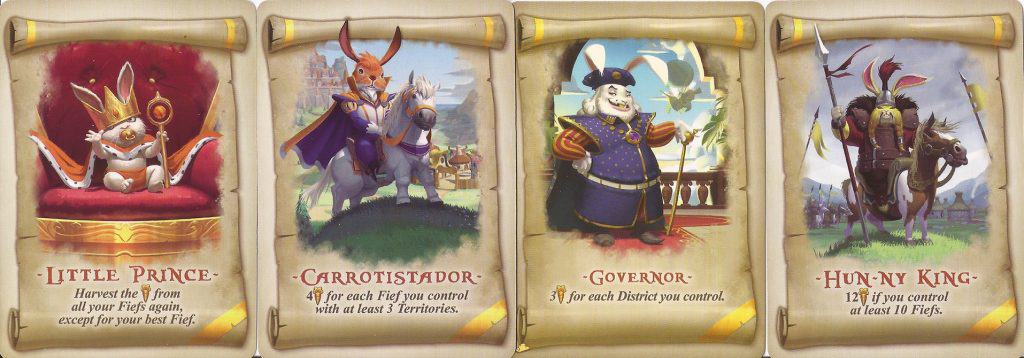
My general advice is to pursue other parchments like Carrotistador, Burgomaster, and Hun-ny King instead, as are all far more reliable parchments for generating substantial points, and don’t require 5D Chess mastery to implement optimally.
Even then, this is a secondary point strategy at best, despite requiring the planning of a primary point strategy to implement well. Plan on pairing this game plan with at least 1-2 other ways to generate substantial points to put in a good showing.
Trade Score
Available in Bunny Kingdom: In The Sky
Trade score is never something to be underestimated, as failure to acknowledge its impact can and will cost you games. It scores at the end of the game (before parchments) using the following formula:
Coins x (Luxury + Wondrous Resources)
Neat! The formula literally tells us what we need to succeed here (though it fails to mention that you must have the resources in play for them to count).
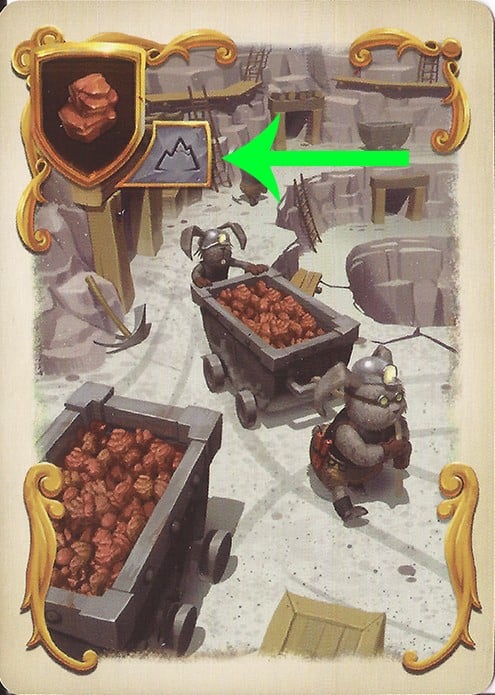
Luxury Resources are found in both the Bunny Kingdom base game and the expansion, and require a specific type of land for them to be cultivated (found next to the icon in the upper left corner). Pretty straightforward.
Wondrous Resources are found on specific spaces of the Great Cloud board provided with Bunny Kingdom: In the Sky. We’ll talk more about the Great Cloud shortly, but these, like Luxury Resources, are almost always good draft picks as they can also work well with all fief strategies.
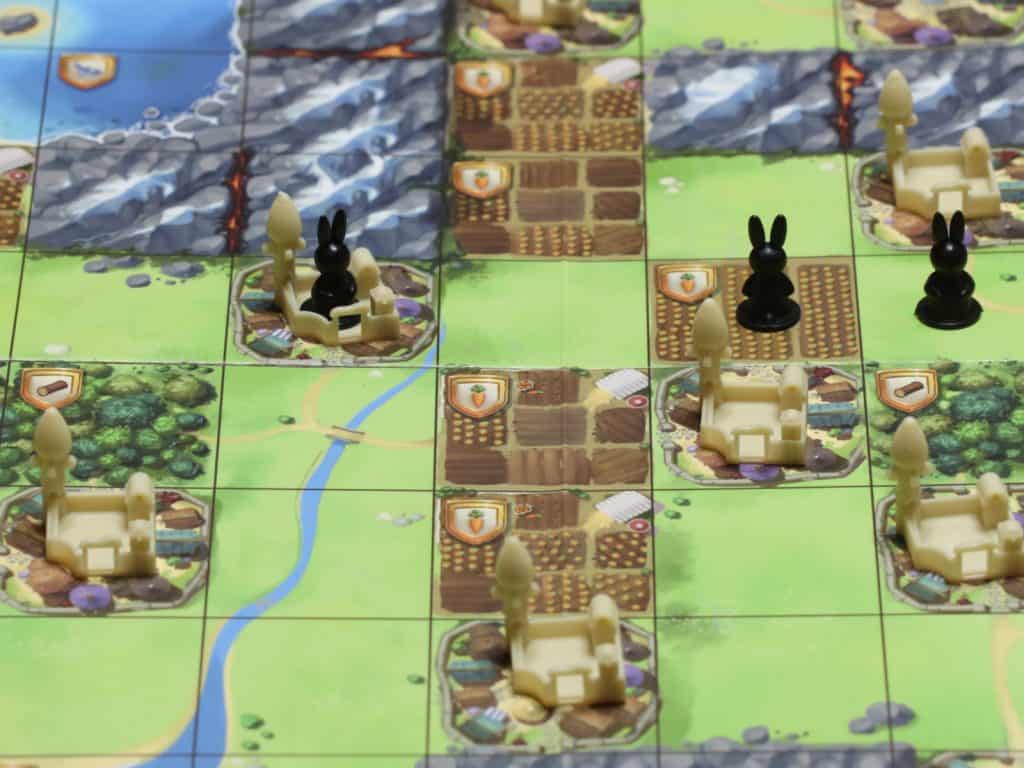
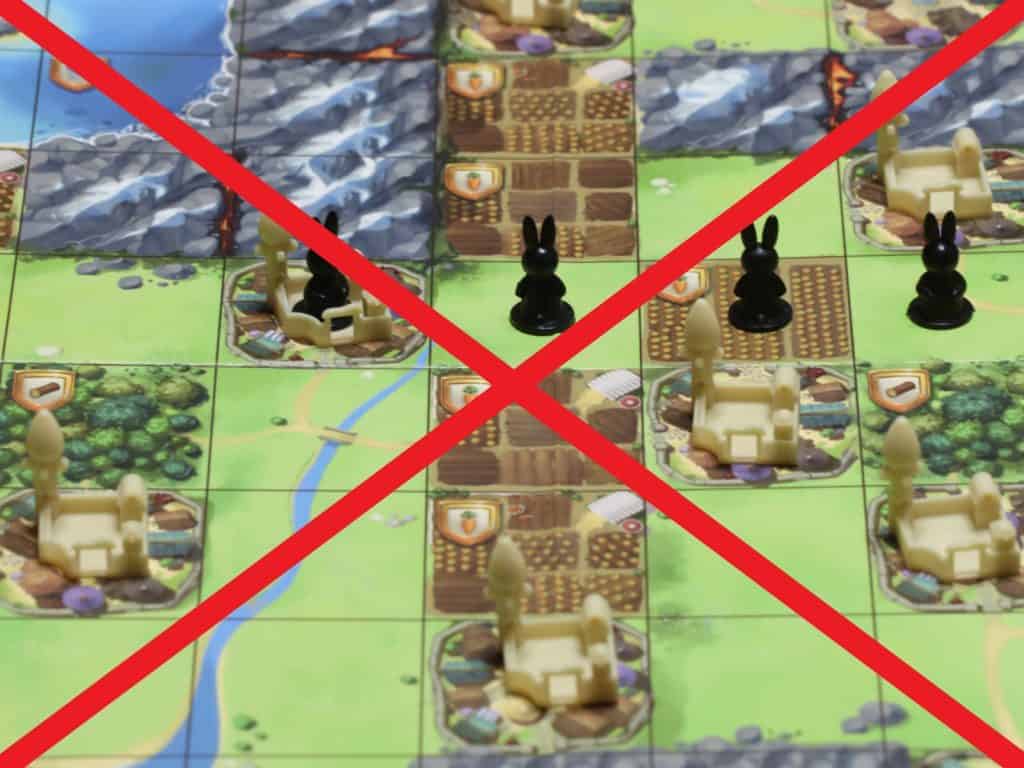
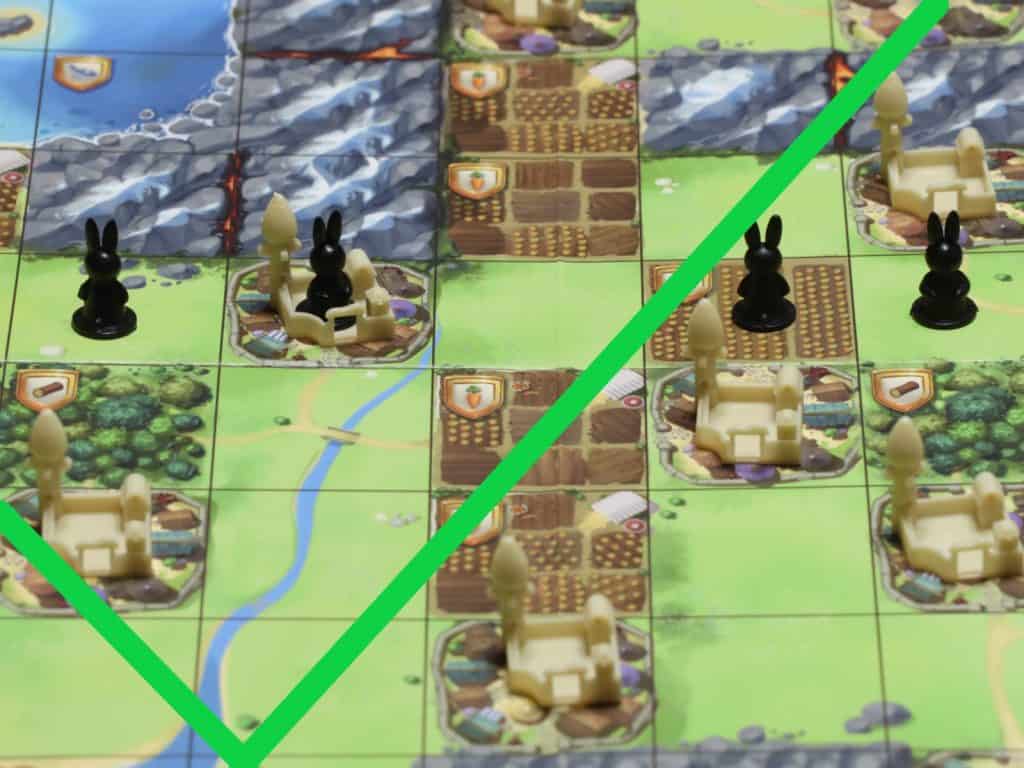
Coins are acquired from the creation of new districts. A district is a fief with 2 or more connected territories with your bunnies, so you should have a zillion of these by the end of the game, right?
Not exactly.
New districts have to be completely brand new for you to receive a coin. So let’s say you have bunnies on E5, E7, and E8. E7 and E8 are a district, E5 is not. If you place a bunny on E4, boom – you have a new district.
Place one on E6 though, and you do not – you’re simply connecting an already existing district. So if possible, you try to place a bunny on E4 first, then E6 so you get 2 coins instead of 1 for your efforts.
Trade Score’s introduction to Bunny Kingdom completely changes the way you should look at fief building when compared to playing the base game, and actually is responsible for making the multiple small fief strategy viable, as it is a natural pairing.
It also encourages a deeper optimization to get the most out of building a really big fief, and can make otherwise useless Camp cards useful too, as they can conveniently build districts at any point in the game. And if an opponent boots your Camp out later, no biggie – you still have the coin!
A little planning will net most strategies anywhere from 20-100+ points at the end of a game, so make sure you figure out your game plan ASAP!
The Great Cloud Board
Available in Bunny Kingdom: In The Sky
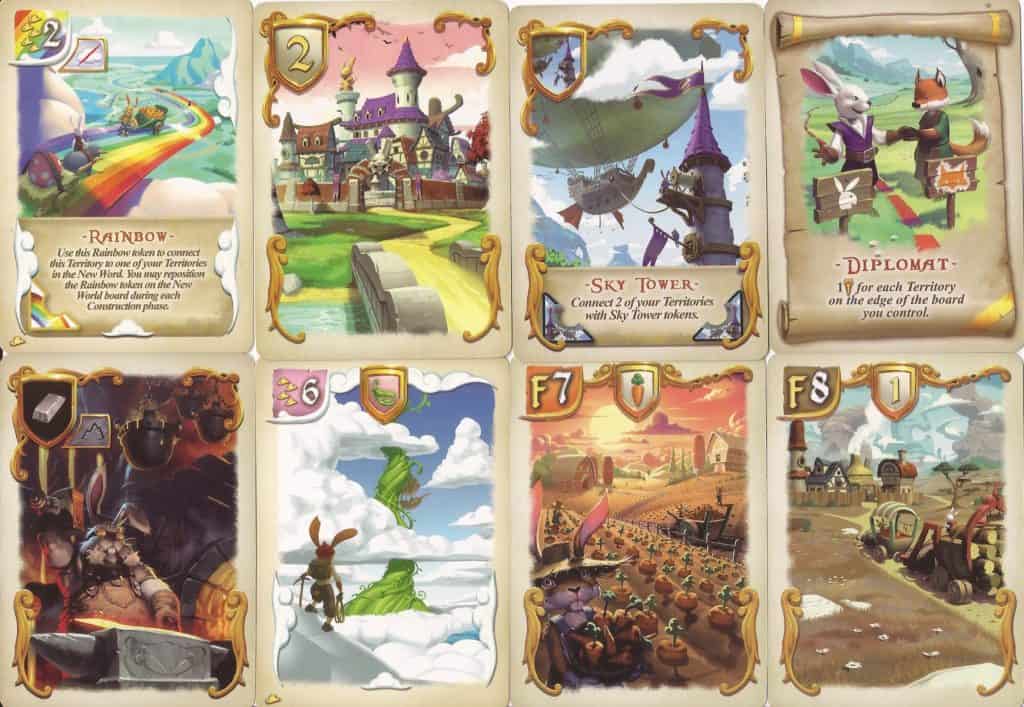
The Great Cloud is absolutely loaded with Wondrous Resources, making it an ideal environment for building huge fiefs. It even has a couple of Rainbow Bridges built in that you can use to connect with your ground fiefs (though Sky Towers can fill in if you don’t snag either of them).
This abundance of desirable resources bolsters the Trade Score strategy too, allowing you to rapidly stack up multipliers if your opponents aren’t paying attention.
Chimneys can also bolster groups of small ground fiefs in a big way, as long as you can combine them with one of the basic resource tiles on the Great Cloud.
Oh, and there are several parchments that care about what you have and where you are on the Great Cloud.

Older parchments like Diplomat and Explorer are also bolstered by the extra edges and corners of the Great Cloud board, so take extra notice of them too.
All of this makes the Great Cloud the ultimate support strategy, as it flows well into every other draft archetype. What you need is going to vary depending on what you’re doing in any given moment or game, but cards that work with it should always get a once-over, even if they don’t appear immediately useful.
Bunny Kingdom Gameplay Tips
Now that we’ve covered the 5 major draft archetypes, let’s talk about the gameplay of Bunny Kingdom itself. With only 4 rounds of gameplay, every card you select has the potential to have tremendous influence on how the game finishes, often far in excess of what you might expect.
While this can be explained a few different ways, the simplest explanation I find for why this is boils down to “Each card you take is one your opponent doesn’t get. Each card you don’t take is one they can get.”
And if your response to that question is “Well, duh!”, I don’t fault you in the least. But it’s the foundation for demonstrating exactly how important information is in this game, which in turn explains why the tips below separate good Bunny Kingdom players from great ones.
Pay Extra Attention to Each Hand You’ll See Twice
Each hand in Bunny Kingdom is going to begin with cards you clearly need above all others, but it’s also going to have its share of duds. Some duds can still be useful, however, so figuring out which ones are most likely to come back can be of great help when choosing what cards to draft until then.
You can do this a couple different ways. The first is simply assessing the relative power level of all cards in your hand. If you’ve got a hand with Luxury Resources, Wondrous Resources, powerful parchments, and territories, the territories are most likely to wheel back to you.
In the first round or two, power level may be all the information you have to go off of, so learning which cards are considered stronger than others is incredibly useful.
The second is to try and guess what your opponents are likely to take. If someone’s playing the Parchment game heavily, even weak Parchments are unlikely to come back. If you’re holding territories that will connect two moderate fiefs an opponent is building, you’d best grab them while you can if you need them yourself.
This also works in reverse. For example, if you want a high number Camp card because of a Parchment that cares about the number of Camps you have, your opponents are unlikely to know you want what is otherwise a relatively weak card because Parchments are drafted face down, allowing you to take two more urgently needed cards first.
Look for Signals From Your Neighbors
Each person at the table is going to have specific strategies they’re pursuing, but those may not be locked in until round 2 or 3. While quickly figuring this out is good for guessing what will wheel, it also will help you determine which strategies are open – especially if you need to pivot or add a new strategy to your game plan.
Since most information in Bunny Kingdom is public, you’ll find this to be considerably easier than something like a Magic: the Gathering draft, where all information is private. All you need to do is pay attention.
If you and an immediate neighbor are clearly pursuing dominance of the Great Cloud board, and you aren’t getting enough cards to support it, this is a sign you should consider shifting strategies. This can also be true if nobody is pursuing your draft archetype and the cards you need simply aren’t being dealt, but you can always pivot back if that changes.
On the other hand, if you’ve seen multiple hands where your opponents aren’t picking up Treasure Cards and are clearly passing them to you, you’ve likely got the all-clear to start picking those up – especially if you’ve already got a card like Treasure Guardian in your Parchment pile.
Do the Math Before Picking Your Cards
If a hand has 6 cards you’d like to draft (which happens a surprising amount of the time), it’s time to get out the calculator to see which ones are going to give you the most points. In many cases, the cards you should take will become immediately apparent after a moment of review.
For other cases, you’ll also need to consider the future potential of what a card is worth too. Fisher King might be worth nothing now, but if you pick up 2 more territories on the water for your fief, it suddenly becomes worth 20 points.
Is that risk worth giving up the guaranteed 10 from cities you have in play right now from Burgomaster, knowing it could scale higher but likely won’t reach 20? Is there enough time to reasonably produce 2 more Fish?

This is where thinking a few steps ahead comes in handy, as doing so can help you decide whether taking 2 extra fish would be detrimental over other cards. It probably isn’t if you’re building multiple fiefs or collecting Parchments, but almost certainly is if you are building a giant fief that already has fish.
Will that detriment be worth more or less than 10 points? Answer that question and you will figure out whether the risk is worth the potential reward.
Play Your Own Game
Keeping your cool and rationally thinking about each card you draft is integral to dong well in a game of Bunny Kingdom. You want to be paying attention to what your opponents are doing of course, but keeping a primary focus on the plan you think will win the game will prevent you from taking unnecessary cards.
As you get better at card evaluation and calculating the math of both the cards you take and the ones your opponents will be taking, you’ll be able to stray from your plans a little bit, as taking a less optimal card for yourself in exchange for costing your opponent a lot of points, also known as hate drafting, can be a very good play.
Hate drafting is exceptionally difficult even for seasoned pros, however, as your information is never fully perfect due to Parchments. Additionally, the information you’ll need to make an accurate call in complex situations is often only available in rounds 3 and 4 – the earlier in the game you hate draft, the greater your risk of making a significant error.
Know When to Hate Draft
While your game plan should always be your primary focus, sometimes you need to make a sacrifice in order to keep an extremely valuable card out of your neighbor’s hands.
In later rounds, you can often run the numbers and make smart decisions regarding moderately or situationally powerful cards, but some cards are just so strong that taking them out of play, even if they don’t help you, is simply the right play.
Luxury and Wondrous Resources represent multipliers for fiefs and Trade Score, and their double-duty work is almost always worth a minimum of 20 points, and often far in excess of that in the right hands. You can almost always harness some benefit from these cards even if you aren’t building large fiefs.
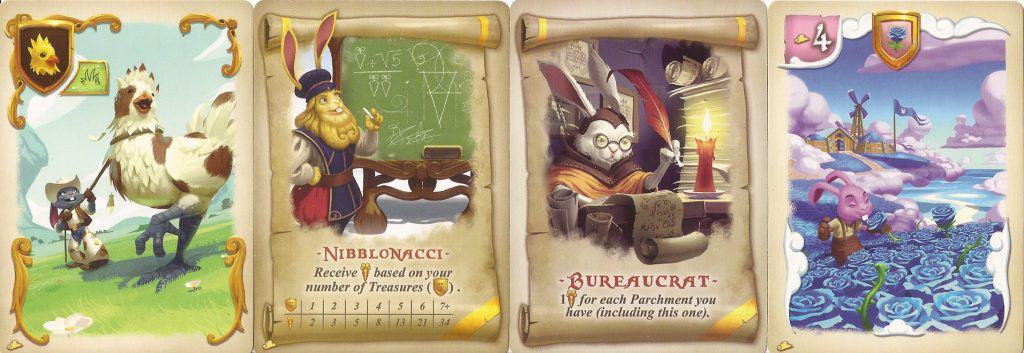
Nibblonacci is an example of a situationally powerful card, but it is surprisingly easy to snag 6 or 7 Treasure cards to score an insane kicker on top of the points you’re collecting from your Treasures, as these tend to go under the radar.
Bureaucrat is one of the strongest cards for the all-in Parchment game, but everyone collects at least a few Parchments throughout a game of Bunny Kingdom so at worst, it will still be an average card for you, while keeping roughly 20 points out of someone else’s hands.
Is Bunny Kingdom a Good Game?
Absolutely. Bunny Kingdom‘s rich strategy and easy to understand gameplay are going to deliver big fun for anyone roughly 10 years of age or older, making it a stellar addition to board game nights with 2-5 players.
As was mentioned earlier, playing with the Bunny Kingdom: In the Sky expansion is strongly recommended, as it balances overpowered strategies from the base game and brings the number of primary draft archetypes up to 5, ensuring each player, even in a full game, can pursue a fully functional game plan.
While 5 draft archetypes may not seem like a lot to learn and master, many of the cards you’ll be drafting can support multiple strategies in very different ways, increasing both replay value and encouraging creativity as you explore all the different interactions among the cards.
So what are you waiting for? Those Golden Carrots aren’t going to harvest themselves!
Bunny Kingdom FAQ
What is the difference between a Territory, District, & Fief?
- A Territory is any individual square on the New World or Great Cloud board.
- A District is any connected series of squares (minimum 2) with your bunnies on them.
- A Fief is any number of connected Territories (minimum 1) with your bunnies on them.
For pictures and additional clarification, you can refer to the section where we discuss Trade Score.
How Do You Play Bunny Kingdom with 2 Players?
During 2-player games, both players have a hand and a Reserve Pile (10 cards each in the base game, 12 cards each if playing with the expansion).
When drafting, both players begin by drawing a card from their Reserve and adding it to their hand. After that, they draft 1 card, then discard one card from their hand face-down before passing their hand to their opponent. Repeat this process until all cards from both piles have been drafted or discarded.
What Card Sleeves Do You Use for Bunny Kingdom
I use Dragon Shield’s Clear Matte sleeves (standard size). They fit in the box without having to buy a special insert, rarely tear or break, and have an excellent shuffle feel.
How Do Ties Work On Cards Like Matriarch?
Per Richard Garfield himself, if you are tied for the most of something, like Territories on Matriarch, you do not score the points.
How Many Cities or Building Tokens Can I Put On a Territory?
There can only be up to one city or cardboard token on any given territory at a time. If one is already on a territory, another may not be placed.
Other Articles You May Enjoy
- How to Win at Pandemic Board Game
- Settlement Placement Guide Catan
- Mansions of Madness vs Betrayal at House on the Hill
- The Red Dragon Inn’s Best Characters
- Ranking Every Lord in Lords of Waterdeep
Braden is a founder of Assorted Meeples and has been a gamer & writer with a vivid imagination all his life. Don’t believe us? Check out his excitement when meeting Goosebumps author R.L. Stine as a kid! An avid Magic: The Gathering spellslinger for over 15 years, you can always convince him to shuffle up for a game (or three!) of Commander.