
When I started playing games we had a couple of them and that was it, now I know I am not that old but that kind of a story is not where I am going with this. I played as a kid, all the basic staple games everyone knows. Then in junior/high school I played Risk, Axis & Allies, Scotland Yard, and others of that generation and flavor.
In my late 20’s I got introduced to Settlers of Catan by playing it with a bunch of retired guys at a Target cafe. They were great playing several times a week and helping me get better at it by crushing me every chance they got. And being really great sports about it.
In playing with them I had an idea for a game that I pursued down the rabbit hole that is game creation. An awesome and amazing world of creative engineering that leaves one wanting to keep going and also frustrated as hell when you cannot for the life of you make the confounded thing to work like you want it to.
But that is a rabbit trail that I am not going to go chasing at the moment in the article.
What game design truly introduced me to was the board game industry as the huge monster that it was.
Games of all kinds suddenly came onto my radar and while I want(ed) to play them all, I am a father of four with college debt and a mortgage as well. My game budget was pitifully small, that could also be read as non-existent at time.
My wife likes games but was willing to indulge me in buying things that I like so I started collecting pretty slowly and with only extremely solid games at first.
Now flash forward about 3 years and I have a collection of 50-60 games precariously balanced on top of the bookshelf beside our bed safely out of reach of our 4 younger children who would love to play with all our games when we are not looking and even when we are looking.
Play also looks like possible damage and lost pieces. I am not a materialistic person but I do like to keep what I have in good condition.
So there my collection grew and waited for its chance to pounce on us in our sleep in a horrible avalanche of cardboard, cards, and plastic.
A year ago my wife and I were given the opportunity to buy a new house and with it the ability to actually display my games properly, and I leapt at the chance. I had seen the IKEA Kallaxes that a lot of the board game industry swears by, they look like THIS.
While they are nice, everyone seemed to store their games vertically and that was something I didn’t want to do for all the reasons. Box Throne came out but my dear sweet baby Jesus they were cost prohibitive for me.
They are really amazing products that answer a large problem of most game collectors: how to store safely and yet have that storage system also enhance the display quality of your collection.
Then enter a video of a guy who built his own knock of Box Throne. Needless to say my eyeballs were stuck to the screen during it, I will gladly give that link and send you to see it:
No this is a very basic construction and while solid, especially after you add the weight of the games, I wanted to go a little beyond and make mine really nice. I didn’t spend any more money on my shelf then he did, I don’t think.
That is long preamble before I get into the actual build process of this game shelf. I will mention that I don’t have a wood shop that I can use, so you are going to see me working in rather abstract places to get the job done.
Any place can be a good place to get work done.
DIY Step by Step Guide to Building Your Game Shelves
Now I will give the warning I would give anyone I don’t know around tools. The tools that I used are machines, they are not alive and will not register that you are alive either, nor will they care. High power tools of any nature are to be used with caution and proper understanding of how you use them.
The Tools I Used
- Chop saw
- Circular saw
- Wood Router
- Drill
- Impact wrench
- Sander
None of them are hard for me to use as I am practiced in their use and function. Again make sure you know what you are doing and follow all safety precautions while using tools. No one wants to explain to his/her friends why they have stitches if it can be avoided, or possibly even worst.
This is not a terribly hard build, especially if you stay to the video, if you know a little more you can follow along with me or if your skills are greater than mine feel free to improve upon what I have done.
Step One: Purchase All the Wood
So the first thing you will need to do is purchase the wood. I am a bit of an idiot and forgot to take a picture of my stack of uncut wood that I started with.
But it was really just fourteen 1×3 boards.
Yes, I went with thinner wood then the video to really go for the Box Throne look. When buying the wood, you are going to want to be extremely picky about any warp in the wood of any kind.
I thought I did a good job of selection but I got some bad ones that made my life quite a bit harder then it should have been.
Step Two: Start Cutting Using the Chop Saw
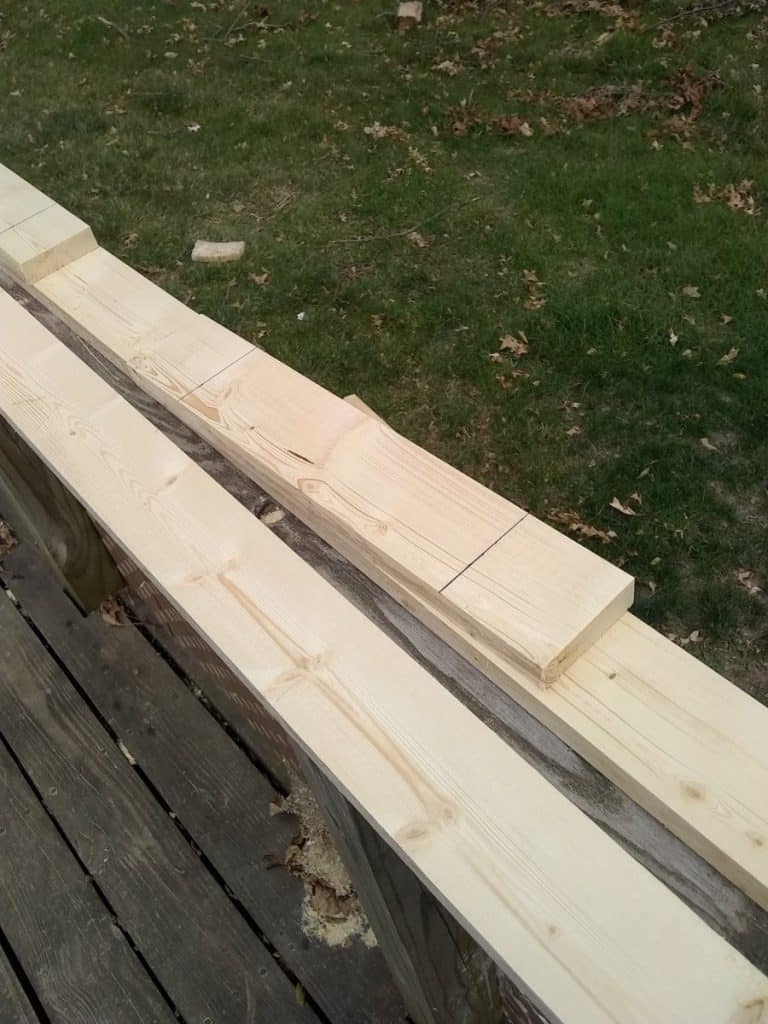
Next part is cutting the boards from the starting 8 foot down 14 inches. This is where the chop saw came in.
Do yourself the favor of taking the time to mark every board before you start cutting.
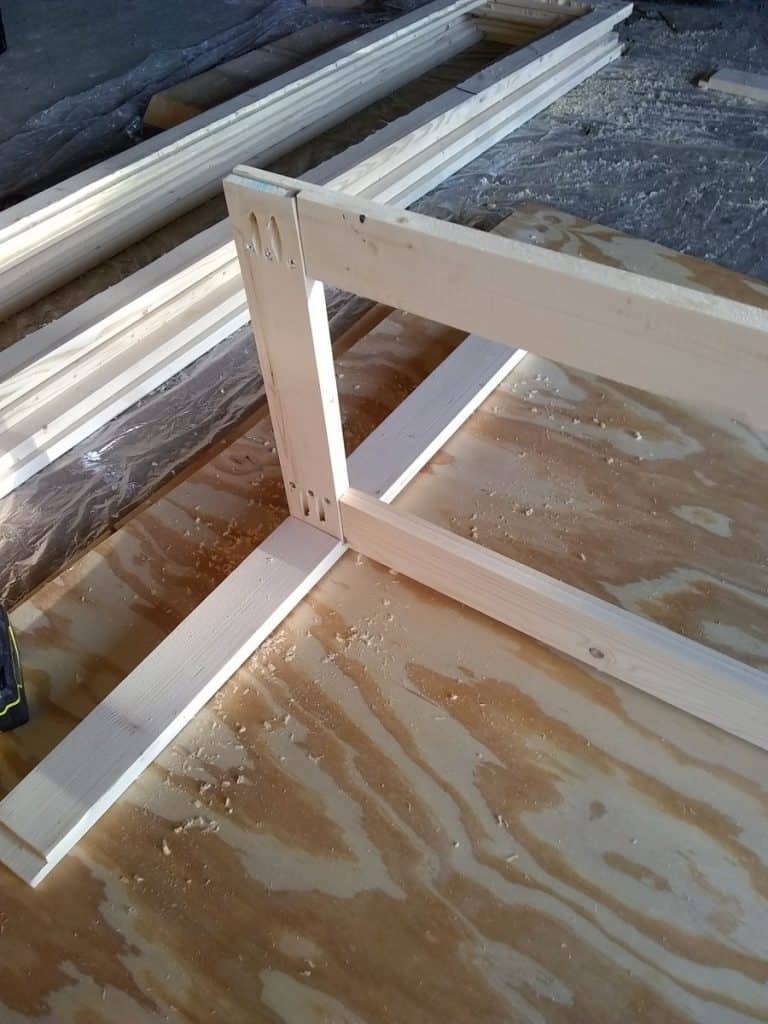
As you can see in the picture two boards are needed to make one upright frame with the two little boards used to create the horizontal supports. At this point if you wanted to, you could just arrange the pieces into a rectangle and screw it together.
But I wanted to take it to another level and decided that if I cut and insert the pieces into the gaps created I could take my cabinet to the next level and make it solid. This is where the router came into play.
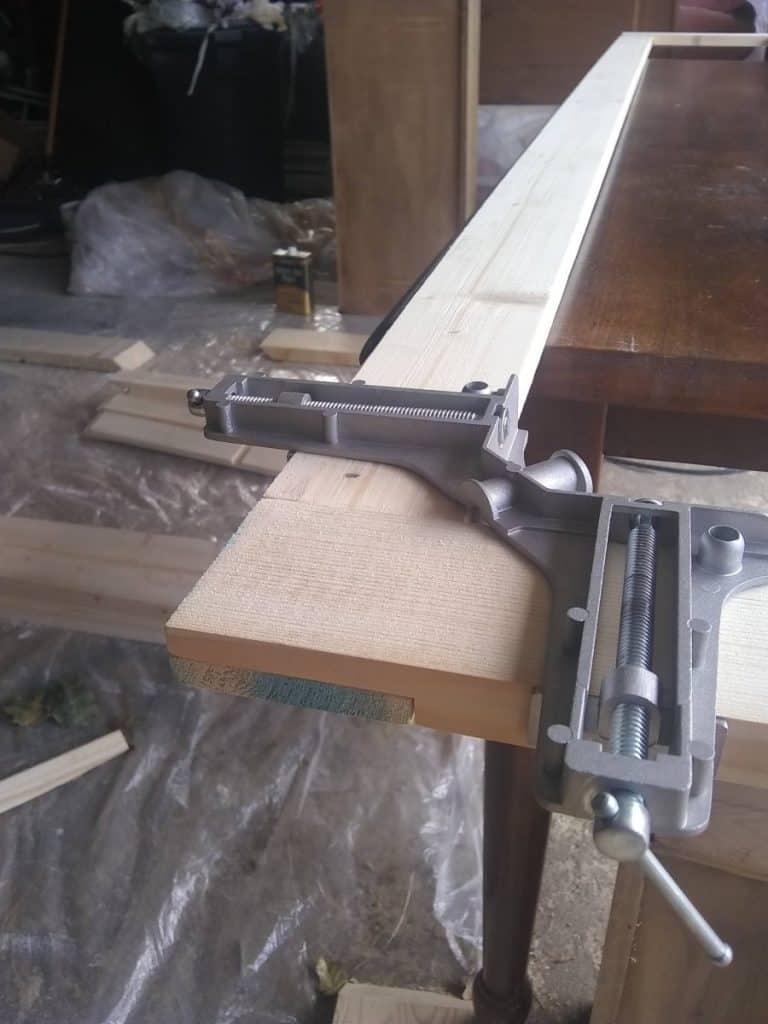
Step Three: Use the Router (or Table Saw with Dabo Blade)
Now the better tool to use at this point would be a table saw with a dado blade on it, which is designed to cut grooves into the piece as you want it to.
Also I used the router free hand so you can see in the picture the drawn lines to “guide” my hand. I am not the normal person (Editor Note: Understatement) and I have the strength to hold that happy little bastard in place as it tries take off like a drag racer down the strip.
IMPORTANT NOTE: As should be obvious at this point we here at Assorted Meeples are not licensed construction professionals, though most of us are really handy with a wide variety of tools. Phil is sharing how he constructed his gaming cabinets. Always be safe with power tools and if you’ve never used them…pay a buddy who is really handy to do it safely.
This is what all your pieces are all going to look like when you are done with the router.
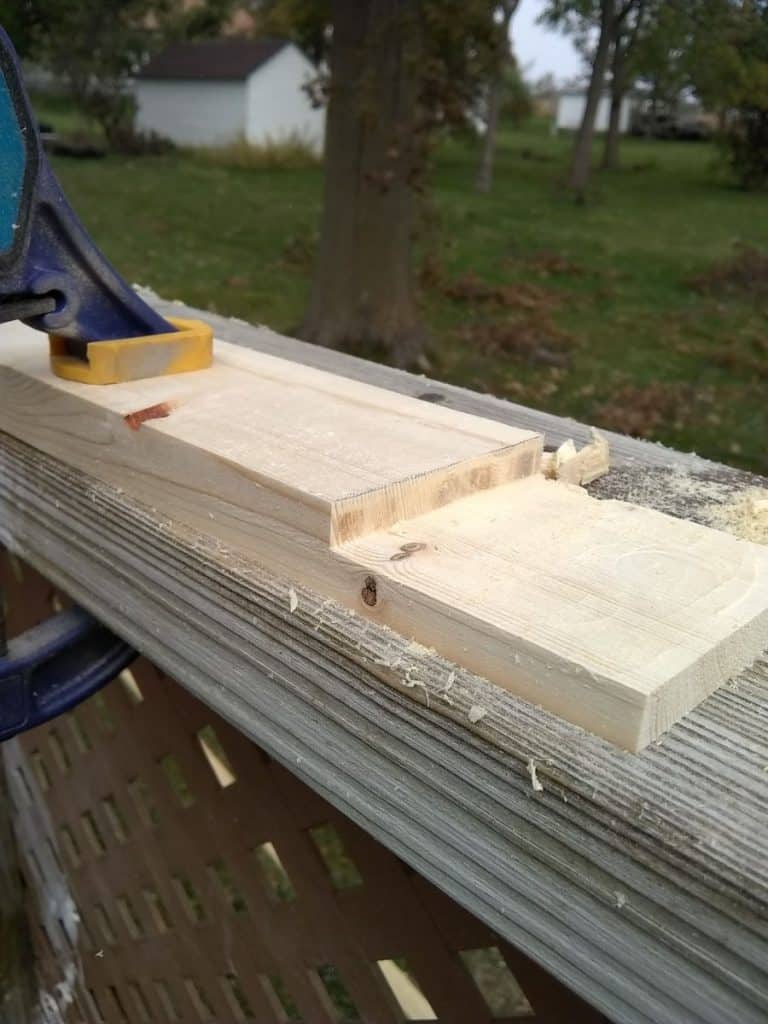
This is how both ends should look. A note on this make sure your pieces all fit together snugly and a flush like it is one board thickness, this took me a few tries to get right.
Step Four: Get the Precisely Measured Cuts Done
The next part that I wanted to do was not have my front and back just stuck on to it.
- So you need to cut your boards to the length needed, 14.5 inches with .75 inches on the ends and in the middle so the board is 31.25 I think is the total (it has been awhile since I was cutting it).
- Then you mark your .75 inch edge to guide your hands.
- From that line measure out a 14.5 space from each side and that should leave a .75 inch in the middle to router through.
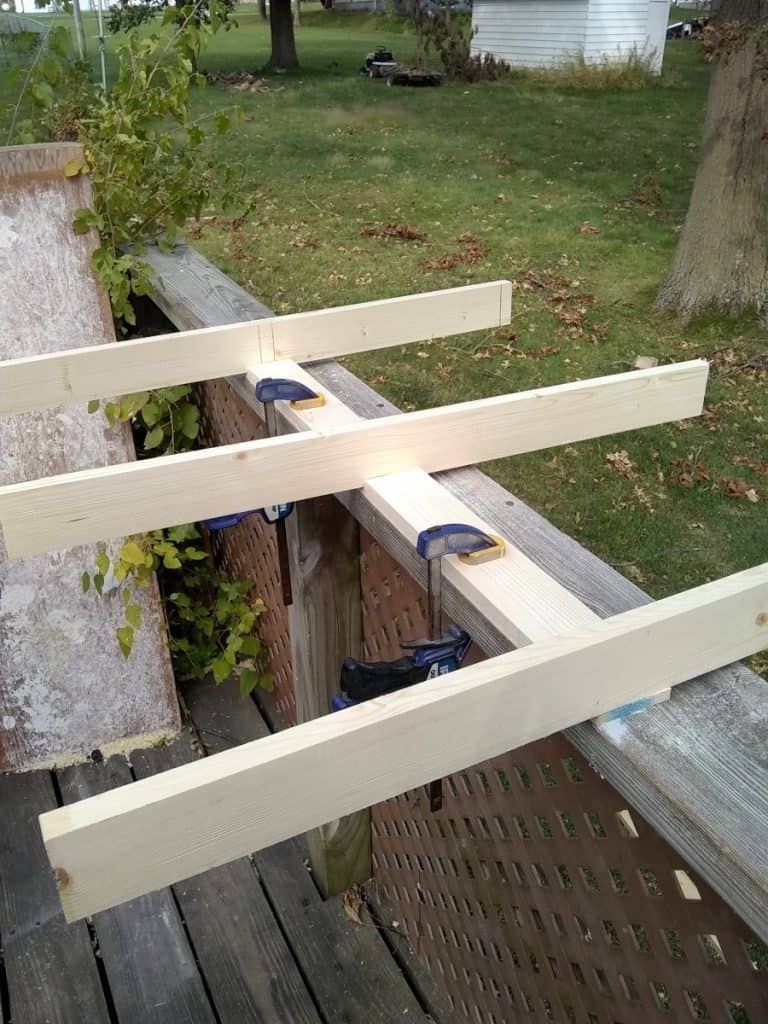
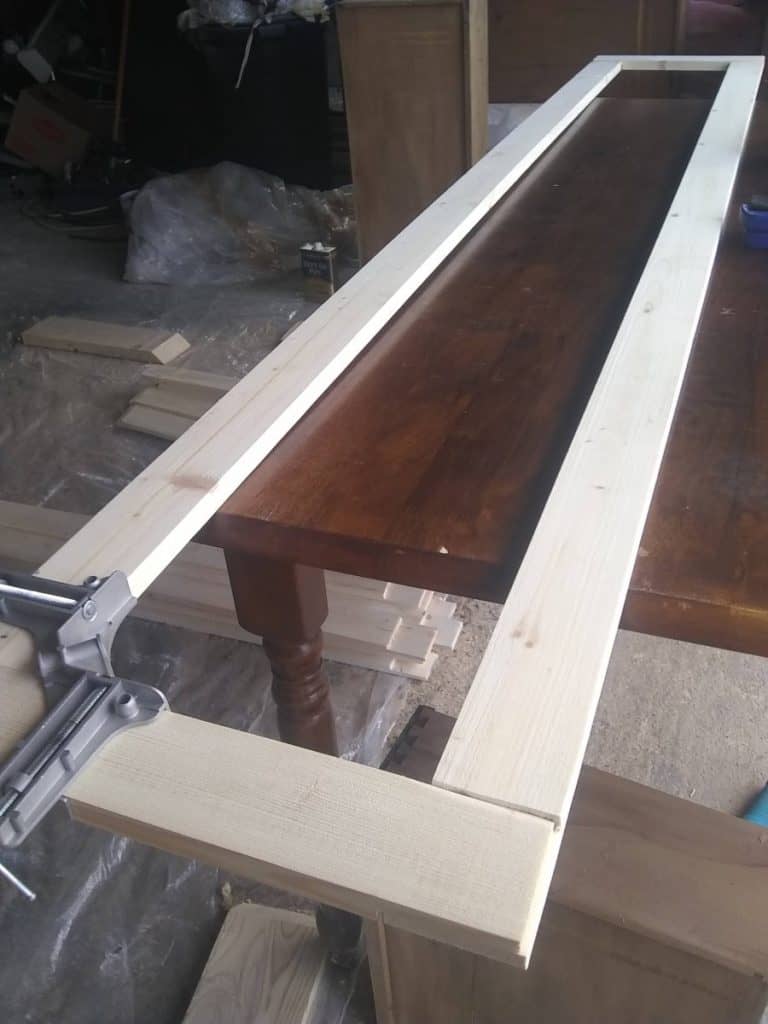
This is a picture of it done with the uprights put in place to show what it should look like when done:
So this is just the first part boys and girls.
It was fairly easy and straight forward with no surprises for me as it all went according to plan for the most part. I had one failure where I had to stop and realign what I was doing.
Step 4B: Trouble Shooting If You Make the Same Mistake as Me
At that point was that I wanted to put in side panels and a back to really solidify the frame and make it look like a true bookcase rather then the Box Throne it was trying to imitate.
My first idea was a to router a strip a 1/4 inch down the rails to slide my panel of plywood into, but I quickly found that I lacked the controls necessary to get that job done within any parameters that I could justify as correct.
So I scraped that idea and moved on to the next portion of this project, the actual building of it.
Step 5: For the Love of God, Do the Sanding Now!
A last thought, this is a great time to give all your rough edges and such a good sanding before you make your life infinitely harder by trying to sand after you have it all put together.
Step 6: Clamp, Glue, & Screw
So you got all you fun little pieces all stacked up just waiting to be put into place. Now this is where you really want a clamp at each corner to hold it all together and wood glue as well as the screws but…. You know what? Hold my beer.
I used one clamp and no wood glue, but the screws I got were the right size so that was a true bonus. Now be very careful if you are doing this the way I am (including using very cheap wood for cost reasons) as I had a hell of a time with my wood splitting even with predrilling my holes.
Other than that this step is really just taking all my pieces and making them stay together very nicely.
One thing I did wish I thought about before I started with the screwing of things is that I was going to be using pocket screws to hold the front and back boards on and so I had to get rather creative after the fact with adding those pocket screw locations.
I will show a picture of that in just a second when I am at the place. If you are doing just one of these you should now have a minimum of 2 frames ready to be joined together, I had 6 as I was building two units with to shelving bays each because my collection is already at 50-60 games and I needed the space.
Here is where I had a thought as well as to how to get my side panels slid in as I really wanted to. What I did was to router a line along the side about a half inch into the inner side of the panels I knew where going to be on the outside. Just deep enough that my sheet of plywood would sit flat on the inside while being recessed on the outside.
As I said I did all of this routering free hand with out the controls of guides or rails of any kind and on this part of the project I just eyeballed it know that these sins would not be seen by any but the most inquisitive person out there, though I am just leaving it all out there in this article for everyone to see.
I remember in high school, the router I used a guide rail that made it much easier to use but as I was borrowing it from the wonderful wood worker Callahan.
And the fact that I was not using a dato blade because I burnt up my table saw cutting my bar countertop into shape, I am not arguing too much at there results that I achieved.
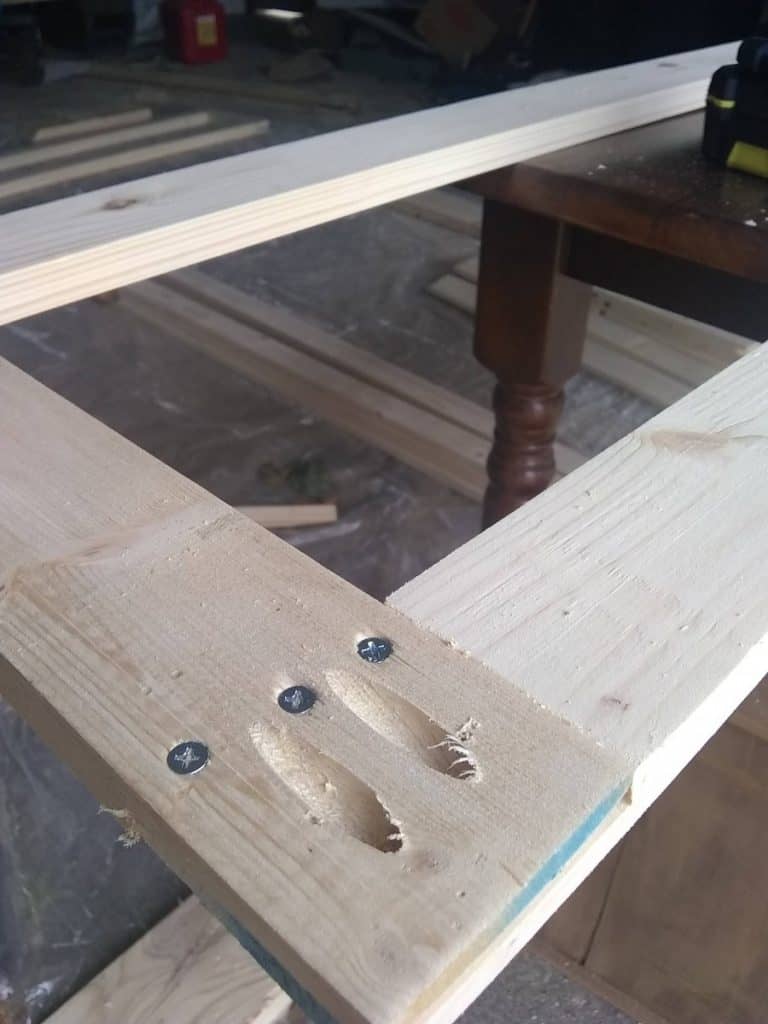
The finishing touch on the frames that I wanted pretty easy though made harder by the fact that I didn’t plan on doing it before hand and had to retro actively put the pocket recesses in after the fact. A Kreg pocket screw jig is an amazing tool that after using on my L shaped counter and on several projects now I cannot recommend enough. This little tool can really make the difference in how your final projects look with the ability to hide all your screw heads from view.
Here is a quick picture of the pockets screws in place right before I was ready to start attaching all the frames together to from my shelf boxes.
So I do have to admit that I had the hardest time with attaching the frames to my cross bars as I could not find the best length of screw to use in this situation.
In part because I made the board that I was going to be screwing into so thin, which meant that I went through my board face with two screw lengths and did not get any grip with the next size down.
Which is frustrating as hell when you are just trying to get it done so you can get it out of your garage so you can move on to your next project and get extremely valuable floor space back in your bedroom because it is still the safest place in your house from the terror of inquisitive hands.
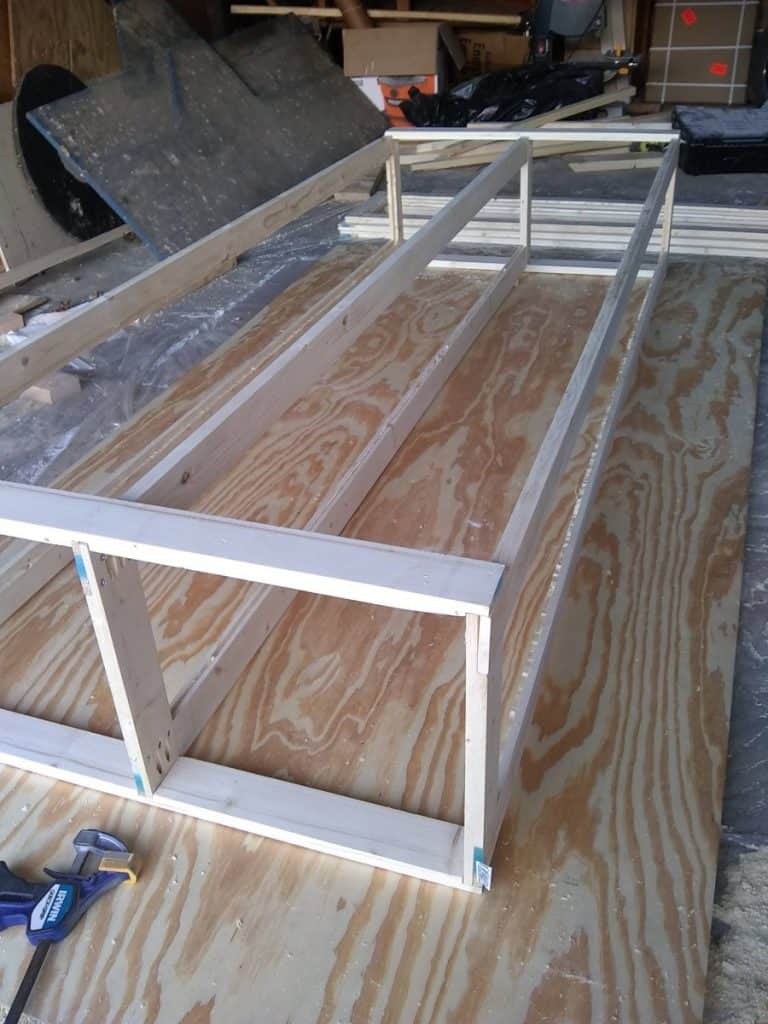
Step 7: Slide Frames into Place for Cross Bars
The next part is pretty easy when you have the right materials for the job.
- Slide your frames into place on your cross bars
- Square your stuff up
- Screw it down
Do this with all your frames and cross bars on both the front and back being careful as you move them around as they are a little delicate at this moment.
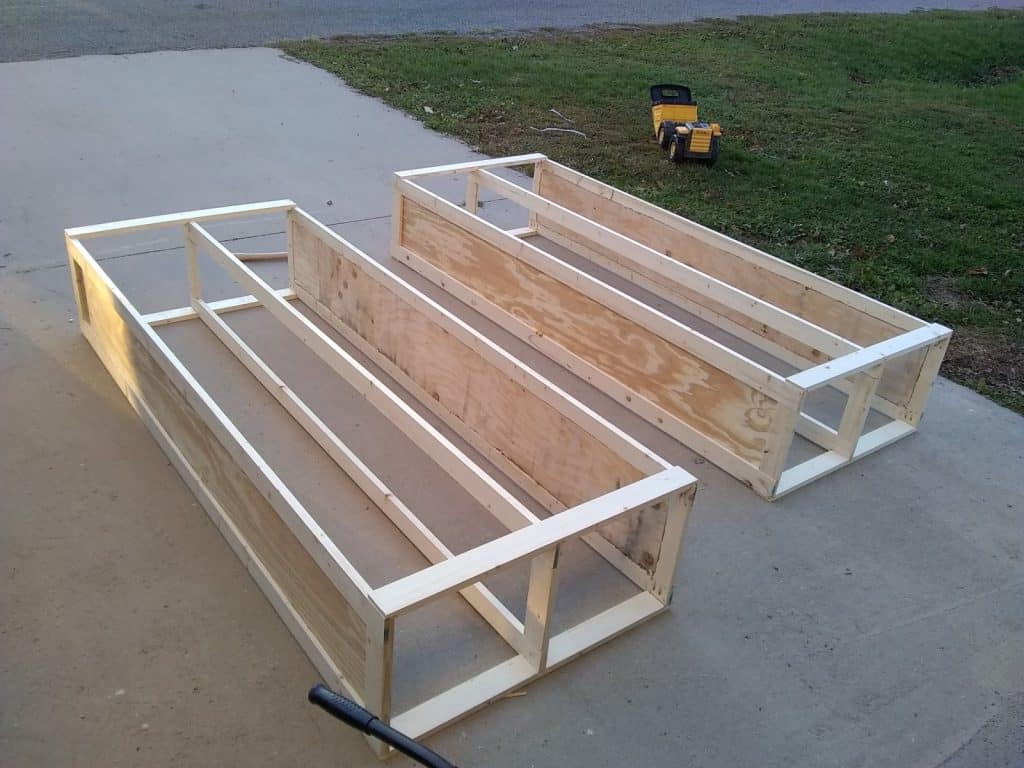
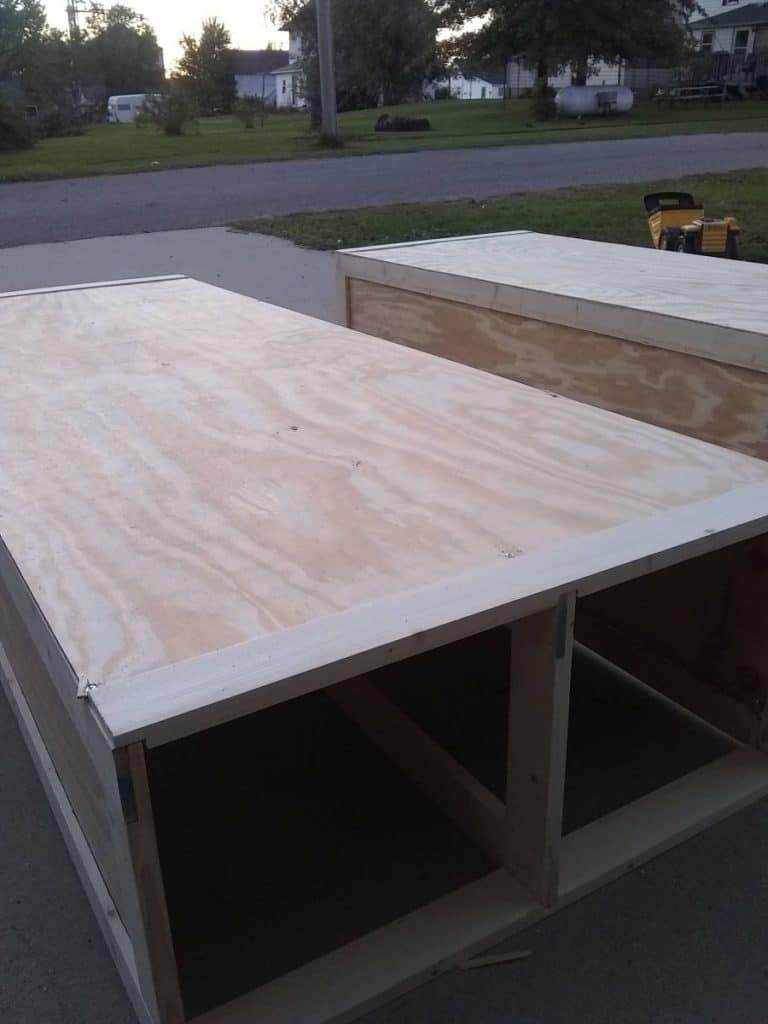
Once you have all of these done and in place, if like me you want the side panels now is the time to measure the space that you need and screw them into place.
The back panel I chose to measure all the way to the outer edge of the frame. Securing those down will turn a possibly wobbly frame into a very tanky box for you to feel secure about your games sitting on.
At this point I really sat back and looked at the work that I had done and was extremely satisfied by what I had done and how much I had accomplished over the course of a week or two a hour or two at a time (yes my life was that busy the was all it would allow for).
At this point you are either going to be happy with how your work turned out or ready to throw it in the burn pile with the happy glint of arson in your eyes.
Step 8: Sanding, Part 2
Again this is the time for the sander to attack in full force. This is prepping for Step 9.
Step 9: Paint or Stain Depending on Your Preference
You are either now ready to stain and seal or paint it. I chose to paint mine an ivory color my wife didn’t want dark heavy stained wood, nor did she want just a pure white bookcase in her living room glaring and demanding all the attention in the room.
I agree with her and not just because like sleeping in my own bed as well.
The painting wasn’t hard as I thought of using our sprayer but that wasn’t working right for some reason. So I pulled out the brush and roller to knock it out and it didn’t take long at all. Two coats of paint later and I was looking really good and was quite happy with the results of my work.
Step 10: Install the Rails
One of the last steps is the rails. This is a very important step as these need, I repeat, NEED to be level with each other, not just close but actually level.
This is what all the shelves will sit on and either make or break whether your collection looks good or like they were just jammed in with no cohesive structure what so ever.
Take your time here and do it right. The following picture shows the rails in place over the freshly painted pieces.
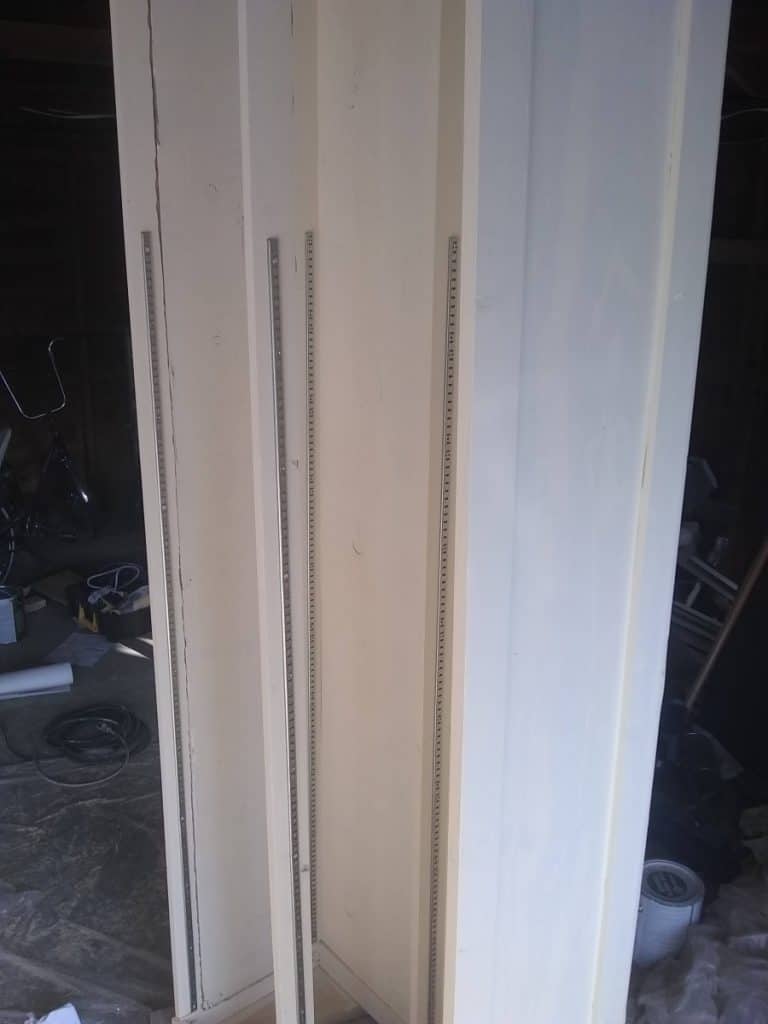
That’s a thing of beauty right there.
When I redo these shelves out of good wood and applying what I have learned from this one is that I would make all my frames seal them however I am going to, attach my rails, and then assemble my cases because those rails in the back were terrible to screw into place.
Step 11: Put in the Shelves
The final bit is putting shelves in and stacking your games on them which in its own right is a game of Tetris and tough decision of where what game goes.
Here is the very start of my collection going into place. Instead of wire racking I chose to use mfd board cut to size because glass and/or plexiglass were out of my price range for the moment.

Enjoy Your New Game Shelves!
I really hope this helps guide you through making your own shelves to proudly display your games around your house on something that you made.
Kallaxes are good but I am too creative to be happy with those and I like my games on their sides.
Century and Villainous are special cases as their inserts are made to go on their sides and not have to chase down all the components and cards the next time you open it.
Keep on gaming guys!
Board Game Articles You May Enjoy
- God’s Forge Board Game Review
- Is Mage Knight Hard to Learn?
- Mice and Mystics Board Game Review
- Red Dragon Inn Strategy
- What Happens When You Die in Munchkin?

Proud to embrace the locally created moniker of “Corrupt Overlord” from one of the all time great Lords of Waterdeep runs, Shane is one member of the Assorted Meeples crew and will be hard at work creating awesome content for the website. He is a long-time player of board games, one time semi-professional poker player, and tends to run to the quirky or RPG side of things when it comes to playing video games. He loves tabletop roleplaying systems like Dungeons & Dragons, Pathfinder, Werewolf, Fate, and others, and not only has been a player but has run games as DM for years. You can find his other work in publications like Level Skip or Hobby Lark.