
Variable menus, new types of cards, and familiar card drafting come together to make Sushi Go Party! an enticing upgrade to the standard Sushi Go! tin. While the base Sushi Go! game is great (check it out on Board Game Arena if you haven’t treated yourself yet), the party edition adds layers of depth and flavor that will keep you coming back for more.
We enjoy Sushi Go Party! so much, it was streamed 8 separate times after just over a year of in-person board game nights on Twitch. It’s that fun, and easy for newcomers to pick up on the rules when they join us.
While being an easy game to understand, due to the cards and board both telling you what your various food items do, mastery of Sushi Go Party! is anything but simple.
There are several variables to consider when deciding how to draft your cards each round, including the points you’ll get in the moment, the points you’re potentially passing an opponent, the points you’re saving for dessert, and the points you can receive in future turns of the current round if specific items are passed to you.
See what I mean? That’s a lot to contemplate from seemingly straightforward and adorable food items.
Not to worry though – we’ll be breaking down the full menu, including promo dishes, to see which items are worth prioritizing for maximum points, and which ones you’ll grudgingly accept when the kitchen starts eighty-sixing entries from the menu.
How to Play Sushi Go Party
Player Count: 2-8
Estimated Play Time: 20 minutes
Sushi Go Party Rules PDF
At the beginning of a game of Sushi Go Party!, your players must begin by agreeing to a menu. Menus contain the following types of items:
- Nigiri (12 cards)
- 1 set of sushi Rolls (12 cards)
- 3 Appetizers (8 cards each)
- 2 sets of Special Dishes (3 cards each)
- 1 Dessert (10 cards total in 2-5 player games, 15 cards total in 6-8 player games)
Once your menu is decided, take all the corresponding cards, except for desserts, and form a deck with them. Then add the appropriate number of dessert cards as marked on your player board.
- 2-5 player games add 5 dessert cards to the deck in round 1, 3 in round 2, and 2 in round 3
- 6-8 player games add 7 dessert cards in round 1, 5 in round 2, and 3 in round 3
Once this is done, shuffle the deck and deal out a hand of cards to each player (exact number varies based on player count, refer to the rules for guidance).
Each player selects a card from their hand and sets it face down in front of them. Once all players have chosen, cards are revealed simultaneously, then hands are passed clockwise. Repeat the process until all cards are drafted.
Everyone sets aside their Dessert cards at the end of a round, only scoring these after round 3. All other cards score at the end of the round (except Uramaki, which can score during the round). Finally, collect all cards not set aside to reform the deck, add Desserts for Round 2, and start the process again.
The game ends after scoring is completed for Round 3, and the player with the most points wins!
House Rule: The Assorted Meeples usually pass counterclockwise in Round 2. This prevents players from purposely taking cards a specific neighbor wants for the entirety of the game (hate drafting), and forces all players to deal with 2 sets of drafting styles and priorities throughout the course of a game.
Sushi Go Party Card Explanations
Now that we know the deck’s composition and the basics of gameplay, we can focus on the menu items themselves!
This section will break down the different types of cards by their subtype (Nigiri, Roll, Appetizer, Special, and Dessert), explain how they work, and discuss how they should be prioritized based on the points per card (yay math!) and other miscellaneous factors they bring to the table.
For reference, here are some loose criteria for the different rankings each card type can receive:
- First Pick: These cards have the potential to score 4+ points per card, require minimal setup, and will generally be coveted by everyone at the table. You should take these first when possible, barring occasional exceptions.
- High: High priority cards typically score 3+ points per card on their own and/or require more setup time to fully maximize their benefits.
- Medium: These cards score an average 2+ points per card, have unique conditions for completion on higher point cards, and/or are good pickups if the right opportunities arise.
- Low: Low priority cards less reliably collect points (1-2 points per card), but can contribute a lot out of nowhere if the stars align. These typically require significant setup, and are frequently safe to skip if they don’t mesh with your other plans.
- Ignore: These cards are not good (1 point per card, if that), and should almost never be picked on purpose. Only take these if there are no other available cards that give you points.
Nigiri
Egg Nigiri
Priority Level: Ignore
Points per card: 1
Nigiri cards are the simplest cards in the entirety of Sushi Go Party! Pick one up, get points. Or a point, in the case of an Egg Nigiri.
These are frequently among the dregs of hands, and honestly, the only time you’re happy to take one is if it’s the last card passed to you in a round.
Beyond that, the only times Egg Nigiri matters is if you are completing a set of Nigiri for Pickled Ginger, or if no other cards in your hand will provide points. There are 4 of these among the 12 Nigiri cards, and while 1 point is better than nothing, it’s not anything worth chasing.
Salmon Nigiri
Priority Level: Medium
Points per card: 2
Salmon Nigiri sometimes gets a bad rap. 2 points isn’t amazing by any stretch, but it’s a reliable pick in the middle of a round, and is rarely a card you’ll regret taking once all the cool dishes are gone.
There are 5 Salmon Nigiri cards to be found within the 12 Nigiri cards, so it’s relatively easy to pick up 2-3 in a round if you want some solid points that don’t require any fuss or extra calculation.
Squid Nigiri
Priority Level: High, First Pick if Wasabi is on the menu
Points per card: 3
For such a boring, straightforward card, Squid Nigiri is incredibly dangerous in any game where Wasabi is involved. Wasabi triples the value of the next Nigiri drafted after it, and nabbing 4.5 points per card is some of the best point value per card in the game.
Even if you aren’t setting up for this massive bonus, unless you can account for at least 2 of the 3 Wasabi cards in your opening hand, taking Squid Nigiri first is a good decision as it might foil your neighbor’s Wasabi setup, and does so without costing you many points.
In games without Wasabi, the 3 Squid Nigiri cards are still quite good picks. 3 points without any strings attached is a good point rate for any single card, so nabbing these is always solid value.
Rolls
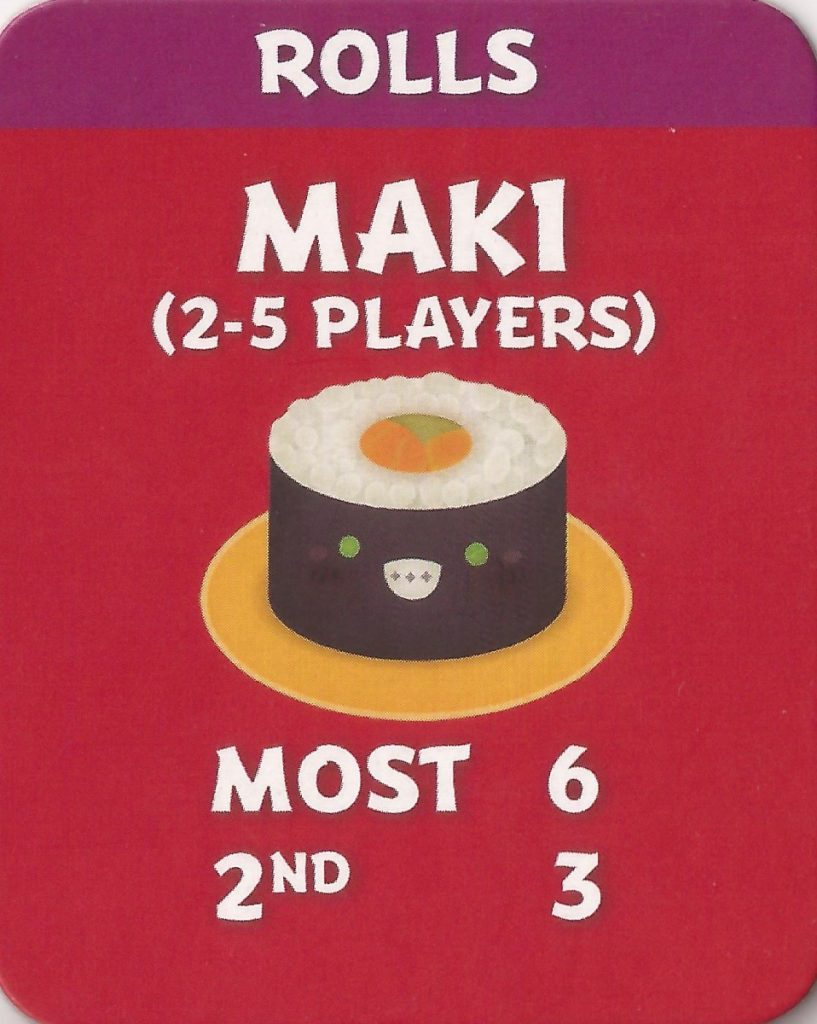
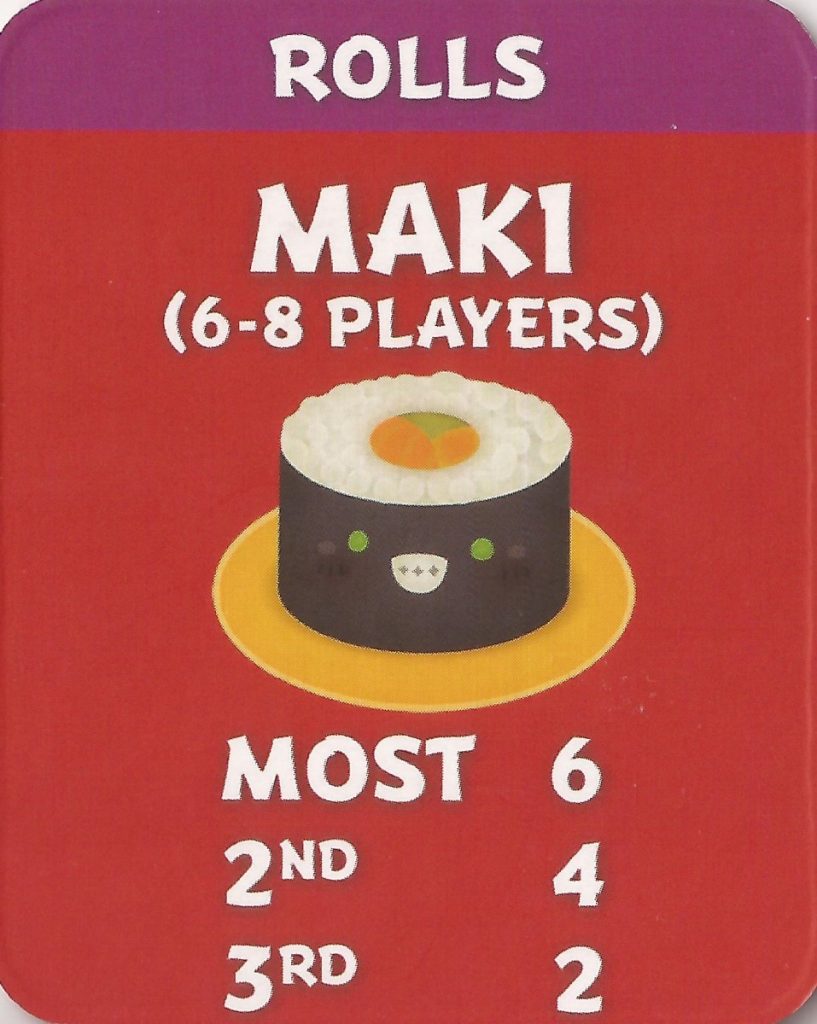
Maki
Priority Level: Low
Points per card: Varies, almost never exceeds 3
Maki cards come with 1, 2, or 3 roll icons on the top of their cards. At the end of a round, you tally who has the most Maki Rolls to see who wins 6 1st place points or 3 2nd place points. In games with 6-8 players, 2nd place earns 4 points, and 3rd place earns 2.
If multiple players tie for a ranking, all players receive the full points for that ranking, then the player with the next most Maki Rolls scores if 2nd and/or 3rd place points haven’t been given out yet.
I’d rank Maki as a card type to Ignore, but sometimes you can sneak in a ranking in the top 2 or 3 with a card or two, depending on your player count, so it’s just important enough to keep track of.
Don’t actively pursue Maki unless you can snag a couple 3 roll cards – it is super easy to overcommit and spend 4-5 cards on a mere 6 points here.
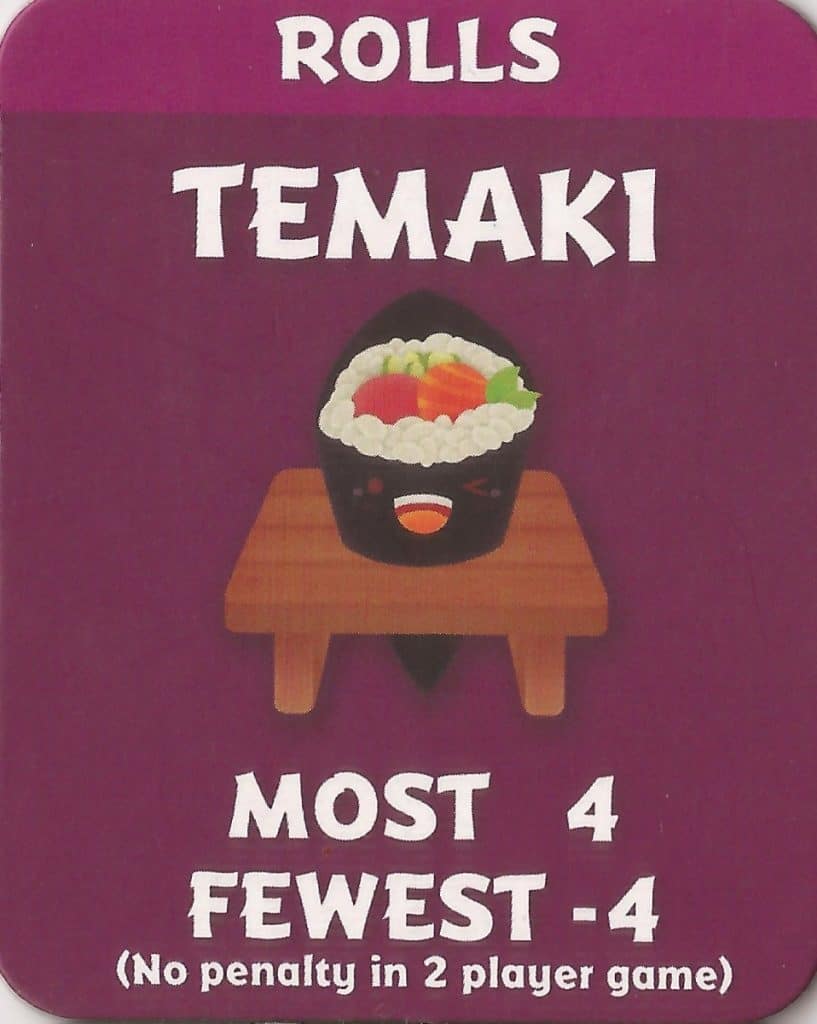
Temaki
Priority Level: Medium
Points per card: Varies
Temaki should command considerably more respect from you than other Maki rolls, as it not only rewards you for collecting the most, but actively punishes you if you collect the least.
This creates a range of up to 24 points throughout a game, as you can gain or lose up to 12 points.
Collecting enough to avoid the 4 point penalty is almost always a must, as getting socked with it in multiple rounds will tank your chances of winning. Accumulating enough to earn yourself 4 points is generally optional, as falling in the middle of the pack with 1-2 cards and going unnoticed by these vengeful rolls is still good value.
Ties assess the full number of points to all involved parties, including penalties, so if you find yourself behind on Temaki in the middle of a round, dragging someone down with you is a good way to soften the blow of losing 4 points.
Note: In 2 player games, Temaki does not assign a penalty, thus making it half as important point-wise. In these games, it’s safe to make Temaki a Low priority.
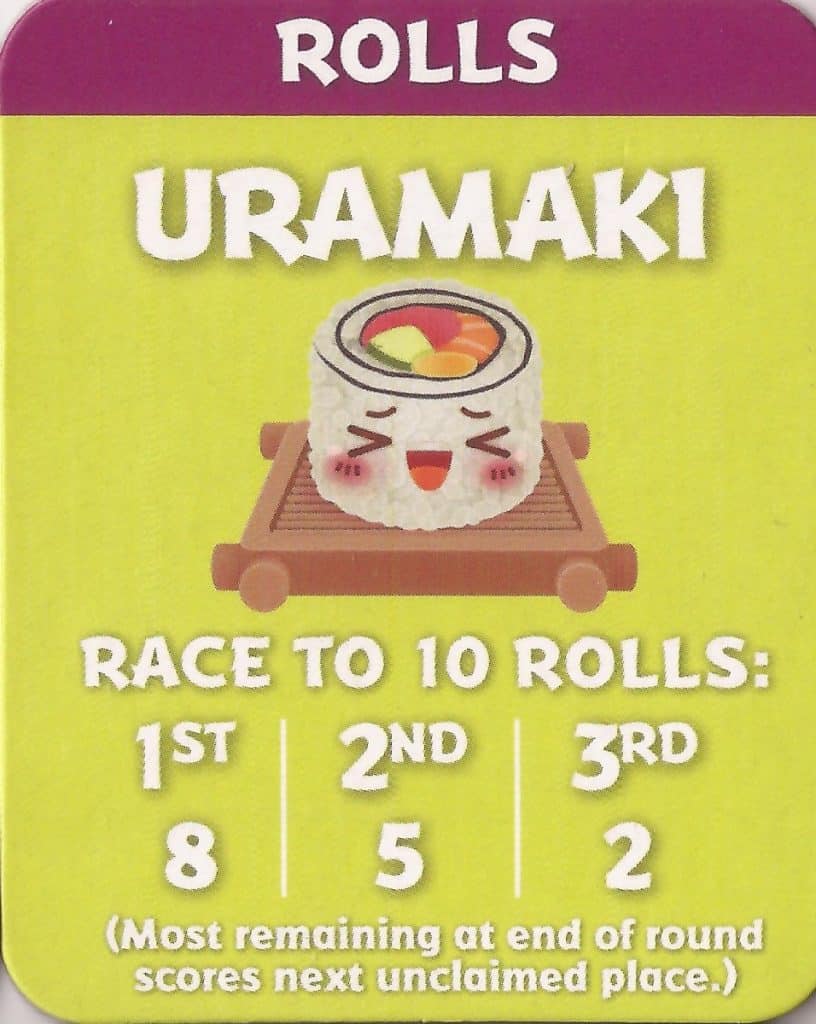
Uramaki
Priority Level: Medium
Points per card: Varies, tops out at 4
Uramaki starts a shot clock from the start of every round it’s in, as collecting 10 ahead of your opponents allows you to score immediately in a round.
Containing 3, 4, or 5 symbols on the top of their cards (4 cards each), here’s how scoring works:
- The 1st player to collect 10 icons during a round scores 8 points immediately, then discards their Uramaki cards
- The 2nd player to collect 10 icons during a round scores 5 points immediately, then discards their Uramaki cards
- The 3rd player to collect 10 icons during a round scores 2 points immediately, then discards their Uramaki cards
- If multiple players are scoring Uramaki at the same time, the player with the most rolls scores the highest available placement, then the player with the next most scores the next available point placement, etc.
- Example: Braden and Callahan are the first players to collect more than 10 Uramaki cards after picking their 4th card in a round. Braden has 13 rolls and Callahan has 12. So Braden will score 8 points, and Callahan will score 5.
- If players are tied for the number of rolls, they all score the full points for the highest available placement, then the next subsequent placement(s) is skipped.
- Example: Shane and Phil tie for scoring Uramaki first with 12 rolls. Each scores 8 points, then the next player to reach 10 will receive the 3rd place award of 2 points.
- If 1st, 2nd, and/or 3rd place have not been awarded by the end of a round, all players who still have Uramaki cards tally their Uramaki symbols, then the remaining scoring is assigned accordingly.
While ties feel complicated to sort out, they’re pretty easy to understand when they actually occur in gameplay. Naturally, scoring 1st through a pair of 5-count Uramaki is the most efficient option, but if you can get 1st place with 3 Uramaki cards, the value’s still pretty good at 2.67 points per card.
Once 1st place is scored, however, Uramaki loses much of its luster. Scoring 5 points with 2 cards is comparable to Tempura, which is above average and still passable, but spending any more than 2 cards is sub par unless you lack better cards to choose from.
The discard mechanic is chronically overlooked with Uramaki as well. The ability to score multiple times is a little overrated if you commit a lot of cards to the process, but if you can sneak in some extra points with a card or two, that’s very solid value.
Note: Discarding Uramaki after you score it may impact whether you get points for your Soy Sauce at the end of a round.
Appetizer
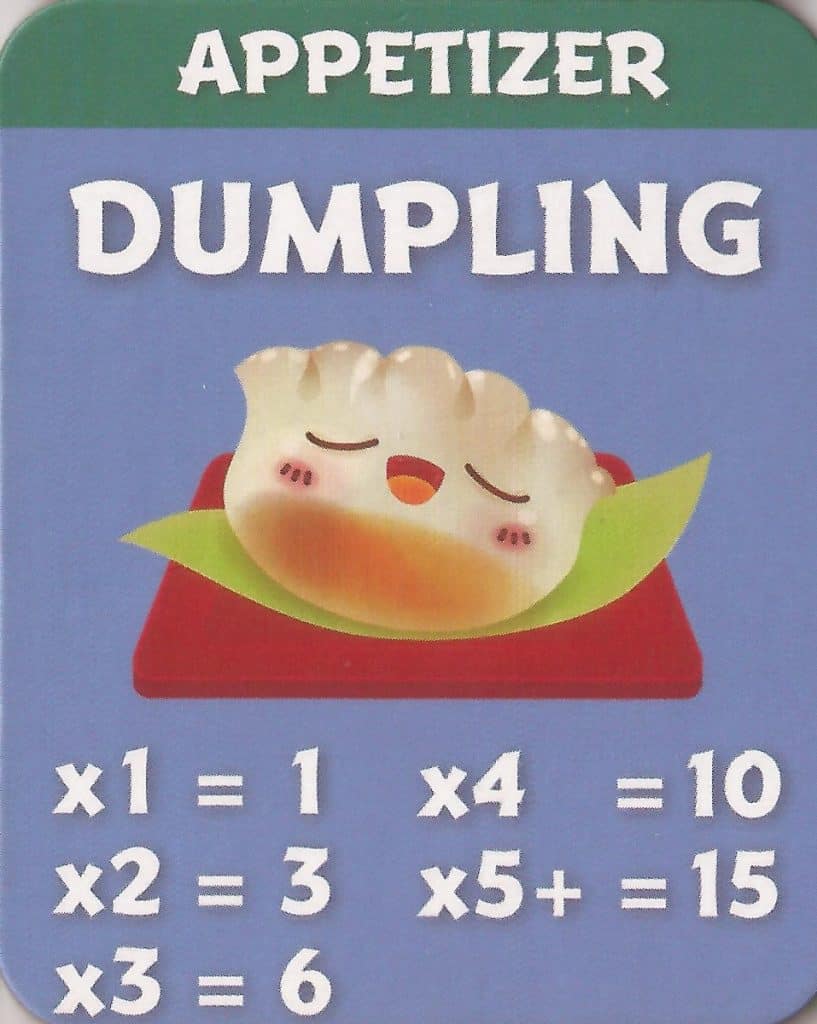
Dumpling
Priority Level: Low
Points per card: 1-3
Dumplings are usually a suckers’ game. Each one you collect beyond the 1st raises the point value per card by .5, meaning you need to collect at least 3 to score an average 2 points per card, and 4 to really make collecting them a worthwhile endeavor.
If the cards being passed around the table are more desirable at face value, you can often scoop up enough Dumplings to put in a decent showing. More often than not, however, you’ll get 3, and someone will warn your neighbors to stop letting them go by.
In short, Dumplings are fine for a long shot play that can slip under the radar, but why you’d prioritize them over better cards is often beyond me.

Edamame
Priority Level: Low
Points per card: 0-4
Edamame is probably my least favorite card in the game. It scores points for each opponent that has at least 1, capping out at 4. This is great value per card, until you realize it is sharing that value with everyone else who took Edamame. As a result, it’s often among the last picked cards in a round.
There are two ways I’ve found to take advantage of Edamame. The first is to purposely not take any. If you Ignore Edamame cards, its value is lowered for anyone who spent turns accumulating it. This strategy often works well in games with 2-5 players, especially if 2 people are accumulating it.
In larger games, your goal should be to accumulate 2-3 Edamame and ensure the rest get spread out between players so you get more points from it than everybody else. This is often easier said than done with savvy players, but nobody’s going to be willing to spend 2-3 picks on stopping you unless the other available cards are really bad.
Note: Edamame is not available for 2 player games.
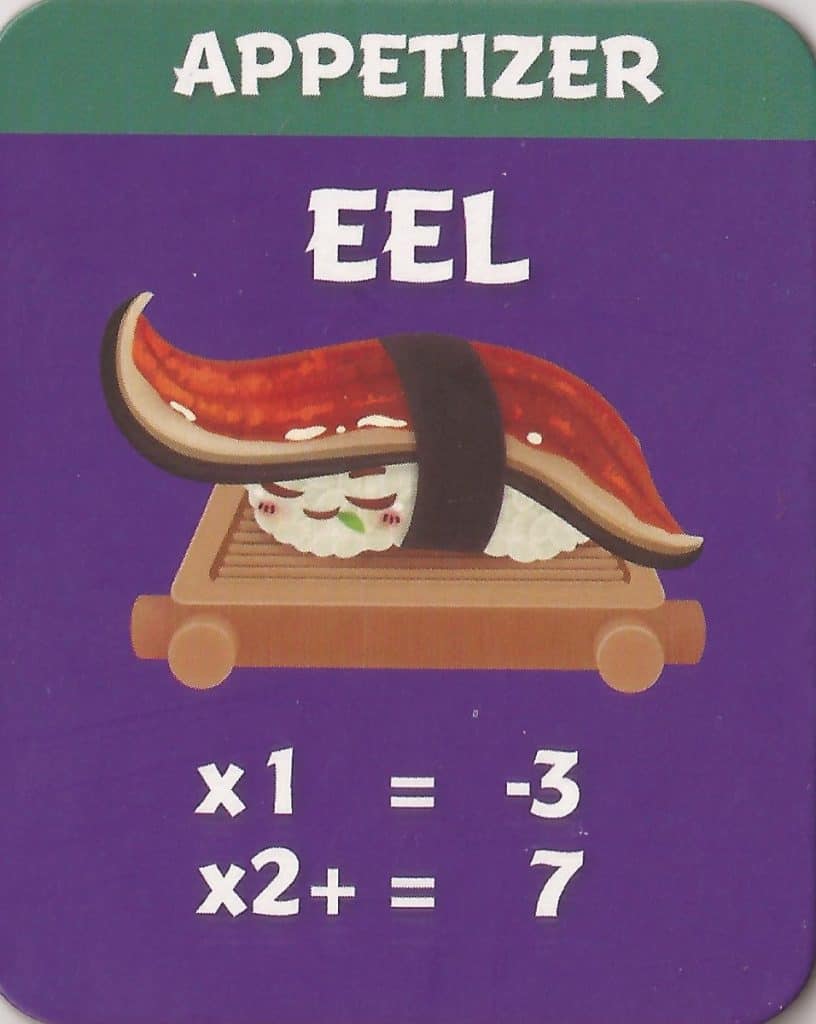
Eel
Priority Level: Medium
Points per card: -3 or 3.5
Eel is designed to be a high risk, high reward card, particularly in larger games where there may not be enough to go around. Collecting 2 or more will net you a comfortable 7 points, and if you block your neighbors from finishing their pairs, you’re potentially causing a 10 point swing in their point total.
Brutal. Absolutely brutal.
Occasionally, you’ll also be able to stick someone with an Eel as their last card for a round, costing them 3 points and probably earning you an enemy for the rest of the game. Otherwise, if you’re going for Eel, snag them relatively early to give yourself the best chance of collecting your set.
House Rule: The Assorted Meeples allow additional Eel cards beyond the first 2 to impact scoring. This means that collecting 3 will net you 4 points, but if you can get 4, you’ll get 14 points. This adds significant impact to Eel cards if you go all-in, and keeps them relevant for an entire round, especially in smaller games, often making them a High priority pick.
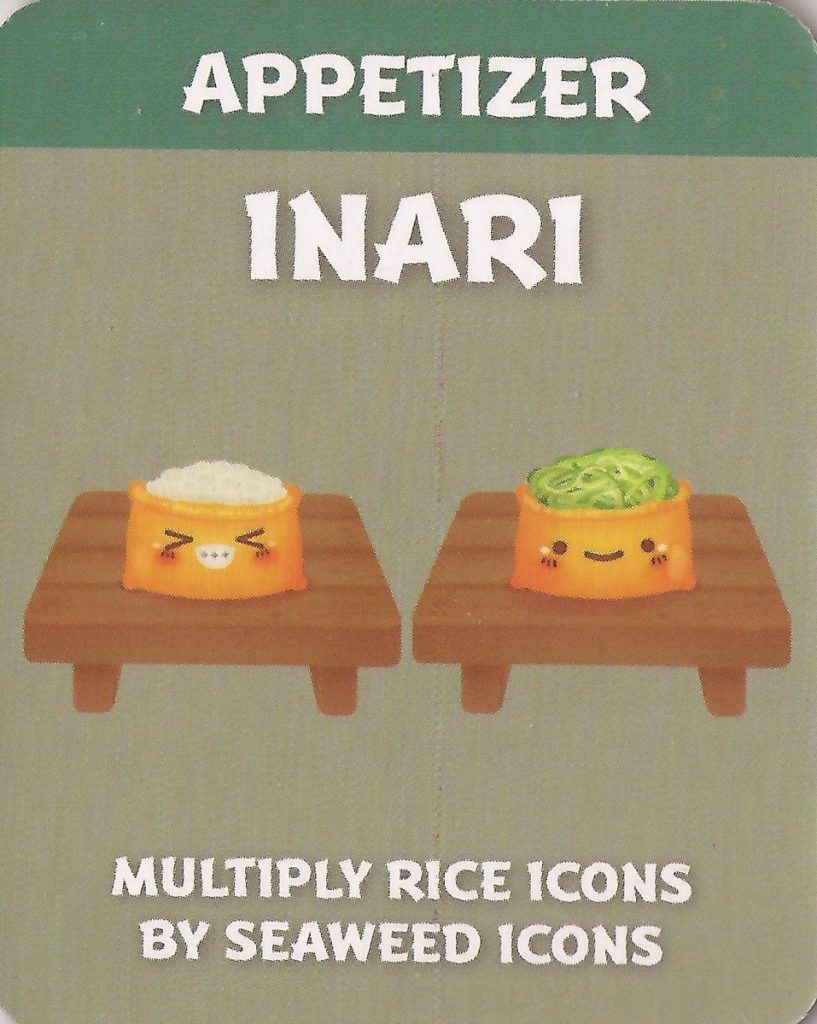
Inari (Promo)
Priority Level: First Pick
Points per card: 0-10.5
No, that isn’t a typo. If you can somehow collect all 8 Inari cards, you’ll walk away with a cool 84 points. It also will never happen – access to that many points is going to be very tempting for the rest of the table, and at least 1 other person is likely to go after them too.
Inari cards contain 2 types of icons – seaweed and rice. Multiply your total number of Seaweed icons by the total number of Rice icons to find out how many points your Inari cards give you.
But that’s only part of the battle – knowing how these icons are distributed across the cards is equally important:
- 2 cards contain 2 Seaweed icons
- 3 cards contain 3 Rice icons
- 3 cards contain 1 Seaweed and 1 Rice icon
Naturally, this distribution makes Seaweed cards the most desirable. With only 2 copies, they’re absolutely crucial for setting up a good multiplier. Ideally, you’ll want to collect at least 1 of each type of card, as those 3 cards will net you 12 points, or 4 points per card.
Inari can also backfire horribly. If you collect all the Rice, but no Seaweed, you’ll score nothing for your trouble, and vice-versa. Collecting only 1 of either is also subpar, limiting your multiplier considerably. This means if you want to pursue it, you need to go after it immediately, and hope that nobody else has the same idea.
If you aren’t pursuing Inari, its priority can be reduced to Medium, as you’ll need to keep an eye out for anyone focused on collecting Inari and intervene if appropriate. There’s no coming back in a game where a player runs away with these, even if it’s only in one round.
Note: The Inari Appetizer is different from Sukeroku’s Inari, and neither interacts or combines with the other.

Miso Soup
Priority Level: Medium
Points per card: 3
Miso Soup is one of my favorite cards in Sushi Go Party! It’s worth 3 points if you’re the only person who takes it, but if multiple players attempt to take one at the same time, all copies are discarded.
Direct payoffs for paying attention to the cards that remain in hands you pass are fairly rare in this game, and with the extra wrinkle of trying to predict when an opponent is considering one, I’d argue Miso Soup is the most skill intensive card of all.
You can either take advantage of it to rack up high point counts, or sabotage an opponent if you’re good at noticing their tells or following their deductive reasoning.
Either strategy will usually have a major impact on the standings at the end of a game, so go with whichever works best for you and the current game state.
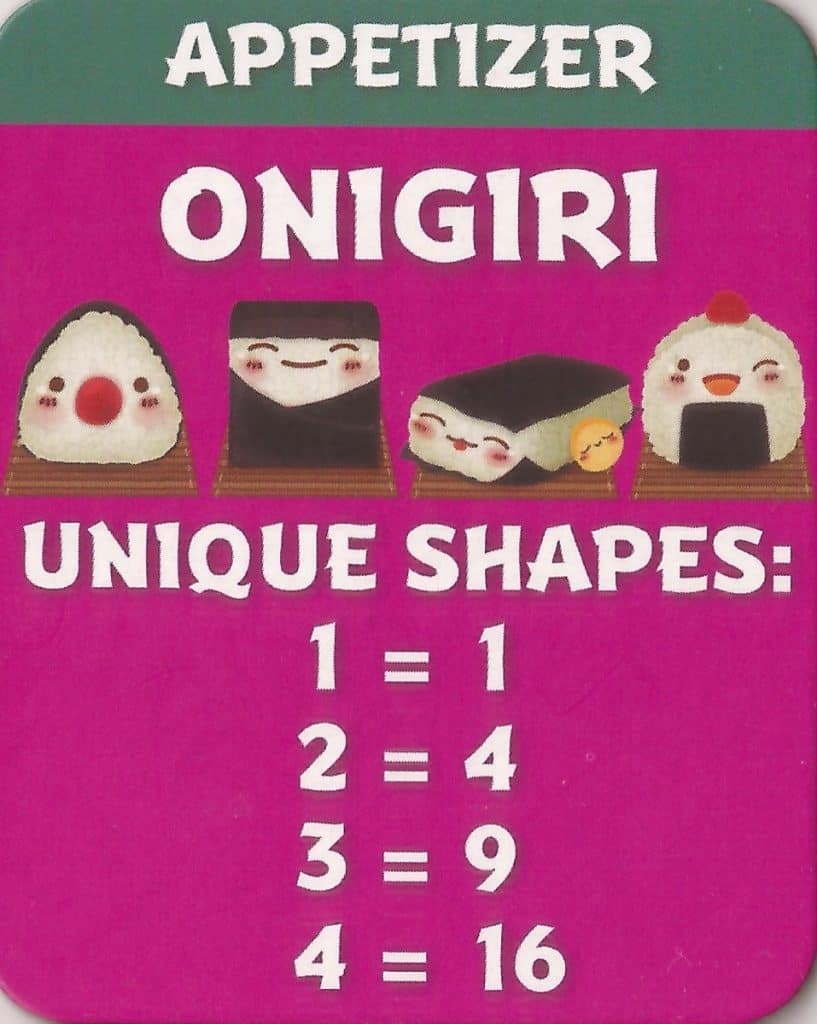
Onigiri
Priority Level: High
Points per card: 1-4
Onigiri are the better version of the Dumplings, potentially rewarding you with a lot of points over fewer picks.
The catch? You have to collect different shapes of Onigiri to collect these massive bonuses.
Your best shot at preventing your opponents from hate drafting these is to start collecting them when there are more attractive cards in hands. I wouldn’t take one over any card marked as a first pick all the time, but if I didn’t see a bunch of them stuck in the same hand, I’d certainly consider taking an Onigiri first in many situations.
Since the number of different shapes squares your Onigiri’s point total, each new shape raises your points per card by 1. You’ll usually cap out at 3, but I’ve seen a few games where someone got the full set – establishing a lead that was nearly impossible to overcome in the process.
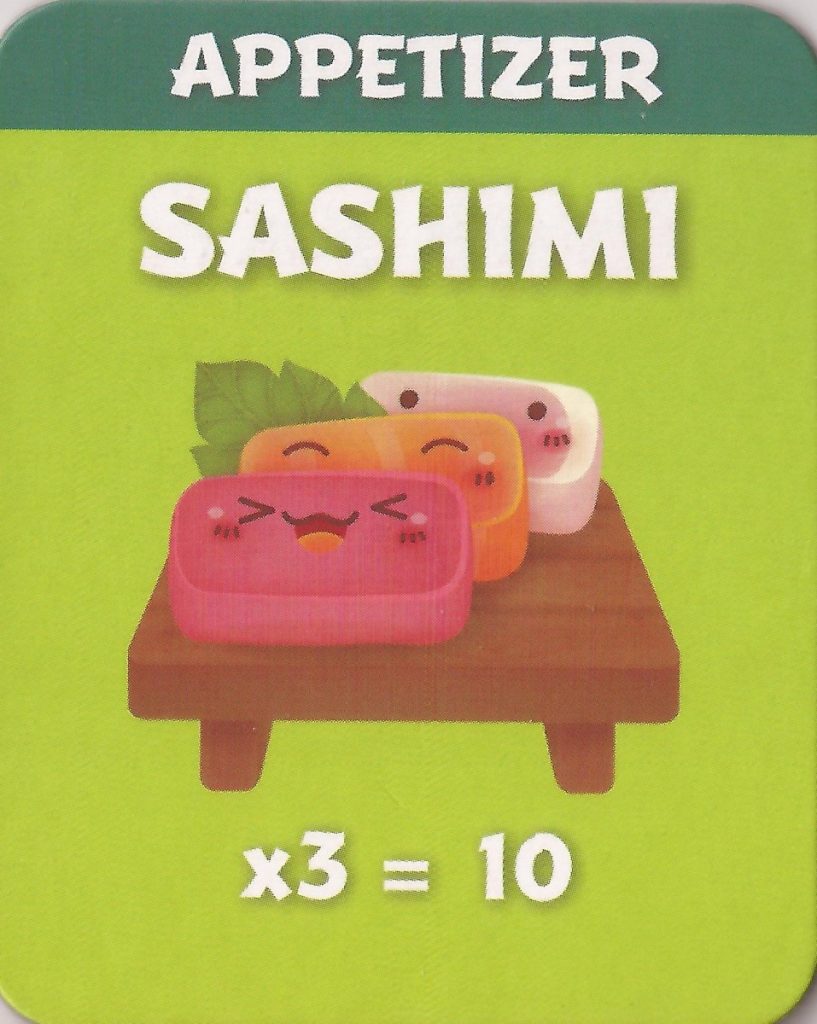
Sashimi
Priority Level: High
Points per card: 0-3.33
Much like Onigiri and Inari, if you plan to try and score points with Sashimi, you have to go for them early. This is especially important for Sashimi, as you score nothing if you don’t collect at least 3 Sashimi cards, making them both the riskiest appetizer and the easiest to target for hate drafting.
Your risk with Sashimi is further compounded by the fact that only up to 8 will be available, and not all of them will be dealt out depending on your player count. I personally don’t like going for them for this reason, but if they’re still open 2nd or 3rd pick, it might be worth taking a shot at them if the other players are disinterested.
Otherwise, Sashimi are safe to Ignore unless the neighbor you’re passing to has collected 2, in which case you should probably hate draft any others that come your way.
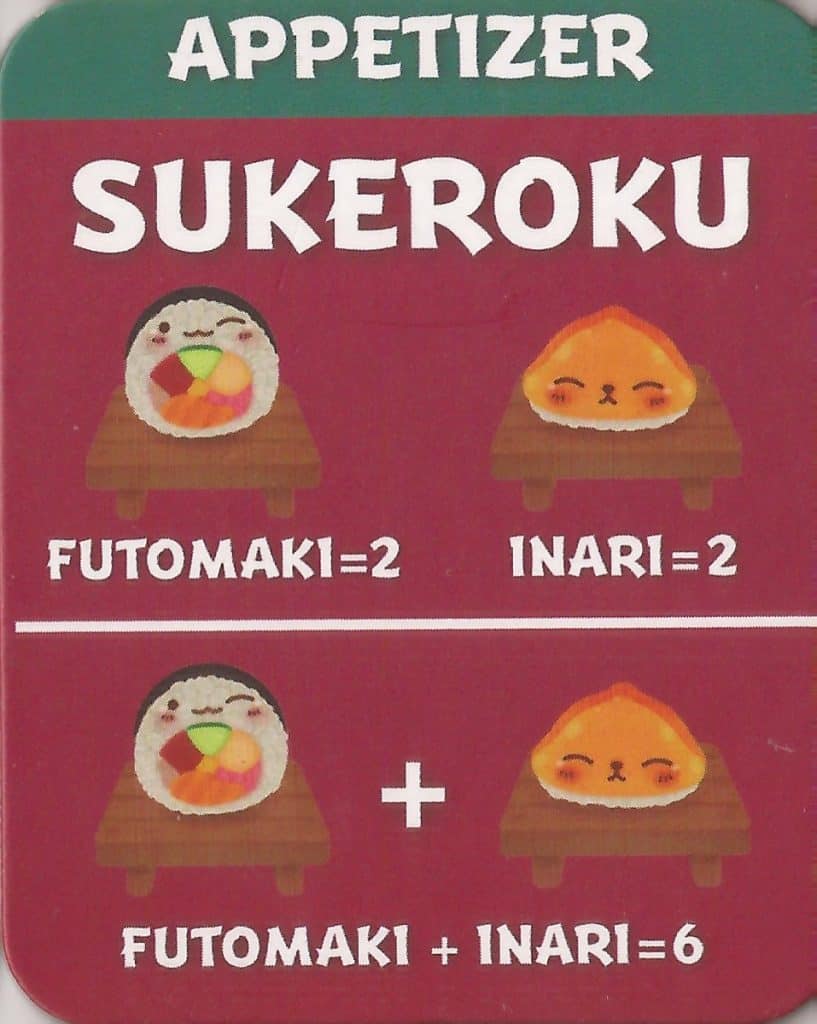
Sukeroku (Promo)
Priority Level: Medium
Points per card: 2-3
Sukeroku are the perfect cross between Salmon Nigiri and Squid Nigiri, with the tradeoff of only being able to combo with each other rather than other cards like Pickled Ginger or Wasabi.
A Futomaki or Inari gives you 2 points by themselves, and a pair consisting of one of each gives you 6.
These are reliable middle of the round picks that few people are going to try too hard to hate draft, but deliver good point value if there’s nothing better available.
Note: Sukeroku’s Inari is different from the Inari Appetizer, and neither interacts or combines with the other.

Tempura
Priority Level: Medium
Points per card: 0-2.5
Tempura carry less danger than Eel, but less upside than Sashimi, resulting in a pair mechanic that delivers above average point value for minimal risk.
Collecting 1 by itself offers you no points, so the best time to start collecting Tempura is around pick 3-4, depending on your player count and the other available menu items.
If there’s more exciting fare available, definitely don’t feel bad about skipping these, but don’t be afraid to pick them up if your other cards look unattractive or you snagged an early set of Chopsticks.
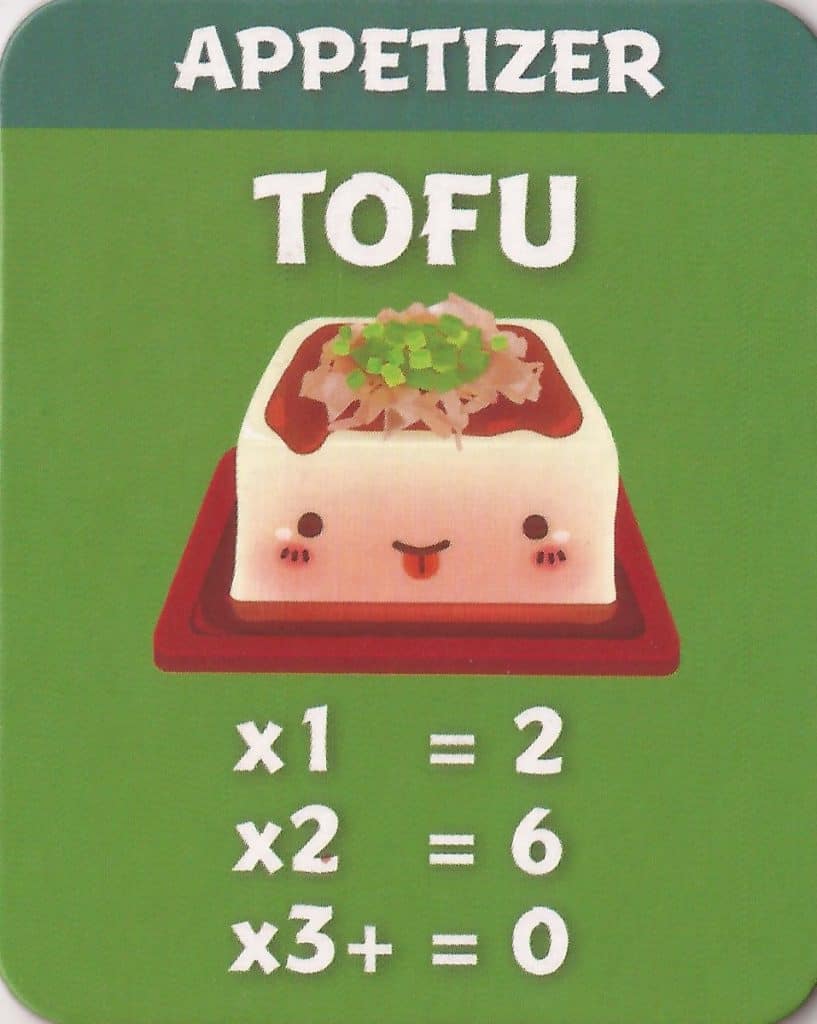
Tofu
Priority Level: Low
Points per card: 0, 2, or 3
Tofu can do a lot of work in games of Sushi Go Party! 6 points for 2 cards is a great rate, and even just snagging 1 for 2 points is acceptable.
If you’re one of the unlucky people who gets saddled with a 3rd Tofu as their last pick, however, losing those points feels like the worst thing in the world.
In smaller games, taking these as close to last as possible is a good plan if you’ve seen most of the 8 Tofu cards roaming the table. Taking your first 1 or 2 too early makes it very easy to saddle you with another you don’t want in many cases, so timing is everything here.
In larger games, there are more players to help spread the Tofu cards out, making it safer to collect the pair you want, but it’s still very risky to take them too early – a little table talk and coordination goes a long way when plotting how to set a greedy Tofu player back.
Special
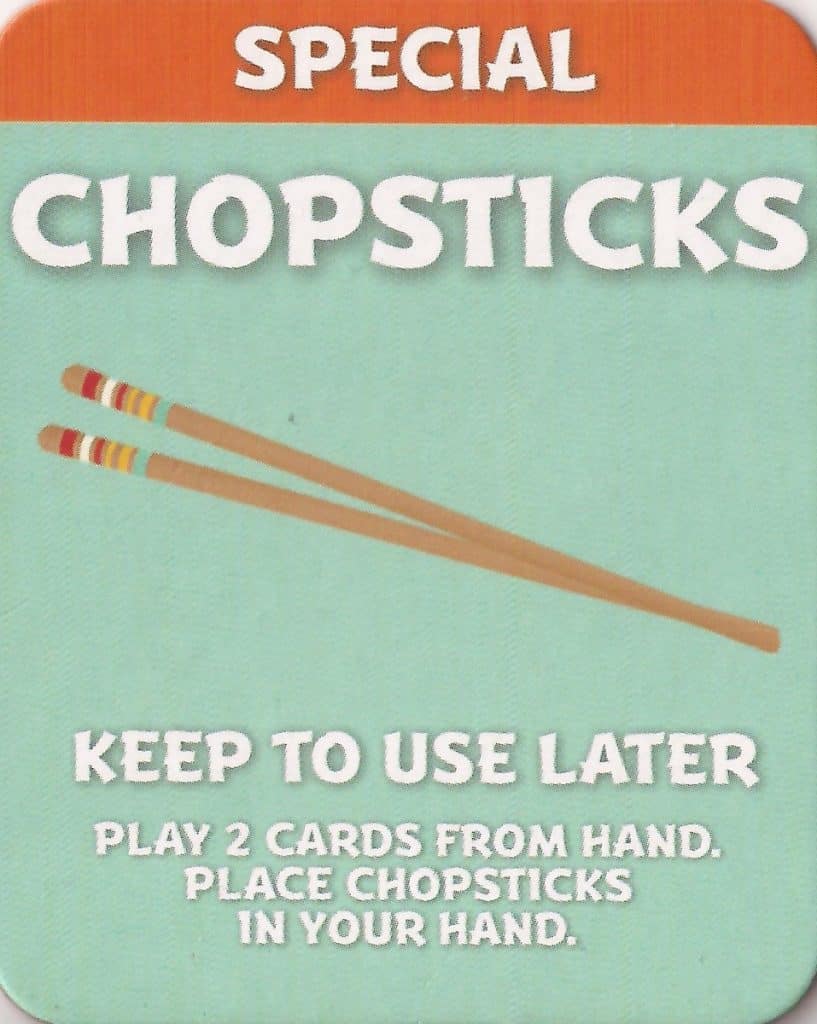
Chopsticks
Priority Level: High
Points per card: 0
Chopsticks are a very interesting card that can shift the balance of a round dramatically. They do nothing on the turn you pick them up, but during a future turn, you can call “chopsticks!” as all players are revealing their cards for the turn, then pick a 2nd card from your current hand, play it immediately, then replace it with your chopsticks.
Early in a round, this can be incredibly strong, allowing you to take the 2nd and 3rd best cards out of a hand, a pair of cards that need multiples to score like Eel or Tempura, or blocking your neighbor from a specific type of card when you otherwise couldn’t.
Late in a round, since Chopsticks are inherently worth no points, you can saddle another player with them as a last pick while you pick up Egg Nigiri, Maki, or other low point cards that are better than scoring nothing.
Yeah, this is a jerk move, but also a very common one at our table.
You should also never choose Chopsticks as one of your last 2 picks in a round, as there won’t be enough remaining cards for you to benefit from them.
Note: Per game designer Phil Walker-Harding, you can only use 1 card that grants a bonus action, such as the Chopsticks or Spoon, per turn. Additionally, if multiple cards use bonus actions during the same turn, refer to the number in the lower right of those cards to determine the order they resolve – lowest goes first.
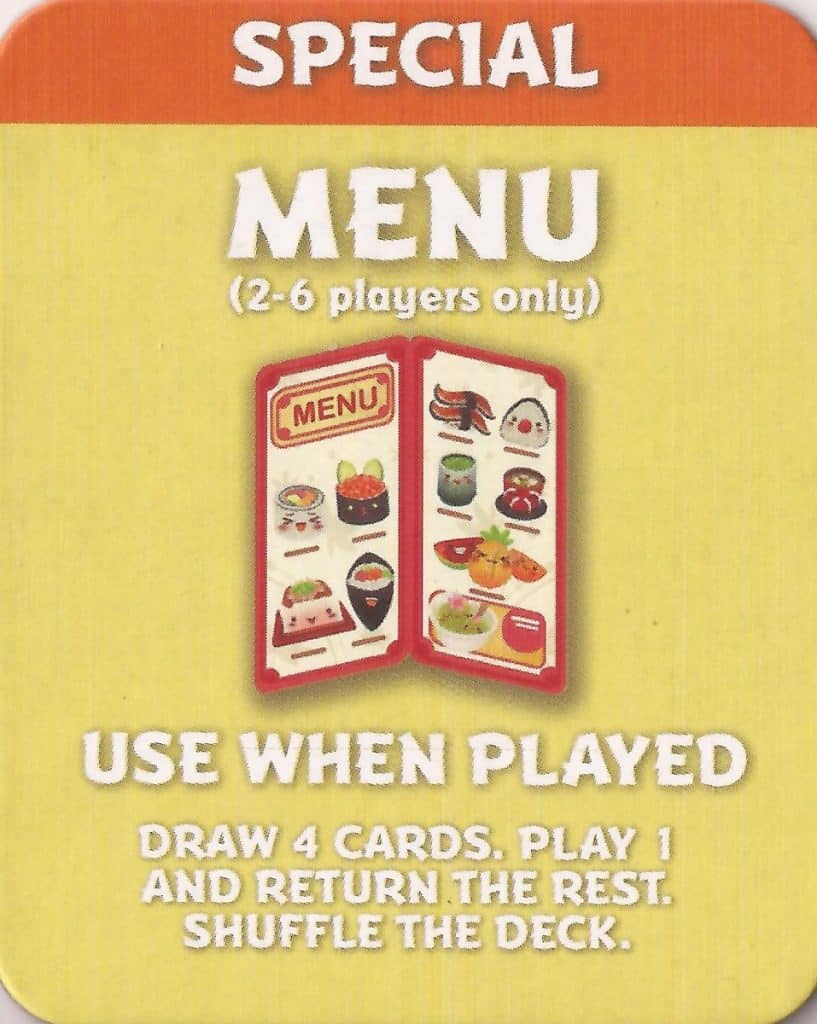
Menu
Priority Level: Medium
Points per card: 0
When your hand looks unappetizing or you really need to fish for a specific card, a Menu can sometimes be exactly what you need. When you play it, you look at the top 4 cards of the deck, take 1 (except another Menu), return the remaining 3 to the deck and shuffle, then discard the Menu.
While the discard mechanic is a bummer for cards like Soy Sauce, snagging an otherwise unavailable Dessert, Onigiri, or other high scoring card can be a gamechanger for collecting points.
Menus tend to get used in the middle of a round, after all the best food items are claimed, and are especially useful for those who are trying to complete otherwise impossible card sets. Take care when choosing whether or not to pass one.
Note: The Menu is only available in 2-6 player games.
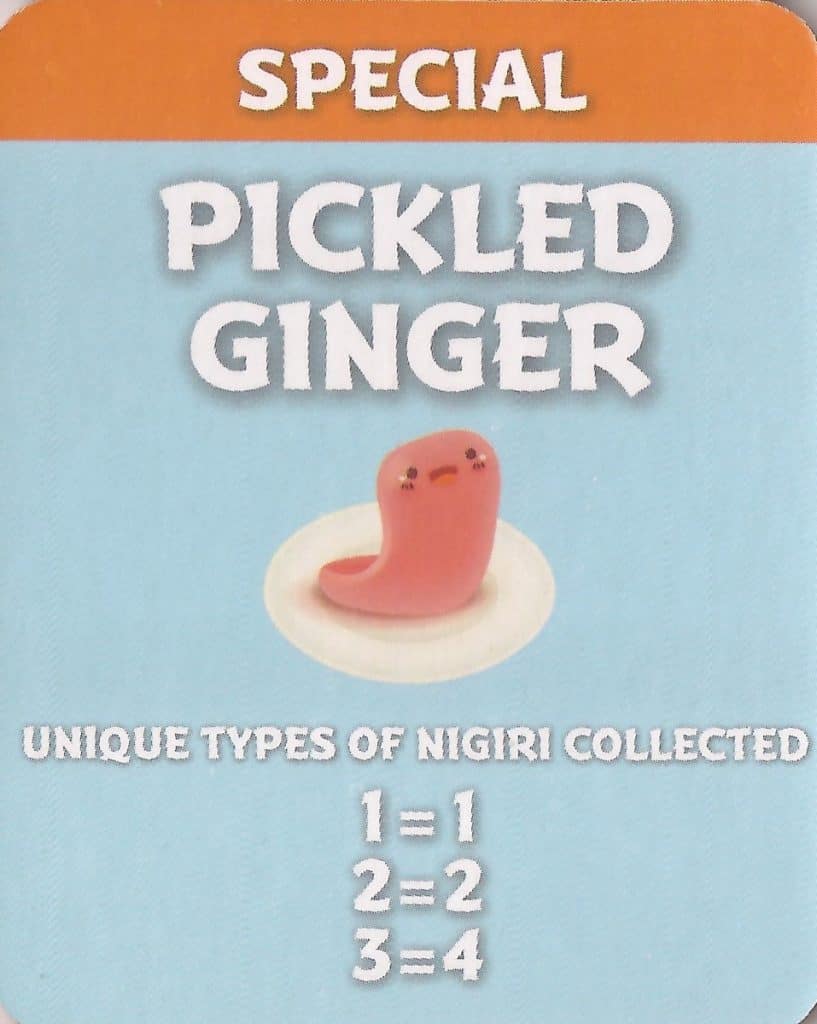
Pickled Ginger (Promo)
Priority Level: Low
Points per card: 0, 1, 2, or 4
I really appreciate the existence of Pickled Ginger – it frequently makes collecting an otherwise unexciting Egg Nigiri feel so much better.
If you collect an early Squid Nigiri, you should have no trouble assembling a Salmon Nigiri and Egg Nigiri to go with it in many rounds, making this a relatively easy 4 points. Taking one on with just 2 Nigiri also isn’t horrible, as 2 point cards are generally respectable in the last third of any given round.
Honestly, I’m surprised Pickled Ginger wasn’t in the base game – its common to serve it with sushi and provides a needed support option to the card type that is guaranteed to be in every game, making it a win-win in terms of both flavor and gameplay.
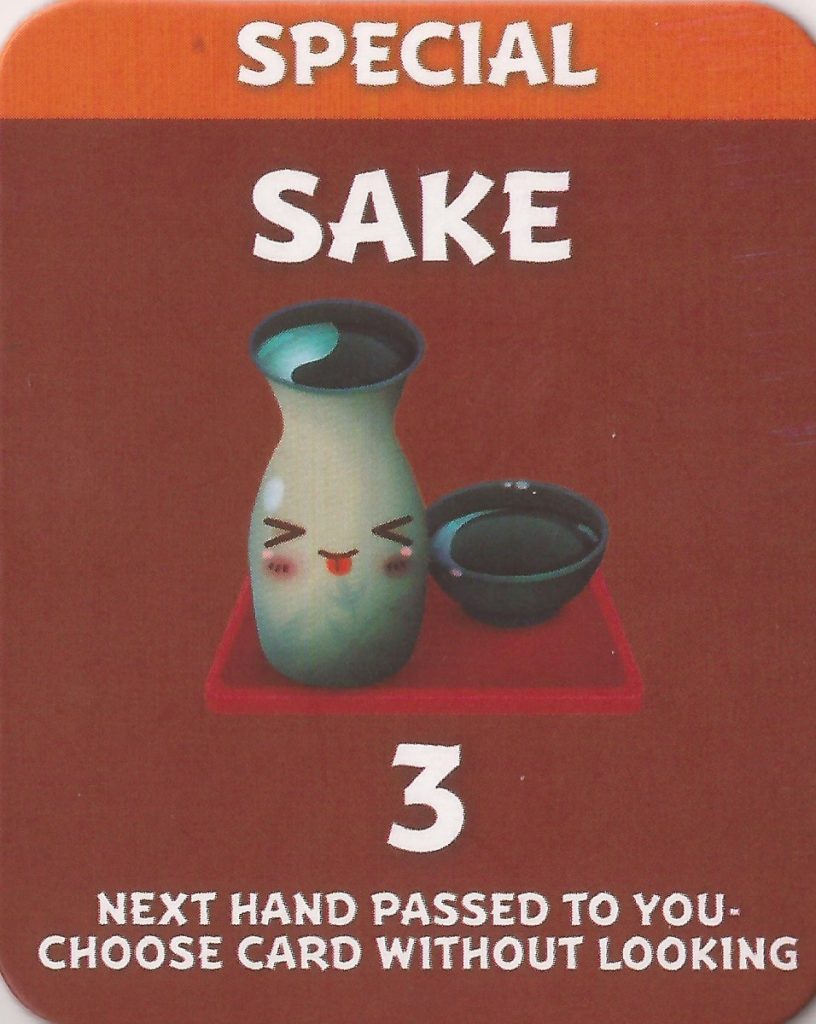
Sake (Promo)
Priority Level: Medium
Points per card: 3
Sake brings shenanigans worthy of its real world reputation, granting you an unconditional 3 points for claiming it, but then forcing your next pick to be random.
Naturally, the longer you wait to take a Sake card, the fewer random options you’ll have, making it a great late round pick, a somewhat dangerous mid round pick, and an extremely dangerous first pick when powerhouses are likely still available.
Sake’s risks can also be amplified by other cards on the menu – especially Eel, Tofu, and Miso Soup. Any of these cards can cost you points when taken at the wrong time, turning an above average point card into a net loss.
I’ll admit that generally hasn’t stopped me from taking it when staring down an otherwise bland hand of cards though. Sometimes you want that extra bit of excitement, others you’re far enough behind that you don’t have to care. Either way, games with Sake just tend to be more fun.
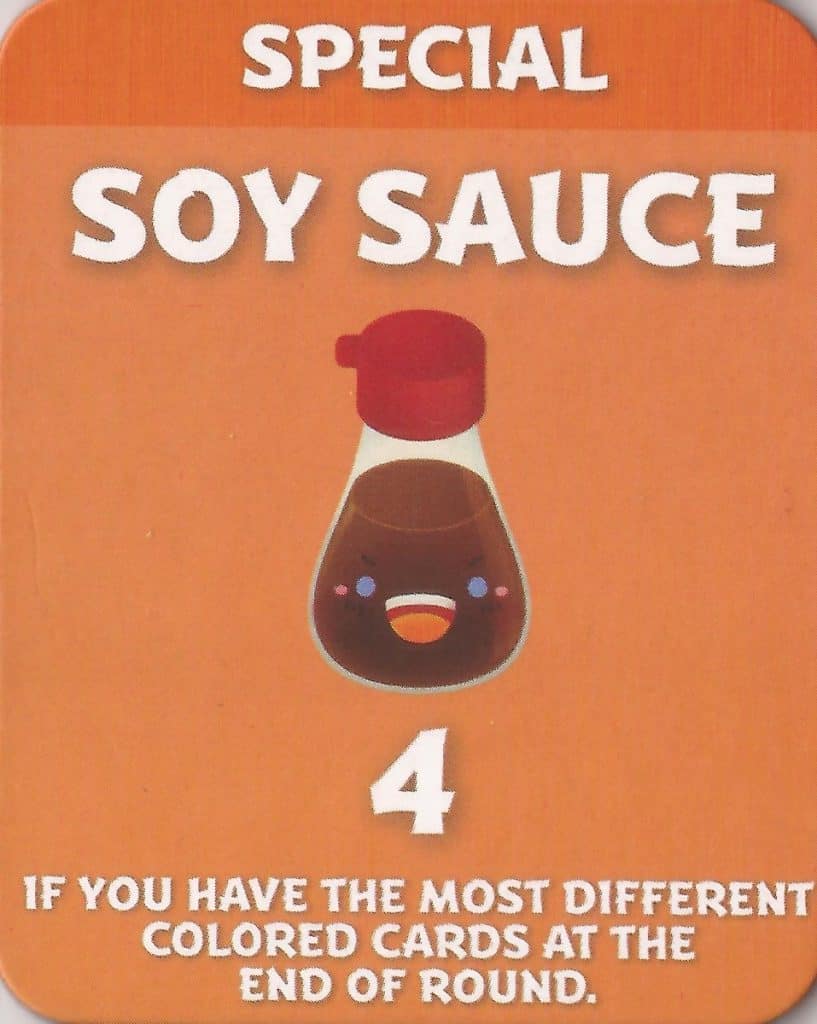
Soy Sauce
Priority Level: Low
Points per card: 0 or 4
Soy Sauce fixes a lot of drafting sins if you just couldn’t find a strategy to commit to in a given round. The potential to score 4 points per Soy Sauce card for having the most differently colored backgrounds among your cards is great value, and even kicks in if you’re tied for the most, giving you a bit of wiggle room for scoring.
There are a few details to bear in mind when calculating the colors among your cards:
- Soy Sauce counts itself
- Wasabi and Nigiri have the same color background
- Special Orders copying another card are the same color as the card they’re copying
- Cards flipped face down by a Takeout Box are considered their own color
Generally, you aren’t going to go out of your way to pursue Soy Sauce as a strategy in a given round, so this will almost always be a later pick, but it’s a safe bet that players who are collecting sets of specific cards like Sashimi or Inari aren’t going to want anything to do with it, so it’s easy to collect at your leisure.

Special Order
Priority Level: High
Points per card: Varies
As a card that copies other cards, you’ll never take a Special Order first, but these cards can enable incredible plays throughout a game of Sushi Go Party! Whether you need that 3rd Sashimi card, an extra Dessert, or are sprinting to finish your set of Uramaki, Special Orders have your back.
While Special Orders also tend to raise the most rules questions throughout a game, there’s usually a simple way to answer them: A Special Order is going to take on the exact characteristics of the single card it is copying, including the color background and any number in the lower right corner.
If you copy a Wasabi with Nigiri on it, you’ve only copied the Wasabi, and must place your next Nigiri card on top of it. Copied a set of Chopsticks? The Special Order will return to a hand you take a 2nd card from. Special Orders copying Desserts are set aside with Desserts at the end of a round, and aren’t shuffled back into the deck.
Take care when passing these beyond your first pick – the more cards someone can accumulate before taking a Special Order, the more powerful moves they’ll have open to them.
Note: The Special Order is only available in 2-6 player games.

Spoon
Priority Level: Medium
Points per card: 0
If there’s a card that rivals the Special Order in terms of rules headaches, it’d have to be the Spoon. Like the Chopsticks, you can’t use a Spoon during the same turn you draft it, but on a future turn of the round, as everyone is revealing their selected cards, you can call “spoon!”, and take a card from another player’s hand after everyone’s revealed cards resolve.
When attempting to take a card using a Spoon, you name a card, then the player on your left then looks through the remaining cards of their hand, and if the card you named is there, they give it to you to play immediately. You give them the Spoon to put back in their hand.
If they don’t have it, the next player looks for that card, and so on until an opponent announces they have it.
If no opponent has the card you asked for, the Spoon is simply discarded with no effect.
When naming a card to take with your Spoon, you can go one of two routes:
- Name the type of card you want. If a hand has multiple variations of that card, the player giving you the card chooses which to give you.
- Example: Maki Rolls are on the menu and you ask for them. The player to your left has a 2 Maki Roll card and a 3 Maki Roll card in their hand. They can choose which of these 2 cards to give you.
- For cards that have variations, you may name the name and variation you want
- Example: Uramaki is on the menu. You can either name “Uramaki”, and the first one available is given to you, or you can name “5 Uramaki” so only a 5 Uramaki card can be given to you.
Because of how the Spoon works, taking it as either of your last 2 picks is a bad plan, as there will be no cards to take with it by the time you can use it. Generally, you’ll want to take it in the middle of a round to complete a set of cards like Eel or Tempura you might not otherwise have access to or are worried about your opponents hate drafting.
As with the Chopsticks, the Spoon can also be somewhat weaponized to make it a dead last pick for another player and claim the best card remaining among the low point cards around the table.
This move won’t make you any friends, but it is undeniably effective.
Note: Spoons are not available for 2 player games.
2nd Note: Per game designer Phil Walker-Harding, you can only use 1 card that grants a bonus action, such as the Chopsticks or Spoon, per turn. Additionally, if multiple cards use bonus actions during the same turn, refer to the number in the lower right of those cards to determine the order they resolve – lowest goes first.
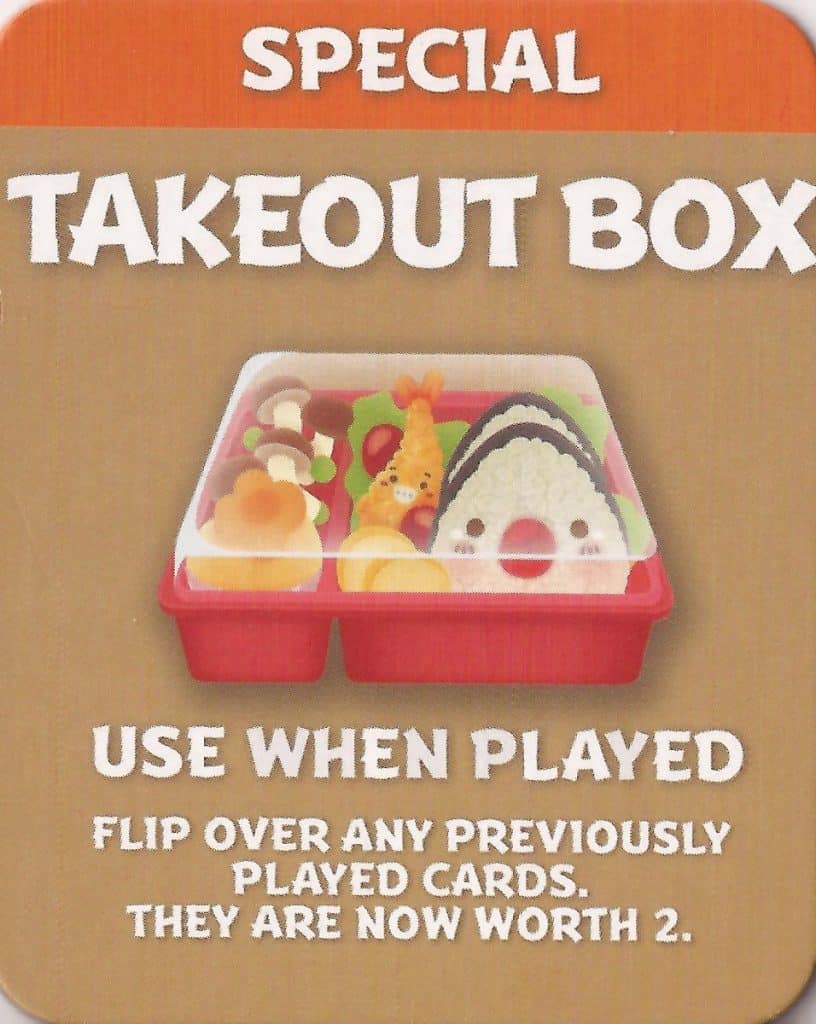
Takeout Box
Priority Level: Low
Points per card: 0-2
Like Soy Sauce, the Takeout Box is designed to help you fix drafting mistakes made earlier in a round. When you take it, you choose any number of cards you’ve previously drafted this round, flip them face down, and they lose the characteristics of their front side, making them worth 2 points each instead.
More importantly, these flipped cards are considered their own unique color, which can be very useful for cards that care about this trait like Soy Sauce and Tea.
Note: If you flip a card that is being copied by a Special Order, but not the Special Order itself, the Special Order remains a copy of the card it was already copying.
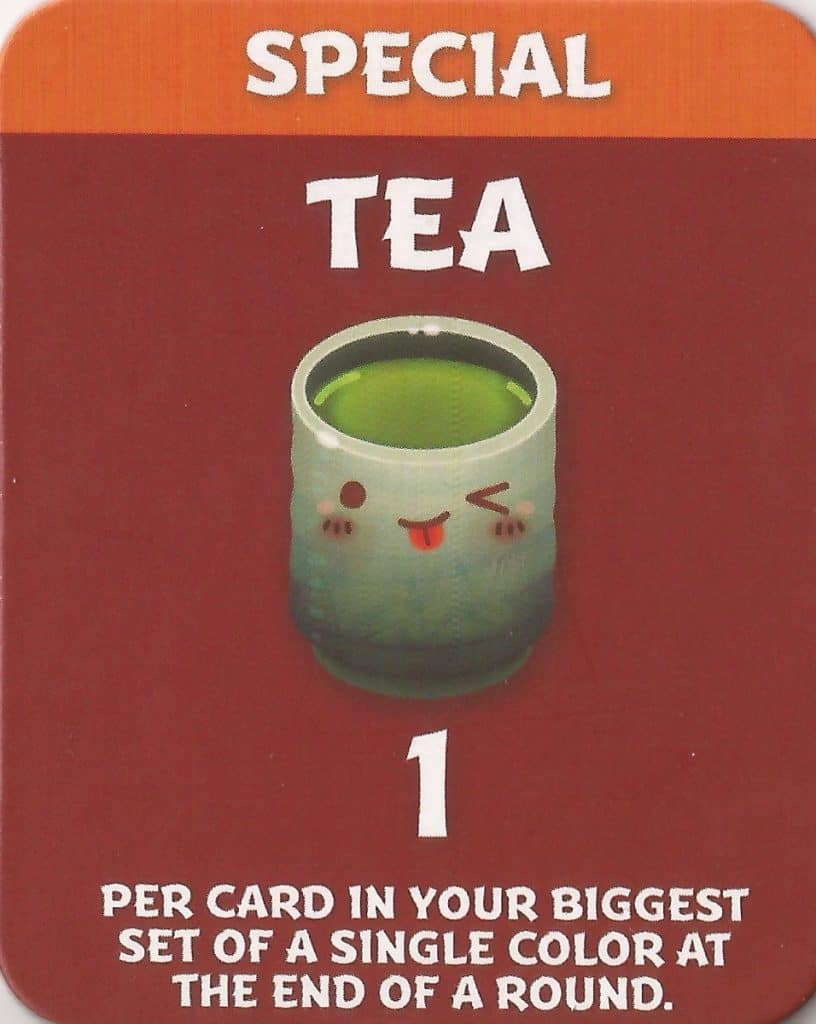
Tea
Priority Level: Medium
Points per card: 1-9
Gaining 1 point per card for the biggest set of cards you have doesn’t look like much at first glance, but can add up very, very quickly. Your biggest set of cards is determined by how many cards you have that share the same background color, so Wasabi and Nigiri are especially good here since they share a color.
Special Order cards can also do a lot to help you score with Tea, as they also copy the background color of any card they copy, but the real winner for abusing Tea is the Takeout Box.
Since cards flipped face down by a Takeout Box are considered their own unique color, you can easily score 5 or 6 points per Tea card you collect in one move and virtually no planning.
That said, any time you can take Tea and have it be worth 3 or more points, you’re usually making a good decision.
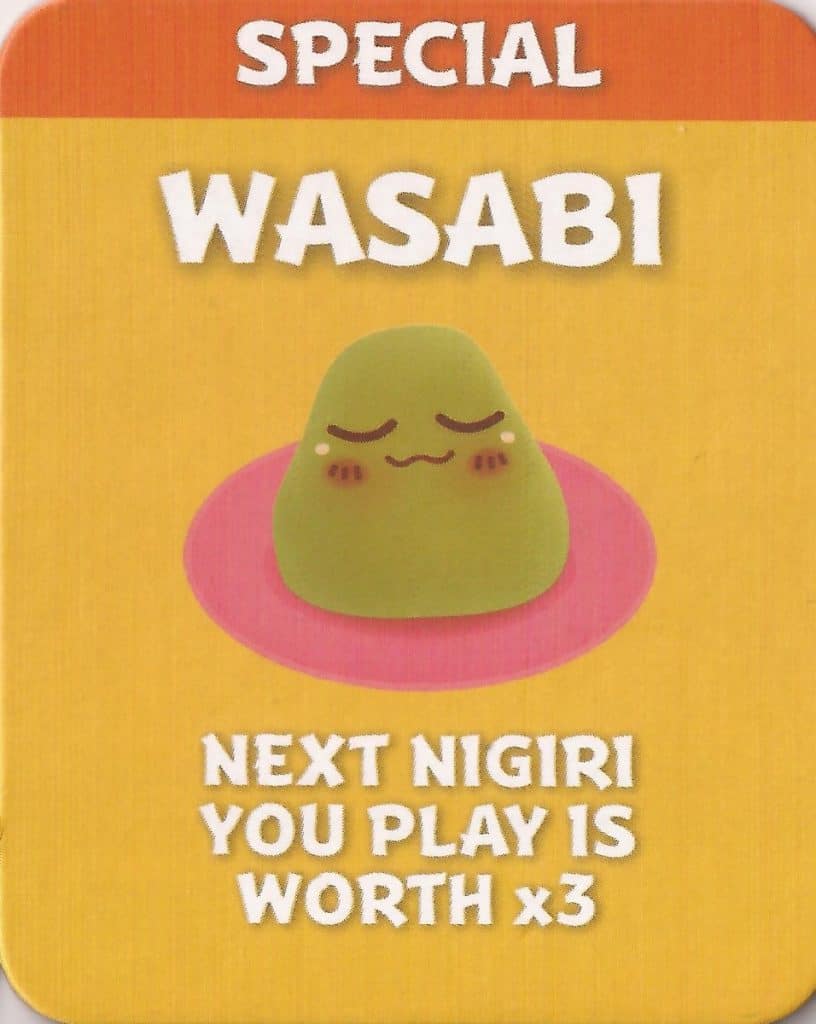
Wasabi
Priority Level: First Pick
Points per card: 0, 1.5, 3, or 4.5
Wasabi triples the point value of the next Nigiri card you draft in a round, so while it’s worth nothing inherently, it’s almost always worth taking to try and pair it with a Squid Nigiri. 4.5 points per card is almost unbeatable in terms of raw value, and even if you have to settle for a Salmon Nigiri, 3 points per card is still above average.
The longer Wasabi sits in a hand, however, the less desirable it is. Salmon Nigiri and Squid Nigiri are fairly popular choices for those who want reliable point cards, and since it is worth nothing by itself, getting stuck with it at the end of a round is akin to receiving the dreaded Chopsticks or Spoon as your last card.
Dessert
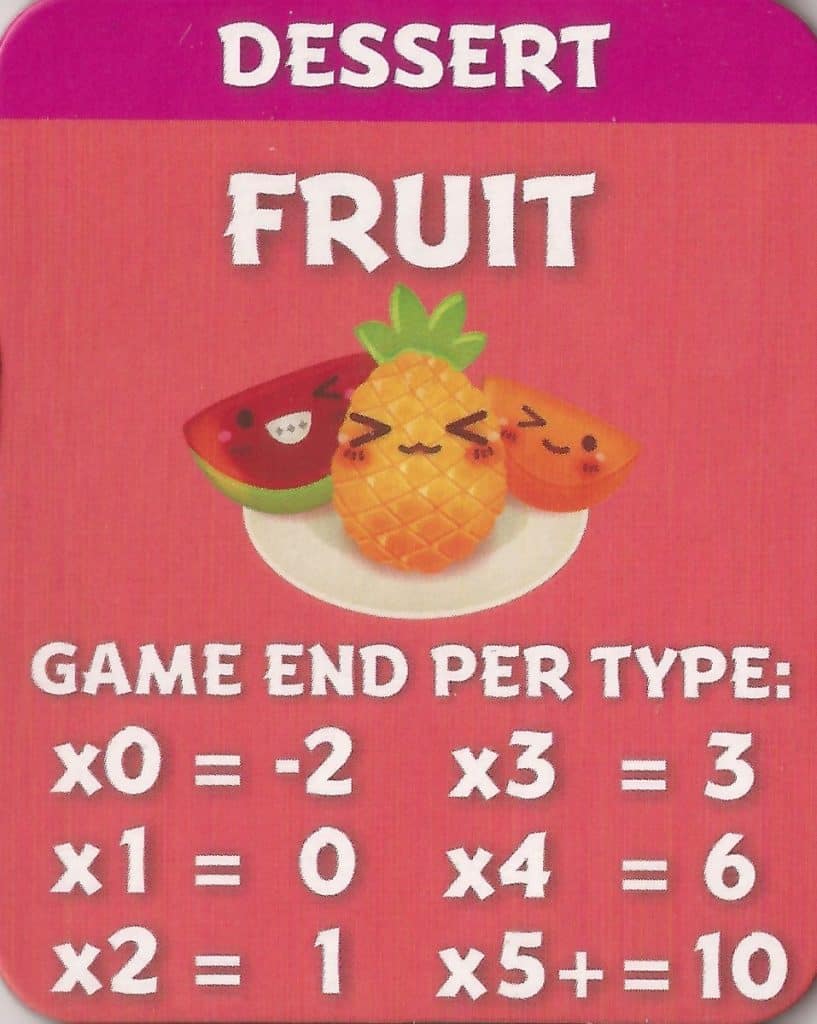
Fruit
Priority Level: First Pick
Points per card: 3-4.6
Fruit are absurdly powerful Dessert cards. Each one contains 2 symbols, which can be Watermelon, Pineapple, and/or Orange.
Points are scored for each individual symbol at the end of the game, depending on how many you have:
- 0 of a given fruit: -2 points
- 1 of a given fruit: 0 points
- 2 of a given fruit: 1 point
- 3 of a given fruit: 3 points
- 4 of a given fruit: 6 points
- 5 or more of a given fruit: 10 points
If you take no fruit cards throughout the course of a game, you’re going to lose 6 points. If the table lets you accumulate all of it, you can score as many as 30 points.
Realistically, tables that recognize Fruit’s value won’t let a player accumulate more than 9 points from it overall. but when you factor in that’s also cancelling out a 6 point penalty, that makes it the most impactful Dessert in the game, even measuring it card for card.
The only exception is in those incredibly unlikely cases where you get 6 points from 1-2 Pudding cards, netting you a 12 point swing when including possible penalties. Even then, you’re all but guaranteed to be sharing that bonus, so the impact of that scenario isn’t even remotely as one-sided.
TL:DR; If you see a Fruit card, there’s almost no reason not to take it immediately. Insane value for no effort.
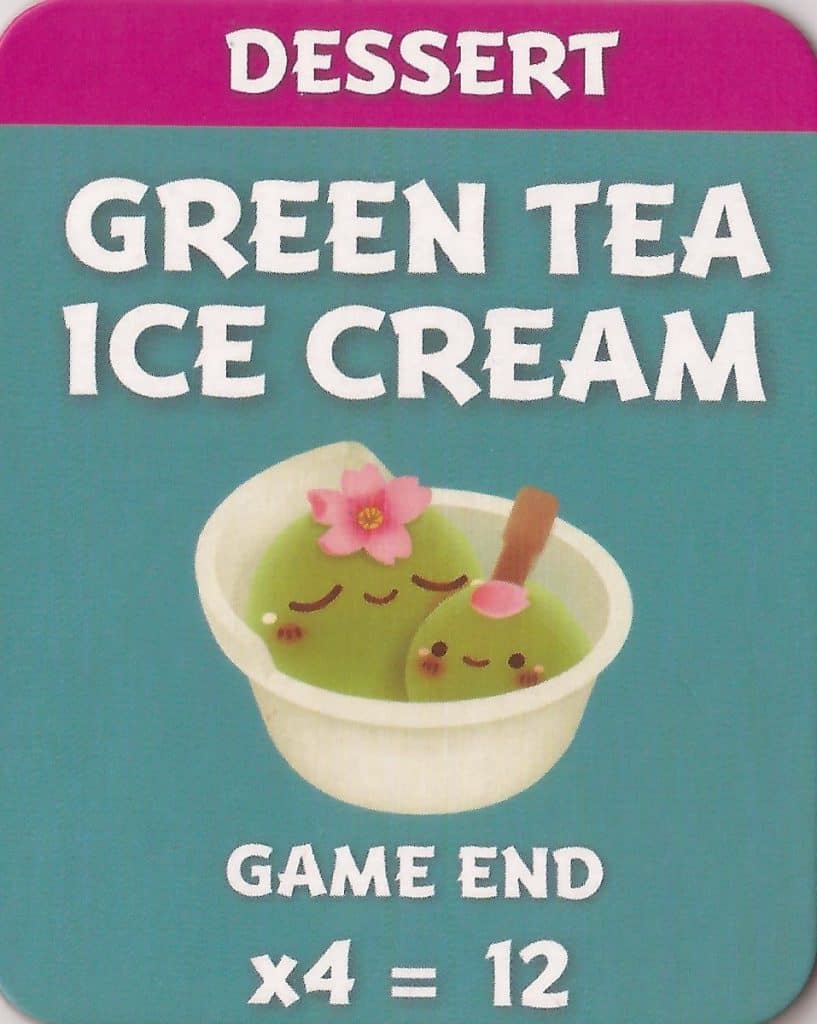
Green Tea Ice Cream
Priority Level: High or Ignore
Points per card: 0 or 3
I personally love Green Tea Ice Cream as a card. Collecting them makes you look like you’re behind on the scoreboard, but if you accumulate 4, suddenly you have a surprise 12 points to overtake opponents at the end of the game!
If collecting it is your goal from the start of the game, taking it first is effectively required to ensure you collect enough before the game is over. If you don’t see one in your opening hand, however, you can easily skip it in favor of other cards.
For those electing to take the latter route, it’s still worth keeping an eye on how much Green Tea Ice Cream your neighbors have accumulated – taking 1 or 2 to keep them from getting 12 points is almost always worth considering.
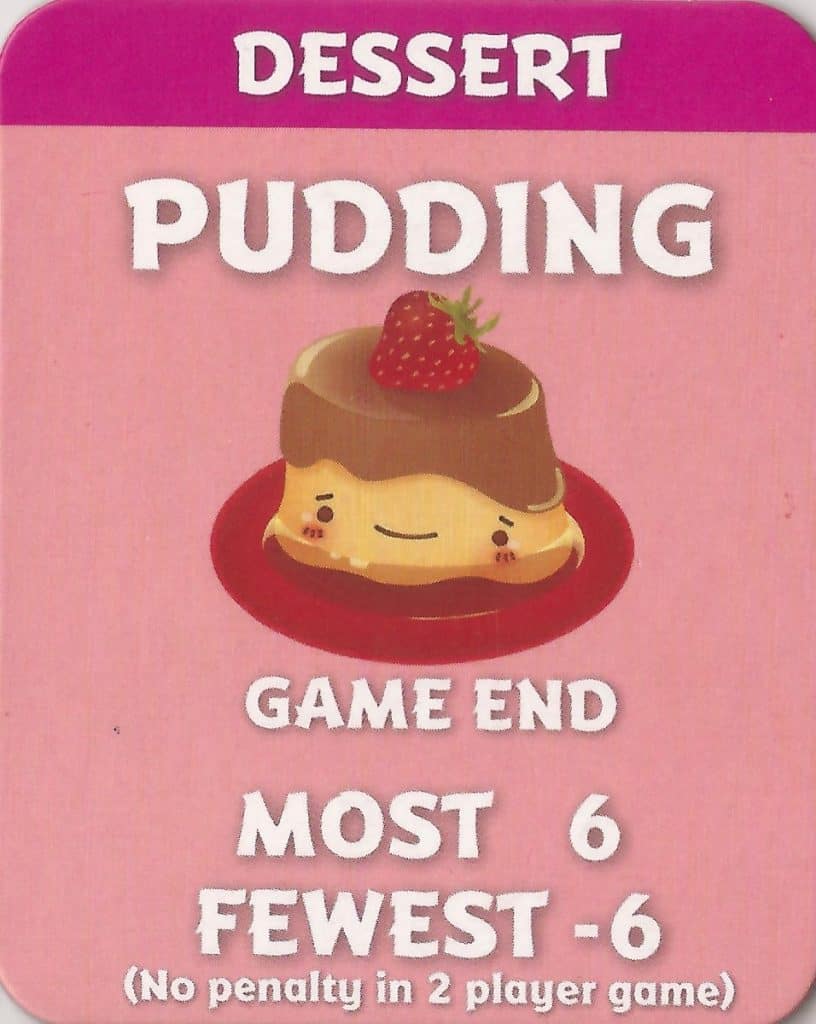
Pudding
Priority Level: High or Low
Points per card: 0-6
Pudding is generally the least exciting of the Dessert cards, requiring a very similar line of strategy as Temaki to thread well. If you have the most at the end of the game, you gain 6 points. Should you find yourself with the least, you lose 6 points. Tied players gain or lose the full amount of points.
I’ve found it is often best to shoot for getting 0 points from Pudding to prevent yourself from overcommitting, then assessing how things stand in Round 3 to see if going for the 6 point bonus is worth it.
A couple Pudding cards are usually enough to achieve this goal, meaning you’re netting 3 points per card. Occasionally, this will backfire if those who have fewer catch up with you, so don’t be afraid to snag an extra 1 or 2 at any time they’re available to either avoid getting penalized or secure an intimidating lead for the extra 6 point bonus.
Whatever you do, don’t undershoot here. If it looks like you’re taking the penalty, own it as early as you can in the game and don’t waste futile picks collecting cards that aren’t going to help you make up for it.
There’s almost nothing worse than staring at Pudding cards that not only netted you no points, but actively cost you points at the same time. Speaking from experience, I can safely say I’d even take a last pick Chopsticks every round over that fate.
Note: In 2 player games, Pudding does not assign a penalty, thus making it half as important point-wise. In these games, it’s safe to Ignore Pudding if better opportunities are available, as it only scores once unlike Temaki, which scores each round.
Sushi Go Party Card Drafting Tips
Now that we’ve thoroughly examined the cards you’ll be drafting in a game of Sushi Go Party!, here are some additional things to keep in mind when choosing which cards to take from a hand.
Try to Average the Highest Number of Possible Points Per Card
This is probably obvious after reviewing the points each card can give you in great detail, but it’s important enough to mention here too. The more points you can get out of every card, the easier it will be to gain and maintain a lead.
Memorize the Cards in Each Hand You See
Taking mental note of the cards in a hand, especially in games with fewer players, will give you a full picture of the available cards circulating the table by the middle or late stages of any given round.
By becoming good at this, you can easily see whether it’s worth going for cards that require a group to score like Sashimi, set yourself up for success with a Spoon, mess with people who are drafting Miso Soup, or assess how quickly you need to jump on Temaki to avoid point penalties.
Most importantly, it will prevent you from making avoidable mistakes. Risking a late Eel when there are no others to pair it with or asking for a card that nobody has with a Spoon will do nothing but cost you points, and even a single mistake can mean the difference between 1st and 2nd place.
If you aren’t used to doing this, practice makes perfect. Learning how to memorize cards will also serve you well in other card drafting games like 7 Wonders and Bunny Kingdom, so if you play a lot of board games and are looking to up your game, trust me when I say the time spent perfecting this skill is well worth your time and energy.
Observe Your Opponents
Paying attention to the cards your opponents are drafting is extremely important in any card drafting game, as it can give you a few pieces of valuable information.

First, you can more accurately predict which cards are likely to wheel back around the table. This can make what appears to be a tricky choice much easier to decide on, and will potentially reward you with more points in the long run.
Second, you can make educated guesses about which cards your opponents are looking for. While taking a Sashimi might not look attractive when you don’t have any yet, if doing so stops your neighbor from claiming their 3rd, you’ve just cost them 10 points – a very good tradeoff for you!
Finally, table talk can give you an idea of the table’s sentiment toward individual players. If you’re not the subject of scrutiny or enmity, you might be able to get away with a riskier play someone else would never be allowed to pull off.
Avoid Forcing Subpar Strategies and Pivot When Needed
Look, we’ve all gotten wrapped up in a race to win the Maki game, gotten our hopes up that there will be enough Sashimi for both you and the neighbor passing you cards, challenged the opponent across the table to a Dumpling eating contest, or cornered the market on Pudding simply because we could.
It doesn’t mean any of these strategies was a good idea, let alone a path to victory.
Part of doing well in Sushi Go Party!, or any other card drafting game, is recognizing when a game plan isn’t going well, cutting your losses, and finding a new opportunity you can use for success instead.
Just take that extra moment to see what your opponents are doing, assess whether it’s really worth fighting them for it, and walk away if you need to. You’ll be amazed by how many pitfalls you are able to sidestep.
Congratulations! You’ve completed the Assorted Meeples course on Sushi Go Party! strategy, and are now officially ready to take on your board game group. Make sure to tell us about your victories on Twitter, or consider letting us know directly by joining our Patreon Discord, where we talk all things gaming!
Other Board Game Articles You May Enjoy
- 7 Wonders Board Game Strategy Guide
- Bunny Kingdom Board Game Strategy Guide
- Family Board Games Like Clue
- Has Chess Been Solved?
- Settlers of Catan Settlement Placement Guide
Braden is a founder of Assorted Meeples and has been a gamer & writer with a vivid imagination all his life. Don’t believe us? Check out his excitement when meeting Goosebumps author R.L. Stine as a kid! An avid Magic: The Gathering spellslinger for over 15 years, you can always convince him to shuffle up for a game (or three!) of Commander.